If you have been using Windows for a while, you have probably encountered Safe Mode more than a few times. Safe Mode is a diagnostics environment that you can use to troubleshoot and resolve problems that might be preventing your computer from operating properly. Whether it’s startup issues, application stability or another issue, booting into Safe Mode might solve your problem and it’s very simple.
The easiest way to boot into Safe Mode is with the Microsoft System Configuration utility (MSCONFIG.EXE).
Click Start, type: MSCONFIG.EXE

Then press Enter on your keyboard.

This will open the System Configuration Utility. Next, go to the Boot tab.

Under Boot Options, check the Safe boot box. Click Apply then OK.
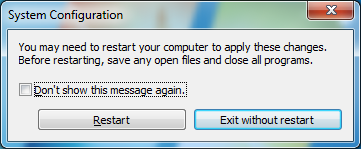
You will be prompted if you would like to Restart now to complete the action, this is optional and you can delay it until you are ready by click the Exit without restart button.

The next method for booting into Safe Mode is when you are starting your computer. At the BIOS screen, just before the Windows operating system loads, repeatedly press the F8 function key repeatedly on your keyboard until you see the Advanced Boot Options menu appear.
Using the up and down navigation arrows on your keyboard you can select each option then press the Enter key load it.

Don’t be alarmed as Windows loads, you will instead see a series of system files splash across your screen. Your log in screen will then be displayed, simply log in as you do in Normal Mode.
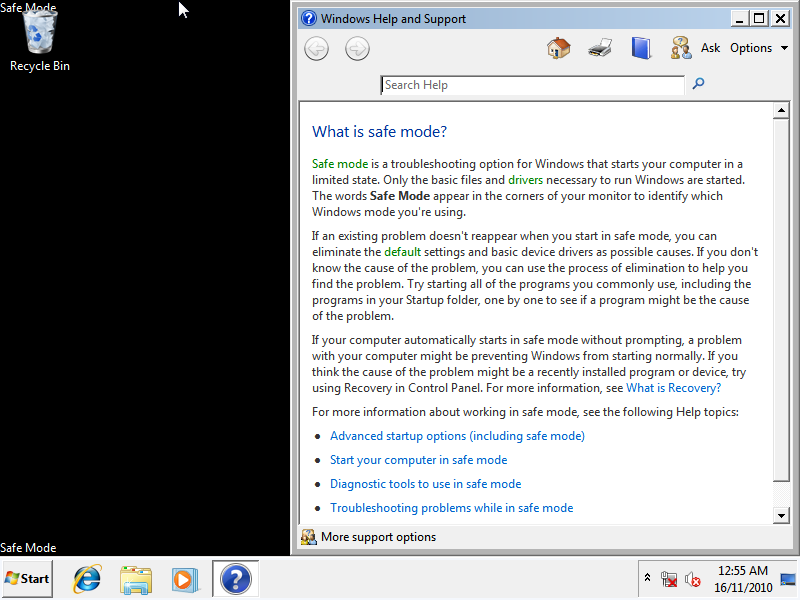
Once you are in Safe Mode, you can proceed to diagnose and resolve the problem you might be experiencing. If you utilized the first option to boot into Safe Mode, remember to reopen the System Configuration Utility and uncheck the Safe boot option.
Related Posts
-
The Windows 10 Start Menu looks a lot like the one that came with Windows…
-

Microsoft’s Windows operating systems let users do a lot of things. Every day, machines loaded…
-

Even though Windows 10 has made upgrading Windows easier than ever, sometimes you still need…