Despite the aim of creating a paperless world through digital alternatives, printing on paper remains a very popular task among business and home users. Whether its printing documents for archival purposes, reports, photos at home or a news letter for your church. In addition to these common activities, printer manufacturers continue to produce innovative products that produce exceptional quality output. Windows 7 introduces some improvements to printing, with a new Explorer shell called Devices and Printers along with a new feature for manufacturers to plug into Windows with unique content about their products called Device Stage. In this article, we take a look at the differences to setting up a Printer, along with common tips and tricks for troubleshooting printer woes in Windows 7.
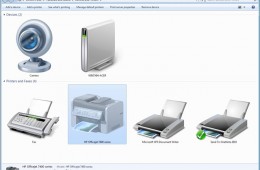
Devices and Printers window in Windows 7
In previous versions of Windows such as XP and Vista, we had the Printers directory called Printers and Faxes, where we added and managed installed printers. Instead of having multiple locations for managing devices, the Windows 7 Team has created Devices and Printers which consolidates all of your connected and wireless devices in one place.
Adding a Printer
There are multiple ways to install a printer in Windows 7. You can plug the printer in whether its a USB or Parallel connector and Windows will automatically detect the Printer and install it for you, this is called Plug and Play. If you are planning to share a printer, this might require that you use a different type of interface such as Ethernet or Wireless (Bluetooth or Wi-Fi). A Printer driver is the software program that enables your computer and printer to communicate with each other. To Add a Printer, click Start, click Devices and Printers then click Add Printer on the Command Bar. This will begin the Add Printer wizard.
Selecting the printer port and type
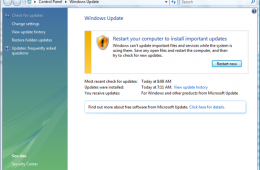
If Windows does not detect your printer, you can install it manually.
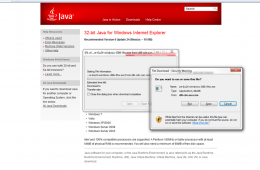
If you decide to install your Printer manually, before doing so it is recommended you check the manufacturers website first to find out if a newer driver is available. If it does not find one, you can supply the installation disk that came with your printer and let Windows search the disk for the available driver. If the driver on the installation disk is not compatible with Windows 7, you can use Windows Update which host an extensive library of the most up to date drivers. If you don't have an available Internet connection, you can proceed with installing by using the default built in drivers in Windows 7. Windows 7 will then check its driver library for an available driver.
If you have a printer that worked fine in Windows Vista and Windows XP but you are experiencing problems under Windows 7, you might need to update the Printer's Firmware, this is especially important to consider for industrial type laser printers used within a office on business networks. The Firmware is a set of instructions stored on the printer to control how the printer operates. If you encounter printing problems or need new features, a firmware upgrade might be just what you need. You can also find this update at the manufacturers website. Some older model Printers might now have available drivers built into Windows 7, requiring that you check Windows Update or the manufacturers website.
Print a Test Page
After setting up your Printer, you can print a test page to verify that printer is operating properly, the driver software is installed and working correctly and the printer and computer are communicating.
Preparing to print a Test Page.
To Print a Test page, click Start > Devices and Printers > right click the Printer > click Printer Properties > and click Print Test Page. A dialog will open, asking if the page printed correctly. If it did not, then its time to use the Printer Troubleshooter feature of Windows 7. You can also try printing from printers built in Printer Panel. Most printers have a front panel with controls to allow you to generate test pages. Consult the print manufacturer's website or documentation to learn how to print a test page from the front panel on your printer if it is supported.
Troubleshooting
One of the great improvements added to the printer experience in Windows 7 is actually troubleshooting. Compatibility can often be a sticking point when you upgrade your operating system. As part of the 27 bundled Troubleshooters that come with Windows 7, Microsoft includes a Printer Troubleshooter that can resolve some of the most common symptoms associated with setting up a printer. Lets take a look:
Using Windows Troubleshooting to resolve common printer issues.
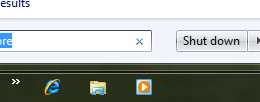
Open the Printer troubleshooter by clicking the Start button, and then clicking Control Panel. In the search box, type troubleshooter, and then click Troubleshooting. Under Hardware and Sound, click Use a printer. The Printer troubleshooter will begin and attempt to automatically diagnose and fix your problem.
If Windows can't detect a printer that you want to use, follow these steps to find and add the printer manually:
1. Open Devices and Printers by clicking the Start button, and then, on the Start menu, clicking Devices and Printers.
2. Click Add a printer.
3. In the Add Printer wizard, select Add a network, wireless or Bluetooth printer.
4. On the Searching for available printers page, click The printer that I want isn't listed.
5. On the Find a printer by name or TCP/IP address page, choose how to find the printer that you want to use, based on the type or location of the printer, and then click Next.
6. Complete the additional steps in the wizard, and then click Finish.
To make sure that printers on the network are being displayed, check to see if the network is working correctly. For more information, see View the status of your network.
Printer Sharing and Location Aware Printing
Sharing a Printer enables multiple users on a network to access your printer. To Share Printer, Click Start > click Devices and Printers > right click your Printer. Click Printer Properties > click Sharing tab > check the Share this printer box. You can give the Printer a name if you wish to make it instantly known to persons. Click Apply.
Sharing a printer in Windows 7
Using the Add Printer wizard to connect to a shared printer.
To connect to the shared printer from another computer. Click Start, click Devices and Printers. On the Command bar, click Add a printer. Click Add a network, wireless or Bluetooth printer. Follow the steps using the Add Printer wizard and select the printer to install it. If you experience problems please see the Troubleshoot network printer problems link.
If you own a laptop for instance that you use at both work and home, you will most likely connect to different Printers when you are at either location. In previous versions of Windows you had go through the manual chore of resetting the default printer every time you move from your business network to your home network. Location Aware Printing only available in Windows 7 Professional, Enterprise and Ultimate simplifies this experience by switching your laptop's default printer when it detects that you've moved from one network to another. You can easily setup default printers for specific networks easily.
Manage Default Printers dialog box
Click to open Devices and Printers.
Click a printer, and then click Manage default printers on the toolbar.
Click Change my default printer when I change networks.
In the Select network list, click a network.
In the Select printer list, click a corresponding default printer.
Click Add.
Repeat steps 4, 5, and 6 as needed. When you're finished, click OK.
Notes
If you don't want Windows to change your default printer settings when you move from place to place, click Always use the same printer as my default printer in the Manage Default Printers dialog box, and then click OK.
If you want a wireless network to appear in the Manage Default Printers dialog box, you need to have successfully connected to that wireless network at least once.
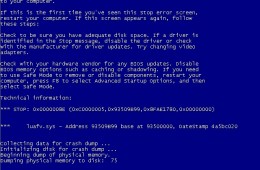
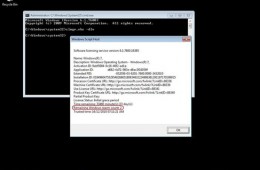
Printer Spool Service missing
The Printer Spool is used for storing files that are being prepared for printing in RAM. You can cancel or pause print jobs in the printer queue. Spooling programs allow the application you are printing from to finish faster. You may also print directly to the printer. If you are experiencing problems such as Windows reporting that the Printer Spool Service is missing, it is possible that the Printer Spool Service might be disable or corrupted. To check if the Printer Spool Service is disabled, click Start, type Services, hit Enter on your keyboard
Troubleshooting the Printer Spooler Service in Windows
Scroll down to Printer Spooler, right click the Service, click Properties. Under the General tab, click in the Startup type: list box and select Automatic. Under Service status, click Start then Apply and OK. Restart your computer and try printing again. If that does not work, try using the System File Checker tool to troubleshoot missing or corrupted system files on Windows Vista or on Windows 7
https://support.microsoft.com/kb/929833
Also see the the following response from a Microsoft employee in the Microsoft TechNet forum regarding missing Printer Spooler here
I’d also suggest you to refer the link below and follow the steps mentioned in the article to troubleshoot network printer problems:
Troubleshoot network printer problems
https://windows.microsoft.com/en-us/windows-vista/Troubleshoot-network-printer-problems
The above article is for Windows Vista. It applies to Windows 7, too. I would suggest you to uninstall and reinstall the latest drivers compatible for Windows 7, the run the Printer troubleshooter.
For further information, visit the below mentioned links:
https://windows.microsoft.com/en-US/windows7/Open-the-Printer-troubleshooter
https://windows.microsoft.com/en-us/windows7/Install-a-printer
https://windows.microsoft.com/en-US/windows7/Find-and-install-printer-drivers
https://windows.microsoft.com/en-US/windows7/Change-your-default-printer
https://windows.microsoft.com/en-US/windows7/Printing-to-the-correct-printer
Windows Live Tags: Clubhouse , Windows 7 , Printers , Installing , Setup , Troubleshooting , Configuring , Resources , Drivers , Plug and Play , Location Aware Printing