If you have one of those new Apple computers that have been flying off the shelves, then you might need a little help getting used to it, especially if you are one of those Windows switchers. We began by showing you some tips for things like window management and closing v. hiding programs and windows in OS X in our OS X 101 Tips for New Users Part One. Now, we give you some more, in part thanks to the folks at Tested.com.

Keyboard Shortcuts
Many of the Windows keyboard shortcuts are also useful on a Mac with some translation. The closest thing to a Window key on the Mac is the Command key. But it often behaves more like the Control button does on Windows. This gets really confusing because the Mac also has a Control button. When do I use command and when do I use Control? The answer is the vast majority of the time in OS X you use Command instead of Control. Apple has a full listing of OS X keyboard shortcuts. Here are some of the most used:
- Command + C = copy
- Command + X = cut
- Command + V = paste
- Command + Q = close application
- Command + O = open
- Command + N = new
- Command + W = close window but leave application running
- Command + F = Find
- Command + I = Get Info (like properties in Windows)
- Command + M = minimize window
- Command + Tab = switch between open applications
There are many others, so hit the link above. They can be time saving if learned. Here is a helpful video about Mac keyboard shortcuts.
Uninstalling and Installing Programs
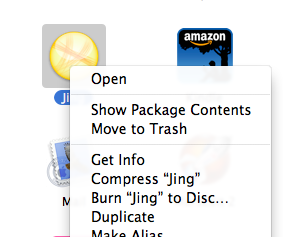
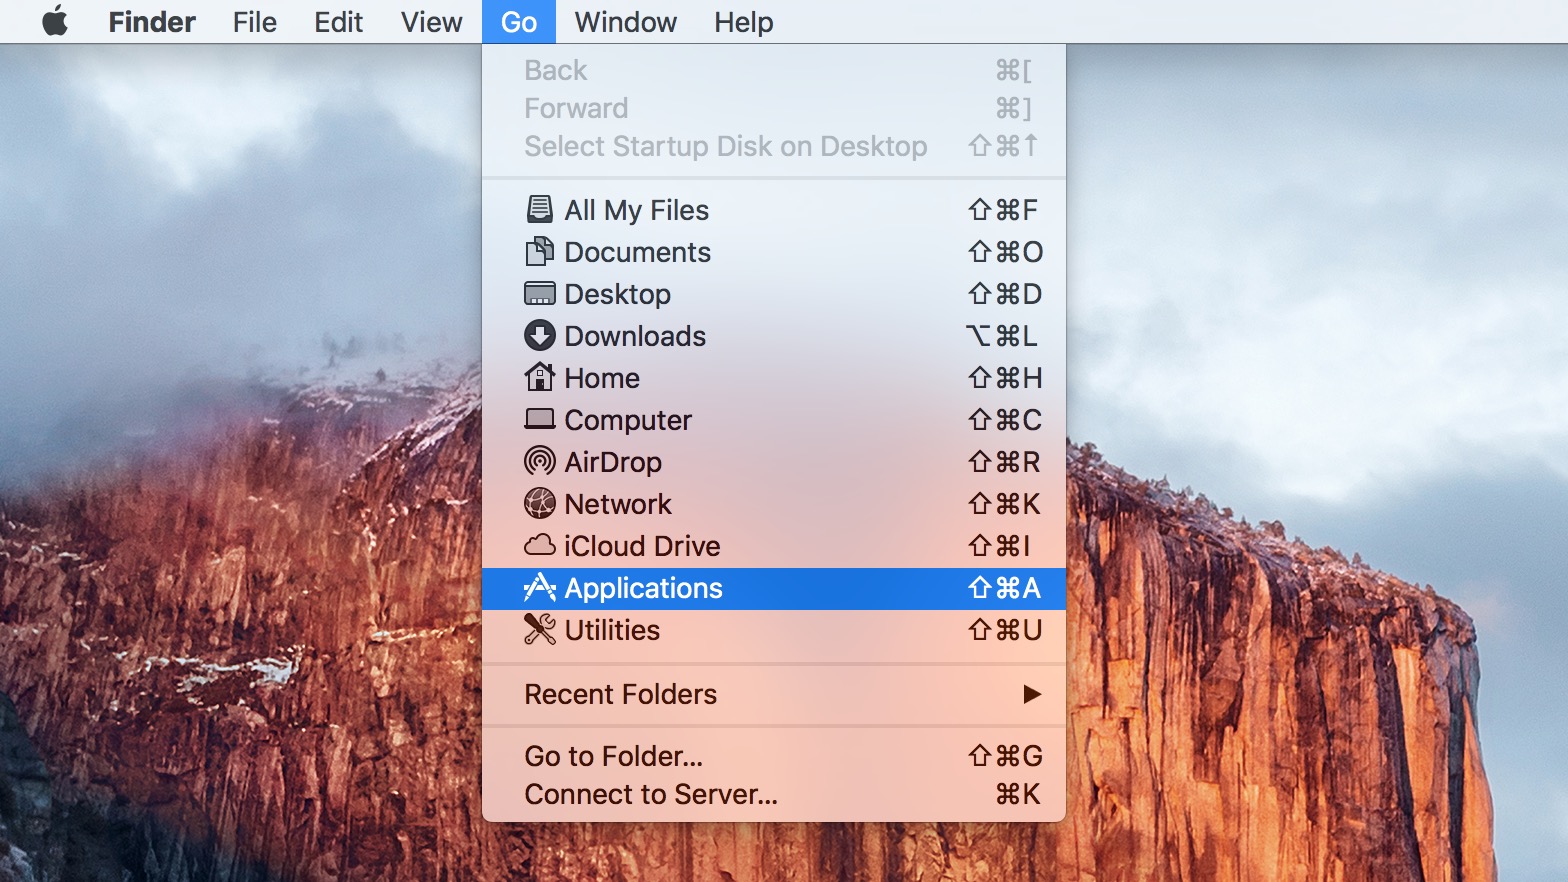
In Windows, uninstalling a program is more complicated than it usually is on a Mac. Windows users have been told to never just delete an application’s directory or folder in Windows Explorer. Doing so would cause problems. But on a Mac that is often exactly how to uninstall the application. Go into the Applications folder of your user folder and right click the app and choose Move to Trash.
On some occasions a more complicated application will require running an uninstaller. In those cases there usually is an app in a folder within the Applications folder that will have a title like “Uninstall Application Name”.
Another issue related to this is an app that you download will sometimes not install into the Applications folder. In that case, the application is what is called an Application Bundle. It is the same as getting an EXE file in Windows that runs in place. So just drag it over to the Applications folder and re-run the application from there and it should work fine.
Warning: Do NOT just delete the app from the Downloads folder unless you know it has been installed and you don’t need it. A good practice is to move downloaded programs and installers to an external backup drive and/or an online cloud storage backup place like DropBox or iDisk if you have a MobileMe subscription.
For other programs the installer is what is downloaded. It can be run from the Downloads folder or anywhere else and it will place the files in the right places. A good guide for installing applications is found at MacRumors.
MobileMe
Some people will be drawn in to MobileMe by the free 60-day trial version Apple offers. This service is a $99/year service from Apple that promises to help users sync and back up their personal information, files and data. It has email, calendar, contacts, file backup via iDisk, image backup via Gallery, and the security service Find My iPhone, which will locate your lost iPhone, iPad, or iPod Touch. But is it worth $99/month?

We recommend that you go with a free email, calendar and contacts service like the great Google services Gmail and Google Apps. They work well with both the Mac OS X applications and with portable devices from Apple that run iOS.
For file backup and sync a better solution is Dropbox. This service gives you free 2GB of storage and backup and for same price as MobileMe, you can get 50GB of storage. It easily syncs between more than just Macs and iOS devices too.
For image backup, instead of Gallery we like either Flickr or SmugMug. They both offer free versions for users who don’t need that much storage and paid version if you want more than the free versions offer.
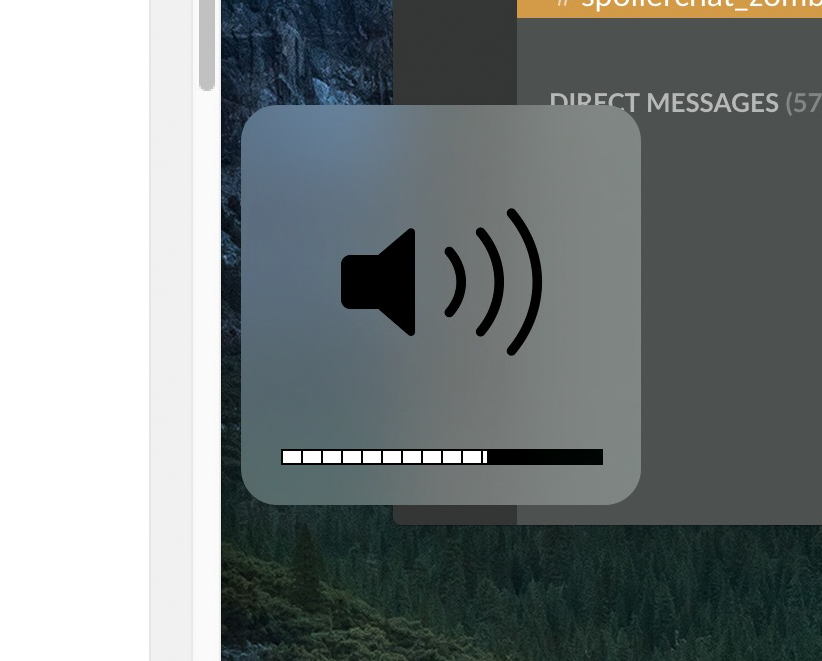
There is one really great part of Mobile Me that might make it worth the cost to some users. Find My iPhone allows the user to log into the site and it will find the current location of your iPhone. This can be useful if you have lost it or someone might have stolen it. The user can send the phone a message, like where to return it. It will make a sound even if the phone is muted. And in worst case scenarios the user can lock the iPhone or even erase it. The good news is that with iOS 4.2 this is now free to all owners of iOS devices. So no one needs to pay even if they think that the service alone would be worth $99.
Unfortunately, if you really want to use Mobile Me it is very hard to get your data out of something like Yahoo, Gmail or Windows Live and into Mobile Me. The best way is to export from those services to something like a comma separated file. Then import them into your iCal or Address Book on the Mac. Just choose File and then Import and point it to the CSV file. But be sure to save the backup until you know that none of the data was corrupted. In our test of this process, it was problematic and messed up many appointments and contact information.
How do I Delete Icons from the Menu Bar?
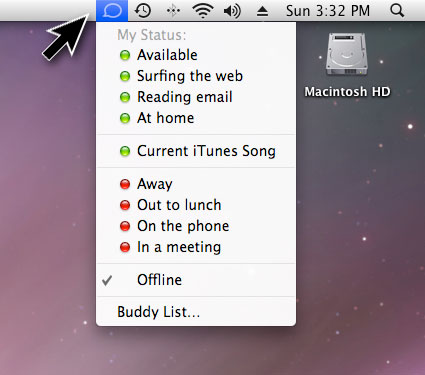 In the upper right corner of Mac OS X’s menu bar will be a bunch of icons called Menulets. They can be pretty helpful. For example there is a date and time, a search icon for Spotlight search accessed by clicking the icon or using the Command+Space Bar keyboard shortcut, and things like battery indicator and many others. Some applications put icons up there to help you use them. But they can get annoying if it fills up.
Removing from or moving them on the menu bar is pretty easy. Press command and then, using the track pad or a mouse, drag the icon from right to left to reposition them. Sometimes, application installed icons won’t move. To delete them, just drag them off the menu by dragging down.
To get the menulet back go to the System Preferences and find the item related to the thing you want back. For example, if you removed the Bluetooth icon, then go to the Bluetooth preferences area of the System Preferences.
Expose’ and Active Screen Corners
Espose’ is the feature in Mac OS X that allows you to see all the currently open windows. There are a number of ways of accessing it. The simplest is the keyboard shortcut of either F3 on most keyboards or F9 on some older ones.
If you don’t want to see all the windows but just those that are part of the present application you are using, then use Control+F3 (F10 on older systems) or click and hold the icon of the application in the Dock. So if you had three Word documents plus a Safari window and a Finder window, while in Word this shortcut would only display the three Word windows.
To hide all the windows so the desktop is revealed, press Command+F3. And to engage normal Expose’ in a slow motion effect use Shift+F3.
A companion feature in Mac OS X is Active Screen Corners. This is a mouse function that allows you to mouse to one of the four corners of the screen to perform an action. The option is found in the System Preferences under Expose’ and Spaces. It can be configured however you choose with many different commands available to be assigned to a corner. But be careful as you might accidentally engage the shortcut while doing normal work and accidentally moving the mouse to that corner.
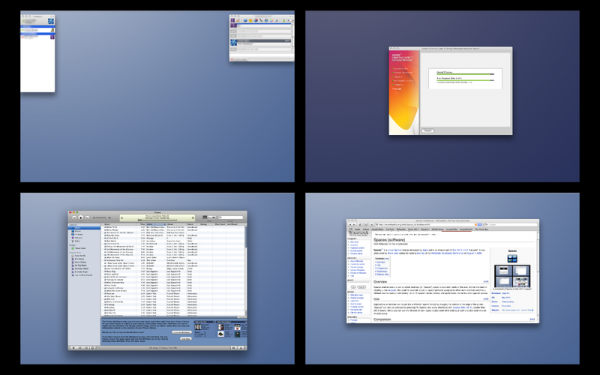
Spaces is a virtual desktop feature that lets you set up virtual desktops that are accessed either by keyboard shortcut or clicking the menulet. Using the same System Preferences box for Expose’ there is a tab for Spaces. There you can set up different spaces so that you can have all Internet applications on one, all Office applications on one, and all Entertainment applications on a third. There is no limit as to what you can put in a space. So set it up as you see fit. You can configure up to 16. Some applications don’t behave well in Spaces like Adobe Creative Suite applications and Microsoft Office applications.
To access the different Spaces, do so by program. Click on the application icon in the dock and that space will become active. Or press Command+TAB to cycle through your open applications and stop when the one you want is highlighted and its space will become active. You can assign an Active Screen Corner to zoom out and display all of your Spaces (see image above). Or there is an option to set up a Menulet for Spaces.
Related Posts
-
Like on a PC, most of your Mac's software lives in the same place on…
-
Apple has a long history of sprinkling Easter eggs, shortcuts, and other hard-to-find tricks throughout…
-
While most people can access their email via the web these days, having a dedicated…