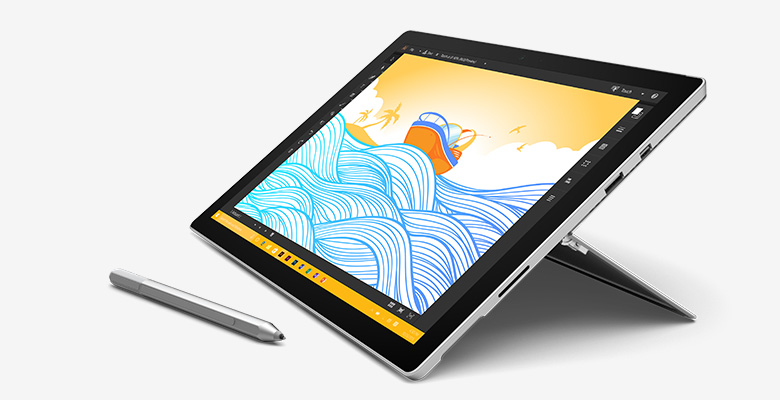
The Microsoft Surface Pro 4 balances perfectly the needs of most laptop users who need a light and portable laptop that works great as tablet too. Other manufacturers tried to reproduce that wonderful mixture of portability and usefulness, but so far few succeed where Microsoft did with this fantastic product. However, new users might need some guidance on the basics of using the Microsoft Surface Pro 4. If you’re already an advanced user, then take a look at our list and add your own tips in the comments below. If you’re a newbie, read on so you too can become a Surface Pro 4 master!
Maybe you need an even more basic guide on using the Surface Pro 4. Check out our Surface Pro 4 Review and our How to Set Up the Surface Pro 4. Those will help you decide if this is the right device for you. If you just bought one, the setup guide will help you figure out some important things.
Now for the Basic Tips!
How to Find and Use Settings
Users can change their basic settings using the Settings app on Windows 10. Find Settings quickly and easily using the Action Center icon in the lower right corner at the edge of the Windows Taskbar. It looks like an empty quote bubble unless there’s a notification active. Then it will look like a white quote bubble often with a number super-imposed on top of it.
Click or tap on the Action Center icon. The Action Center flies in from the right side of the screen.
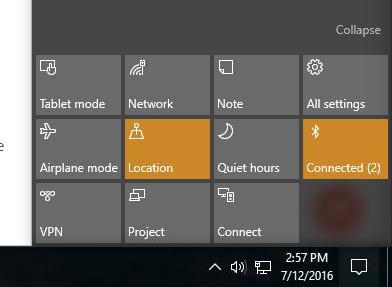
Then, tap on All Settings to open the Settings screen on Windows 10. The Windows 10 Start Menu also has a link to the Settings screen.
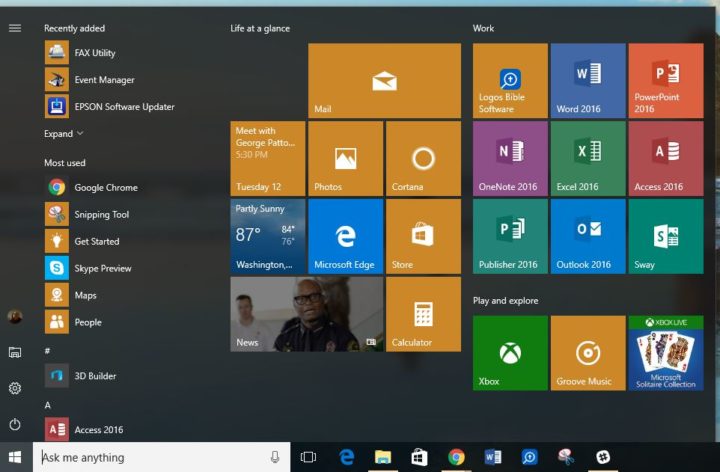
Users will find the Settings icon in the lower left corner of the Start Menu. Along the left there’s a stack of icons above the Start button. The Settings icon sits two icons above the Start button and looks like a gear. Click or tap on it to open Settings.
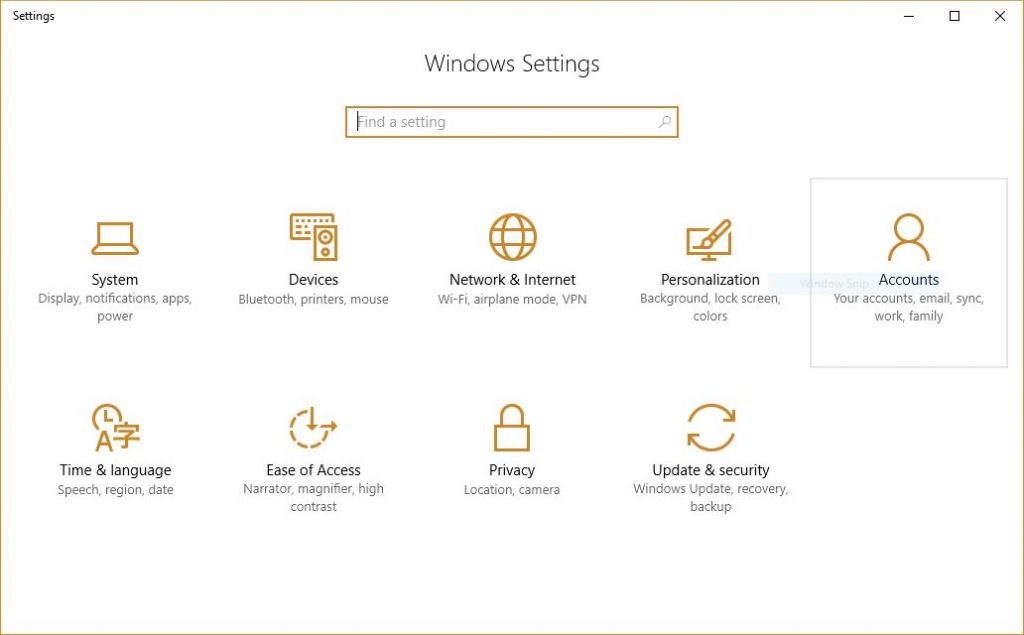
Here’s what you’ll find in Settings and what each category of Settings does.
- System – configure a ton of settings for your system like the display, apps, features, power settings, tablet mode and more
- Devices – add or configure devices connected to the computer like printers, mice, your Surface Pen or USB devices
- Network & Internet – configure and setup Wi-Fi and Ethernet networks and more
- Personalization – change the look, feel and behavior of Windows 10
- Accounts – configure your Window 10 user account, Microsoft account and family accounts
- Time & Language – set time and change language settings
- Ease of Use – configure settings designed to make the computer easier to use for people with disabilities
- Privacy – settings that affect your personal privacy like location, etc.
- Update & Security – get updates to Windows 10 or reset the computer to factory specs
At the top of the screen, you’ll see a search box. If you know the name of a setting but can’t remember which section you’ll find it in, then type it into the search box. A drop down box shows up listing possible answers to the query. Tap or click the one that seems to fit your search. A search box shows up in each category, too.
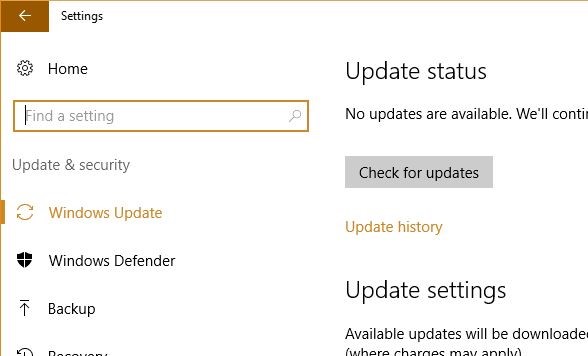
When you’ve opened a Setting category and want to go back to the main screen use one of two buttons. There’s a Home button in the upper left corner. Above that you’ll also see a back arrow.
Search on Surface Pro 4
With Windows 10 on the Surface Pro 4 search got simpler. Users can use Cortana to search many different things. Cortana can search for apps, documents or the web.
Click or tap in the box at the bottom left end of the Windows 10 Taskbar. Start typing to find an app to run. Type a document title. You can also type web searches.
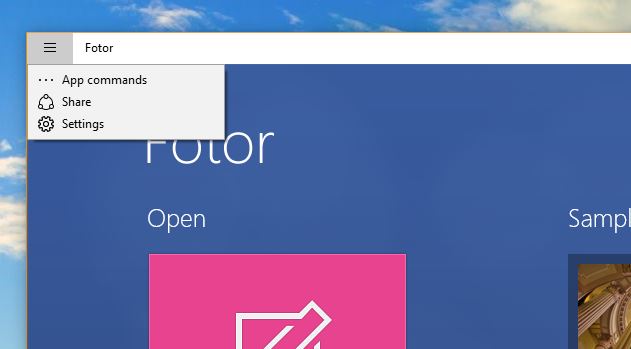
You can search from within in modern Windows Store apps by using the menu button in the upper left corner of the window. Notice above that not every app has a search menu item. See the one below that does.
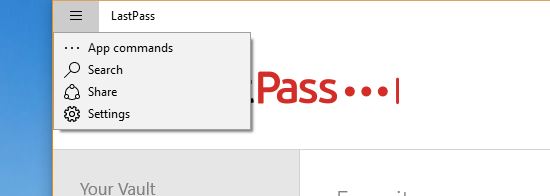 Tap or click on Search and it shows the old Windows 8 style charm from the right edge of the screen as seen below. Use it for searching within the app.
Use Cortana on Surface Pro 4
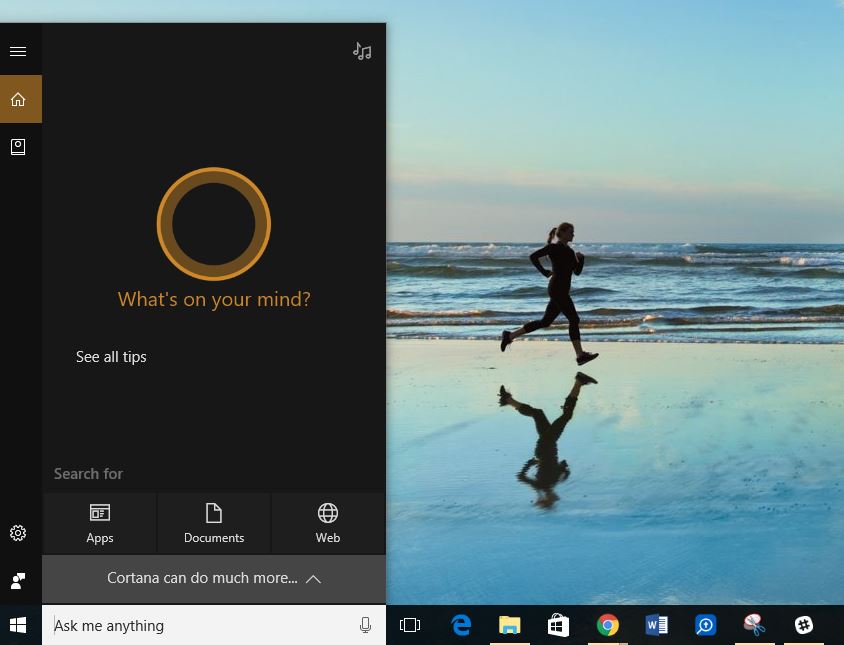
If you’re not sure what to type, click on “See all tips” or on “Cortana can do much more…” and see what else you can do with Cortana.
Notice that there’s also a mic icon in the search box. Click on it and setup the voice features of Cortana. Follow the on-screen wizard to do this. Afterwards, you can search by saying, “Hey Cortana” and then speak the commands. For the details, head over to How to Use Hey Cortana with Windows 10.
Take a Screenshot on the Surface Pro 4
Screenshots are pictures of what’s on the screen. People may want to do this so they can show their friends or family an app they’re using, an image from a video their viewing, or to save a window layout to reproduce it.
If you have the Surface Type Cover connected, you can use the keyboard shortcut Windows + F7 (also labelled PrtScn). The operating system saves a PNG file of the current screen in the user’s Pictures folder. It’s added to a new folder that will show up called Screenshots. Find this folder in Windows Explorer under your user account folder or under This PC along the left of Explorer.
You can also use the physical buttons on the Surface Pro 4. Press and hold the Power button and the Volume down button at the same time. It saves a shot in the same folder above.
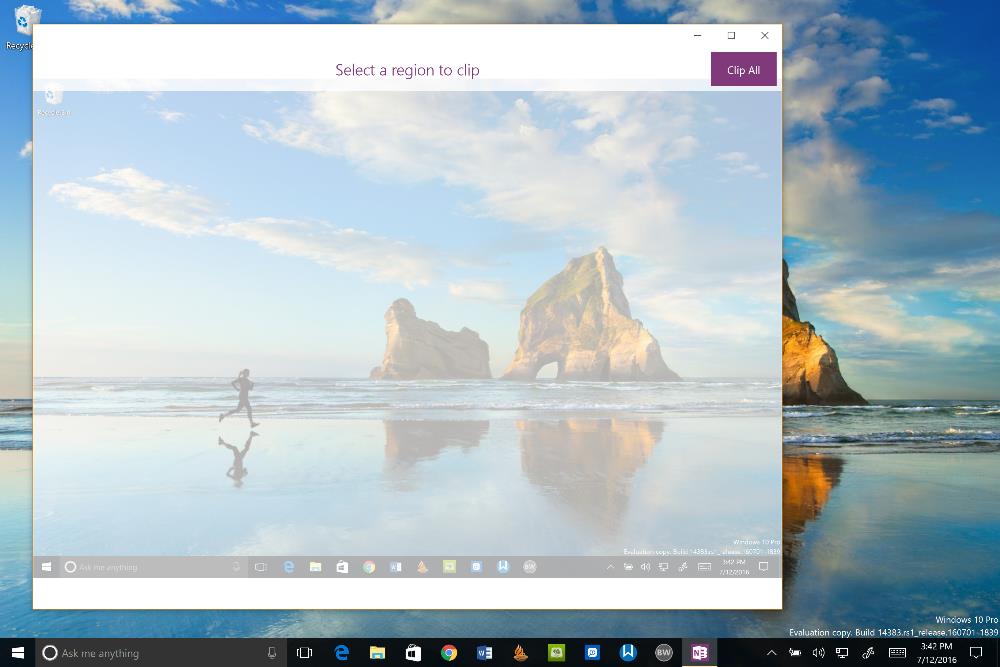
The Surface Pen also helps take screenshots. Double tap the button on top of the Pen and the screen dims and sends the screenshot to the mobile version of OneNote. Select the area you want to capture. This will save that area to a new page in OneNote. You can then select it, copy it and paste it into another program or just save it in OneNote for use later.
Use a Wired External Display
The screen on the Surface Pro 4 looks great, but might not look big enough for some situations. Connect to an external display to get a bigger look at your work while at a desktop or to play media like movies while hooked up to a TV. You might also want to present information at work or school. Here’s how to use an external display on the Surface Pro 4. We’ll start with wired external display.
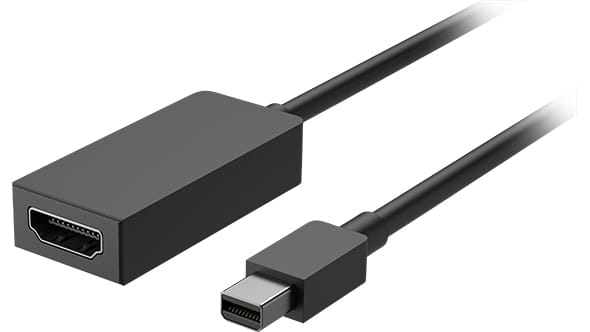
The Microsoft Surface Pro 4 comes with 3 ports on the right side. Many users will want to use a mini-display port adapter to connect to an external display. Users will need to find one that connects to HDMI, DVI, VGA or even a display port (Amazon links). They usually cost between $10-$20. You can buy some of these directly from Microsoft for about $40, but that’s way too expensive for such an adapter.
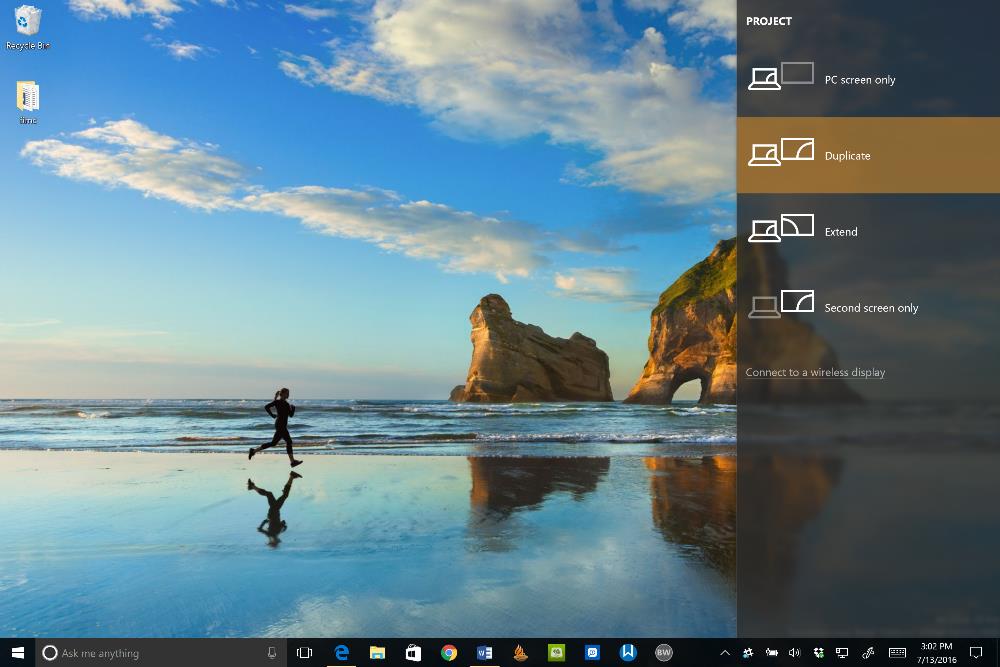
Plug the cable into the mini display port and the Surface Pro 4 will automatically extend the display to the external display. If you want to change what you see on the external display, open the Action Center and choose Project. The PROJECT bar will show up along the right side. It offers four options:
- PC screen only – shows nothing on the external display but does keep the Surface Pro 4 screen showing content.
- Duplicate – changes both screens to the same resolution using the highest resolution that both screens support and shows the same thing on both.
- Extend – Shows different things on each screen so you can put one app window on the Surface screen and another on the external display.
- Second screen only – turns off the Surface Pro 4 screen and only shows content on the external display.
Remember that the built-in display resolution measures 2736 x 1824. That’s pretty high and not many external monitors can support that high a resolution. If your second display resolution measures 1920 x 1080 or something else that’s lower than the built-in display, then using Duplicate mode will change the built-in display to that lower resolution.
Wireless Display and Surface Pro 4
The Surface Pro 4 supports something called Wireless Display or Wi-Di. Microsoft makes a useful Microsoft Wireless Display Adapter for $49.99 and it works great. Plug it into a TV’s HDMI port and then plug the USB cable that comes with it into a USB port on the TV or an AC to USB adapter.
To connect to the external display, open the Action Center again and choose Project. There’s a link at the bottom of the list reading Connect to a wireless display. Now use the four options as you would with a wired display.
The Microsoft Wireless Display Adapter isn’t the only option to connect wirelessly. Many Roku devices include this feature built-in. Some smart TV’s and monitors also include the feature.
Dock the Surface Pro 4
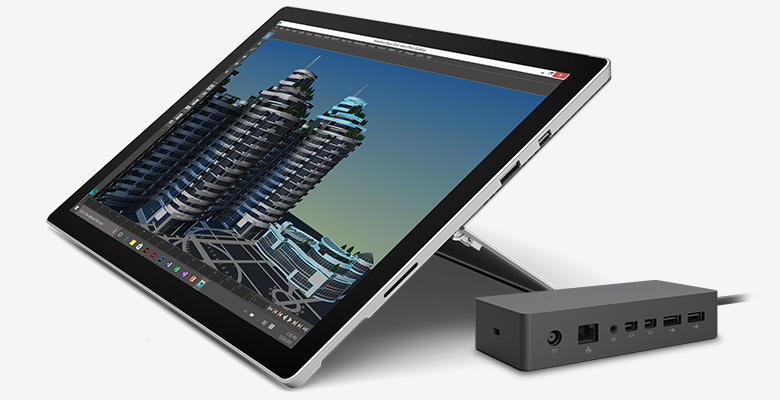
The $200 Microsoft Surface Dock turns the Surface Pro 4 into a desktop system or helps users quickly hook it up to an external display for presentations or gaming. Check out the review posted at GottaBeMobile which talks about how it works and what it can do.
What can the Dock do for you? It quickly connects a number of external accessories as well as power for charging the Surface Pro 4. It includes the following ports:
- 2 Mini DisplayPorts – great for connecting to displays
- 1 Gigabit Ethernet port – faster networking than Wi-Fi
- 4 USB 3.0 ports – fast connection to hard drives, printers, mice, keyboards and more
- 1 Audio out port – get better sound with external speakers
- Surface Connect cable – connects to the Microsoft Surface Pro 4
- External power supply – connects to the AC power and comes with a big brick
Sign In with Windows Hello
Windows Hello lets users quickly sign into their Surface Pro 4 or other Windows 10 computers. To configure it, open Settings either from the Start menu or the Action Center. Then select Accounts. Along the left there’s a list. Find Sign-in options and select it.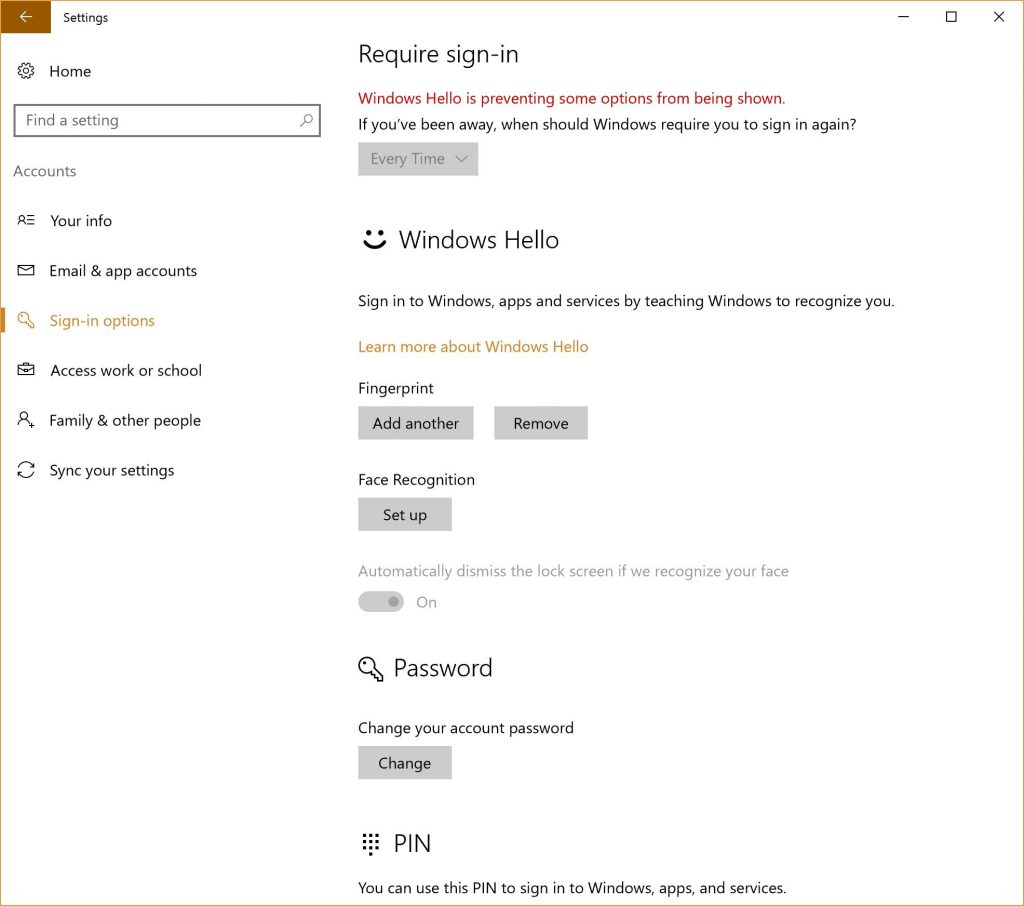 Notice the error message at the top of the screen above. This is a common bug while using the Microsoft Surface Type Cover with Fingerprint Reader ($159.99), but doesn’t affect most of Windows Hello on the Surface Pro 4. Don’t worry if it shows up on your Surface Pro 4 while using the Type Cover with Fingerprint.
The screen offers many sign-in options, but the most important options for Windows Hello include the biometric options like a fingerprint or your face. Click or tap on Add under Fingerprint and follow the wizard that reads your fingerprint using the fingerprint reader on the slightly more expensive Type Cover with one built-in. Tap or click on Set up and follow the wizard to add a face to the facial recognition engine that’s part of Windows Hello.
I don’t like the face recognition system. It’s inconsistent unlike the fingerprint which works quickly and accurately most of the time.
Other options in this Sign In Options screen include:
- Fingerprint
- Face Recognition
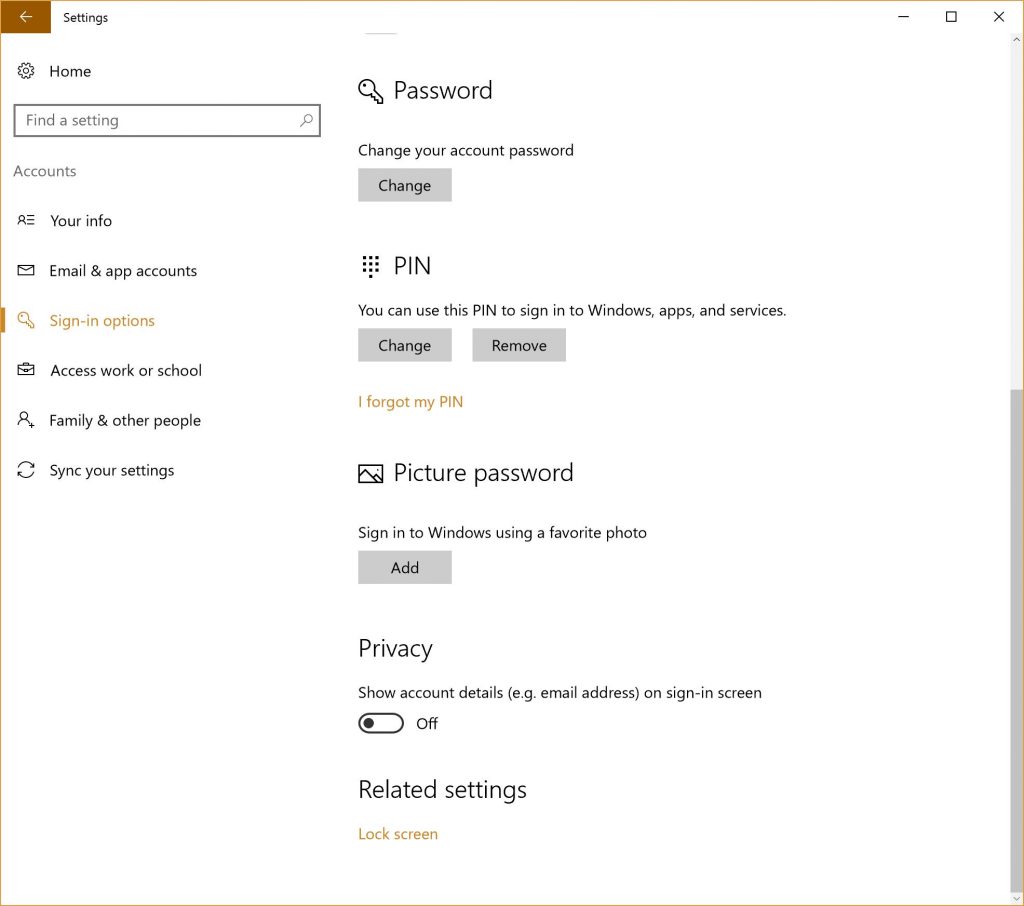
- Password – enter either a local password or your Microsoft account password
- PIN – a simple numeric personal identification number
- Picture password – shows a picture and the user clicks at predefined spots on the photo
At the bottom you can turn on Show account details and go to the Lock screen settings page.
Use Surface Pen as a Shortcut
The Surface Pen comes with a button on the top opposite the drawing point. You can use it to do certain things. By default it does the following:
- Click once to bring up Microsoft OneNote for quick note taking
- Hold it down to use Cortana
- Double-click it to take a screenshot
 Users can customize these in Settings. Go to Devices and then Pen & Windows Ink. Scroll to the bottom and use the drop down boxes to change what each shortcut does. You can choose things like the OneNote universal, launch a classic desktop app or universal app, or launch the new Windows Ink Workspace (click link and scroll to bottom to learn about Ink Workspace).
Customize Surface Pen with the Surface App
Windows 10 comes with an app called Surface. In it the user can customize the Surface Pen pressure sensitivity. Use the Windows key on the Type Cover or tap/click the Windows Start Button and type “Surface”. It should come up at the top of the list of items found. Tap or click to launch it.
The app includes a screen with buttons on the left edge. The top button with three horizontal lines shows or hides the labels on the other four buttons. The bottom button labelled “About” pops up a window with info about the app. The other four do the following:
- Surface app home page
- Pen
- Learn about your Surface
- Support
Tap on the Pen button and you’ll see the following screen.
 At the top, you’ll see a link to the above Settings section that lets you customize the Surface Pen button shortcuts among other things. The screen also shows the battery level. The next section lets users customize the pressure sensitivity. A slider adjusts the Surface Pen’s sensitivity. It ranges from more to less sensitivity. Test it in the box on the right. Tap the Reset link to go back to the default level of sensitivity.
Related Posts
-
If you invested in a Microsoft Surface Pro 4, Surface Book or one of the…
-

When comparing the new iPad Pro and the Surface Pro 4, a lot of people…
-

At WWDC 2017 Apple announced an update to the 2017 MacBook Pro lineup, putting the…