Yes, you read right, we’re going to show you how to network Windows 7 and Windows 98. Now, some people might be wondering if we have ran out of ideas or experiences to write about regarding Windows 7; which is understandable, considering the wealth of information and resources that exist across the web about Microsoft’s latest operating system there are still a small batch of Windows 9x
One particular story I came across on a forum is a user running Windows 98 with GB’s of files he said he would like to bring over to his Windows 7 machine. I found the challenge an exciting one and decided to find out if it was possible to network a modern version of Windows with a 12 year old version way past it’s expiration date.
The answer is, it’s very much possible, but involves more hands on configuration than what you would require between two Windows 7 PC’s. It’s a testament to how far we have come. Networking PC’s today in Windows 7 is so much easier, HomeGroups make it a cinch to share files and resources such as a printer.
Lets get started:
I tried this with Windows 98 SE and Windows 7 64 bit and it worked just as a I describe.
Hurdles you might encounter:
– Setting File sharing
– Ethernet Adapter if you don’t have one installed in the Windows 98 machine, this will make it a challenge.
– You might need to have your Windows 98 disk on hand especially for installing and configuring TCP/IP
In Windows 98
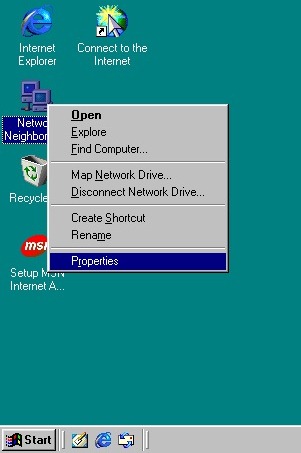
On the desktop, right click ‘Network Neighborhood’
Click Properties
Go to the ‘Identification’ tab
Enter a WORKGROUP name
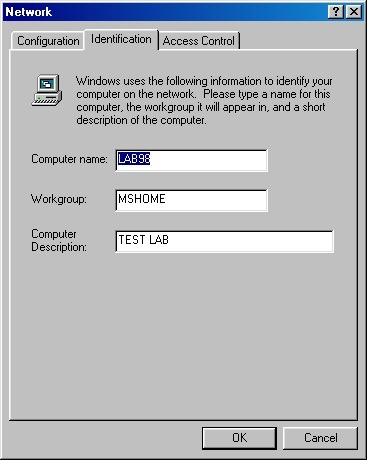
Enter a ‘Computer name’:
Click Apply and OK
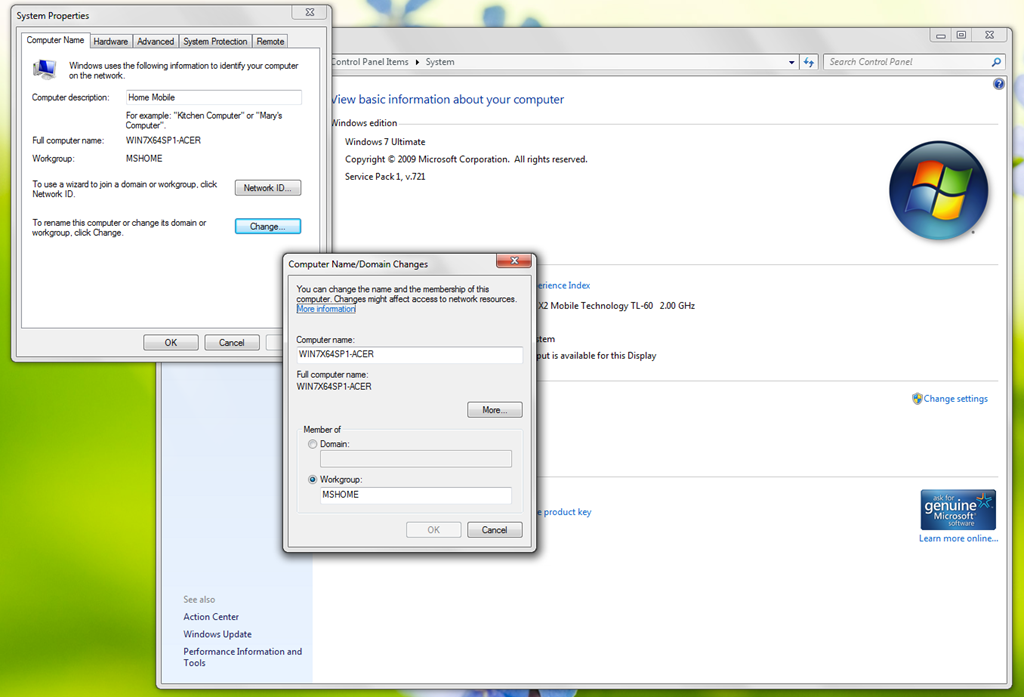
Changing Workgroup settings in Windows 7
You should use this workgroup name also on Windows 7 machine.
In Windows 7, click Start, right click Computer
- Click Properties
- Under ‘Computer name, domain, and workgroup settings’
- Click ‘Change settings’
- Select the ‘Computer Name’ tab
- Next to ‘To rename this computer or change it’s domain or workgroup, click Change.
Enter the WORKGROUP name we created in Windows 98.
Make sure the workgroup name is the same as the one on the Windows 98 machine, you might be required to restart the machine for settings to be applied. Do so.
Once Windows 7 has restarted, you are going to apply an IP address.
- Click Start, click Network
- Click Network and Sharing Center
- Under Control Panel Home
- Click ‘Change Adapter Settings’
- Right click your Network adapter
- Click Properties
- Select TCI/IP 4
- Click Properties
- select ‘Use the following IP address’:
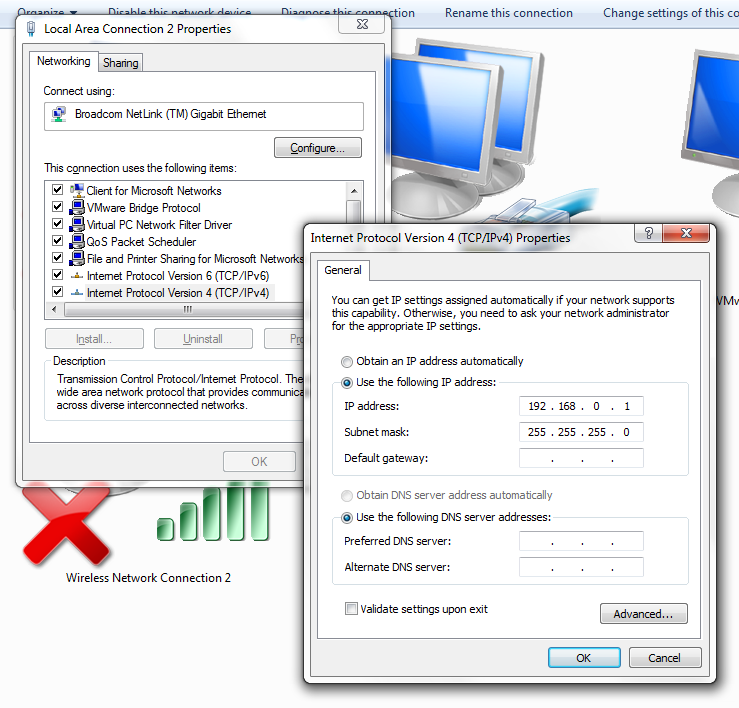
Enter 192.168.0.1
Click OK
Click Apply and OK
—————————————-
Back to the Windows 98 machine
On the desktop, right click ‘Network Neighborhood’
Click Properties
Select the ‘Configuration’ tab
Select TCP/IP
(again, if it’s not listed, click Add and follow to wizard to install one, you should make sure you already have an Ethernet adapter installed or this will be a futile experience).
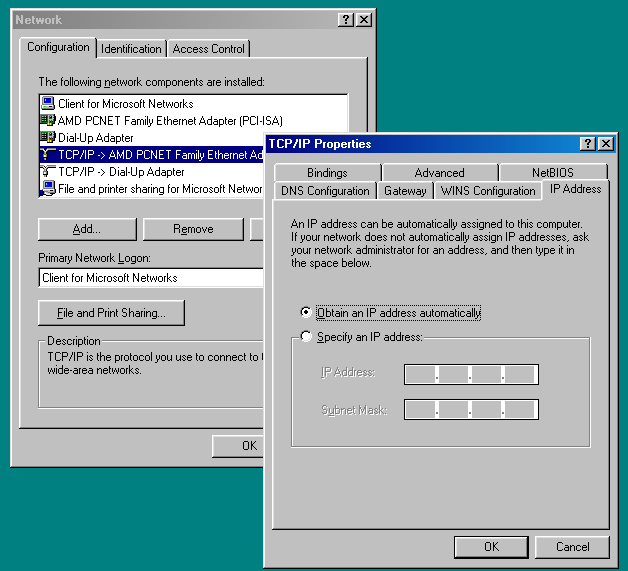
Click Properties
Select IP Address tab
Select ‘Obtain an IP address automatically’
Click OK
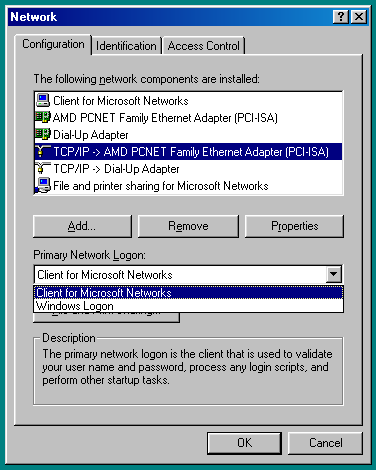
In the Primary Network Logon: box, select: Clients for Microsoft Networks
Click File and Print Sharing
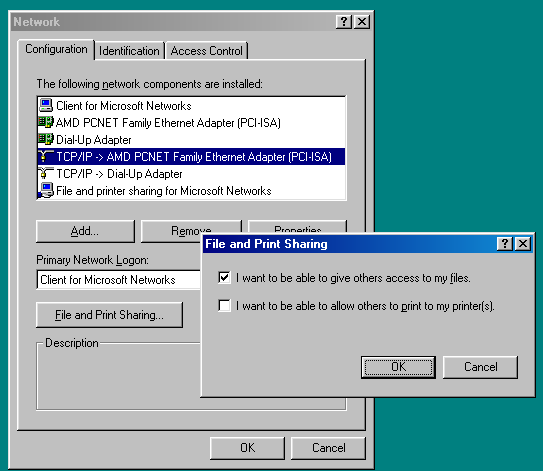
Check ‘I want to be able to give others access to my files”
You might be prompted to insert your Windows 98 CD and restart your computer (good luck with that).
———————————————
Still in Windows 98,
Open My Computer
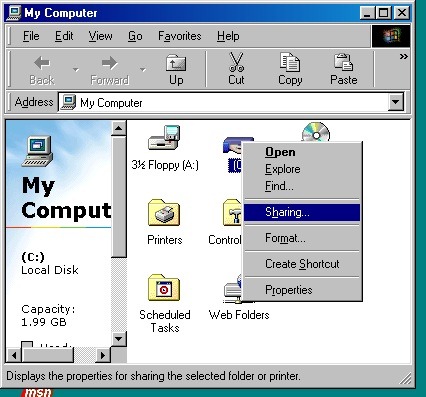
Right click the C: drive or wherever Windows 98 is installed
Click ‘Sharing’
Select ‘Shared As’
Share Name, for example: ‘WIN98BKUP’
If you don’t want to share the drive, you can individually share the folder if you want instead.
Access Type: Full
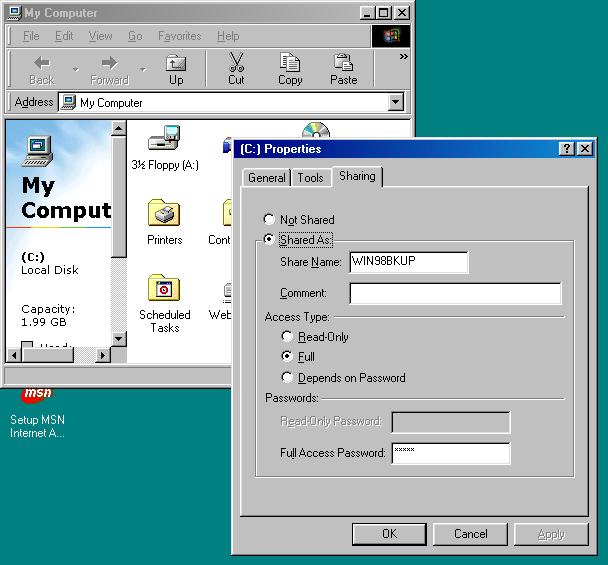
Give it a password just to be safe: call it: win98
Confirm the password
Click OK
Click Apply and OK
Restart the machine.
—————————————————
You should now see both machines appear on each others Network:
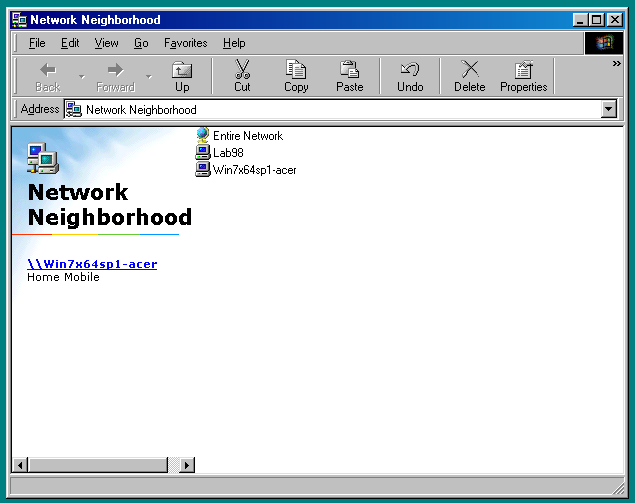
My Windows 7 machine even shows up in Windows 98
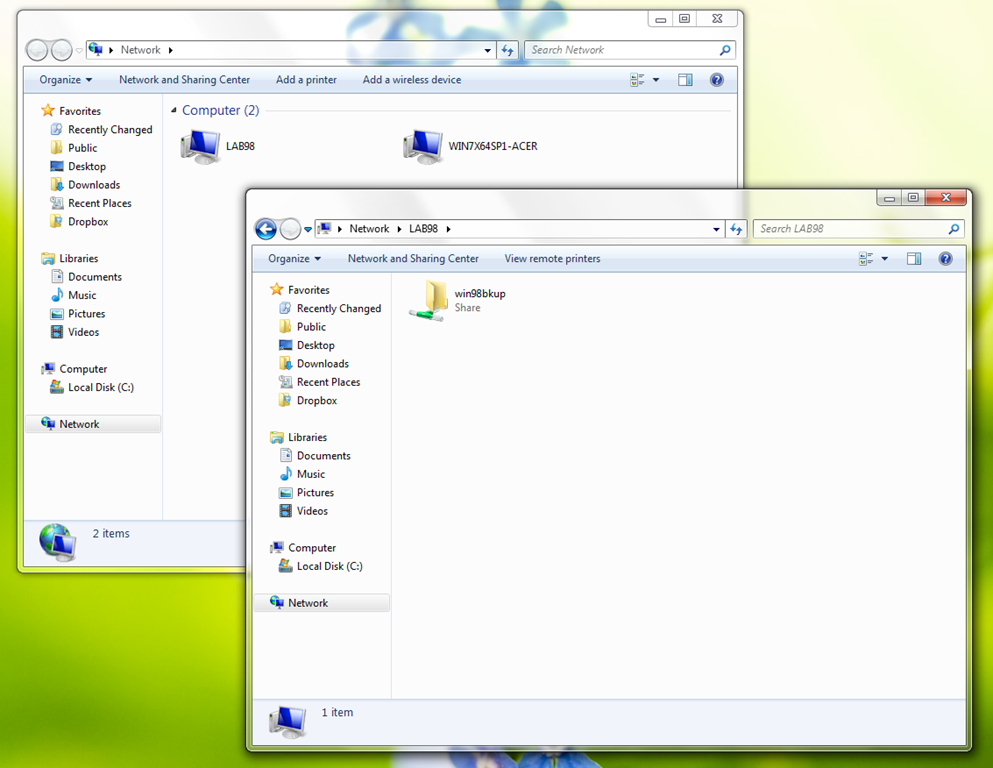
In Windows 7, click Start,
Click Network
you should see the Windows 98 machine show up
The C: drive that was shared appear as a folder
Double click it, enter the password we created: win98
Browse it and copy and paste over whatever files you need.
Related Posts
-

Microsoft’s Windows operating systems let users do a lot of things. Every day, machines loaded…
-

Even though Windows 10 has made upgrading Windows easier than ever, sometimes you still need…
-

On August 2, 2016 the Windows 10 Anniversary Update came out with some cool new features…