With the new iOS4 update users can now sync more than just email, contacts and calendars with their Gmail accounts. Now, Notes in the iOS4  Notes App can be saved to Gmail. You cannot create notes in Gmail and move them to your device however. In this guide we’ll show you how to set this up.
First, you need to determine which kind of Gmail account you plan to use. If you are just syncing your traditional Gmail account ([email protected]), then it is really simple. But if you use the Google Apps for Domain service, it is a little more challenging. We will start with how to sync notes with a regular Gmail account.
Before you do anything, go into your email settings on your iPhone. See if your Gmail account has notes syncing already enabled after upgrading to iOS4. If so, then you don’t have to do anything. To check this, do the following:
- Open the Settings app, and choose the “Mail, Contacts, Calendar” setting.
- Tap on your Gmail account. If it is already setup, it should have the option to turn on/off Notes as seen in the screen shot below. Make sure the Notes slider is set to ON. If it is, then skip the next two sections and go to the third one labeled Configuring the New Accounts below.

Syncing Gmail Accounts
The first thing you need to do is make sure you have a Gmail account. You can get one for free by going to Gmail.com. Now, go to your iPhone and find Settings. Then choose “Mail, Contacts, Calendars”. Towards the top, listed under other email accounts you have already set up will be an option to “Add Account…”. Simply tap on the Gmail option in the middle.

1) Enter your username and password and hit next. Your iPhone will verify your login information.
2) Turn on the items you want to sync. See the image above.
Syncing with Google Apps for Domain or Gmail with Contacts
If you are like me you want to sync mail, contacts, calendar and notes. I wish you could also sync documents automatically, but that’s not possible without a third party app. To just get the four supported things, there is no single option using just one account on an iPhone. So in this part of the guide, I will show you how to have all four by adding two different versions of the same account. The reason for this is with Exchange synchronization you don’t get Notes syncing. With IMAP synchronization you don’t get Calendar or Contacts. Add one of each type and turning off mail in one of the two and you get all four. It is a bit complicated so pay careful attention. I have tested this out on my phone and it works great.
This will help you get your Google Apps for Domain account to sync with your iPhone. These are special Gmail accounts that allow you to use the Gmail tools with your own domain. For example we have our [email protected] set up with this kind of an account. Another reason to use this would be if you have a simple Gmail account and want Contacts to sync with your iPhone in addition to mail, notes and calendar information. The above guide won’t let you do all of that.
First, go into the Settings of your Gmail account online. You find it in the upper right corner of the Gmail window. Tap on “Forwarding and POP/IMAP” tab and make sure that you have IMAP turned on (see below).

Now, click the link at the bottom that says “Configuration instructions” which will open a new list. Choose iPhone from the bottom list. Follow those instructions very carefully. I have had to repeat it several times because I went too fast and was careless. Once you are finished, click the bottom link about “recommended client settings”. Select iPhone from that list and follow those instructions as well.
When you are finished, you should have an item in your list of Accounts in the iPhone Settings under “Mail, Contacts, Calendar” option. Tap it and you should see Notes as one of the options. However, you won’t see Calendar and Contacts. For that you will have to add the account again as an Exchange account. To do this you will have to have this feature enabled for you Domain. If you have control over this you can learn how in Google’s help. If you don’t, ask your administrator to set it up so you can then enable it by following the instructions below.
Now, go to your Settings App and choose Mail, Contacts, Calendar. Choose to Add Account, this time choosing Exchange. To set it up follow the instructions Google provides very carefully. Be very careful at the end of the guide or you may end up deleting your contacts.
Configuring the New Accounts
You will now have two versions of that account. Set the settings as follows to keep from getting conflicts.
If you want push notification of your email on this account then do the following:
In the IMAP version of your account turn on Notes and Mail. In Exchange turn on Contacts and Calendars but leave off Mail. This will turn off push notifications for that email address, but will give you all four – mail, calendar, contacts and notes syncing.
If you don’t care if you have push turned on for this account, then do the following:
In the IMAP version of your account turn on Notes and turn off Mail. In Exchange turn on all three. This will give you push notifications for that email address. It will also give you syncing for all four – mail, calendar, contacts and notes syncing.
Notes App Syncing
In your Notes App, when you open it you will have accounts listed. If you don’t see them tap on the Accounts button in the upper left. The folder for each of your accounts that has Notes syncing enabled will be shown. Tap that folder and begin adding notes. They will then show up in your online Gmail account under the Notes label. In the left you will see a folder called Notes. Or in the search field type “label:notes” without quotes.

You cannot add notes to the device from within the Gmail interface online. This is a one way sync from the device to Gmail only.
Related Posts
-
With recent updates to the Mac's OS X El Capitan, and the new iOS 9.3,…
-

The OS X Notes app got more powerful in OS X El Capitan and iOS…
-
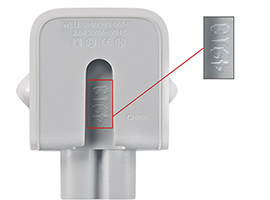
Apple is issuing a recall for its wall plug adapters, after a limited number of…