Do you often find yourself accidentally hitting the wrong keys on your laptop because of poor design or just messy typing?
I know your pain. Some keys just get in the way.
The solution to this problem is simple: re-map troublesome keys so they act like different ones or turn them off all together.
You don’t need to manually edit the registry or have a lot of technical expertise to do this. There’s a program for Windows that will do it for you no matter what kind of PC you have.
Here’s how to turn off or change any key’s behavior:
Step 1: Download SharpKeys 3.5, compatible with Windows 7 on down to Windows 2000, and install.
Step 2: Make a backup of your registry just in case.
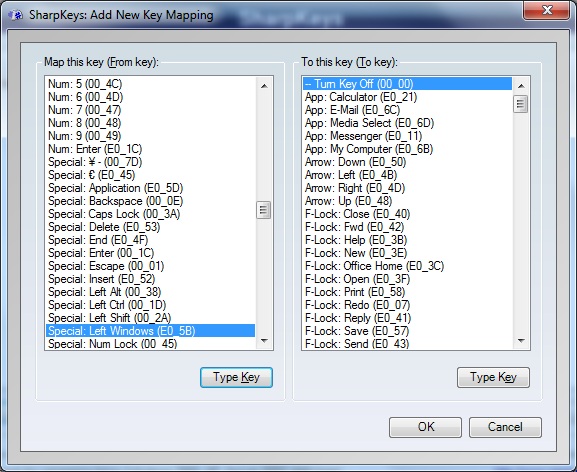
Step 3: Open SharpKeys and click Add.
The left column shows a full list of keys on your computer. Choose the key you want to change here.
You can also click the Type Key button underneath to quickly add the key in question.
Step 4: In the right column is the same list of keys. This is where you’ll choose what the key does going forward.
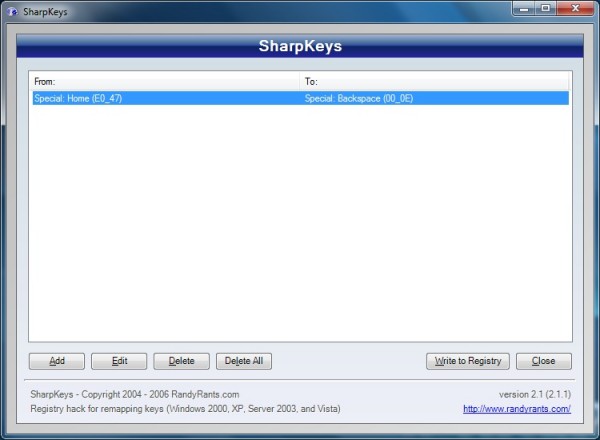
You can change it to a more convenient key — for example, when using the IdeaPad U400 I changed the pesky Home key to Backspace just in case I miss the real Backspace key.
If you want the key to do nothing, choose Turn Key Off (first choice in the list).
Step 5: Hit OK.
To can re-map multiple keys, start again at Step 1.
Step 6: Once you’ve added all the keys you want to re-map or turn off, click Write To Registry.
Step 7: Reboot or log off for the changes to take effect.
Now those pesky keys you don’t need will no longer trouble you. And the process is reversible. Just go back to SharpKeys again to delete or change key re-maps.


