If you have recently installed Windows 7 and you are seeing multiple operating system entries on ehe Windows Boot Manager, here is a quick way to remove it.
Please make sure you remove the one that is not needed or not working.
Click Start, type: MSCONFIG.exe
Hit Enter
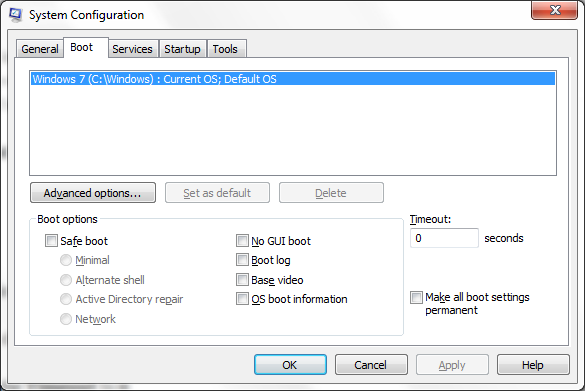
This will open the Microsoft System Configuration Utility, go to the Boot tab
Select the entry and click Delete.
You can also change the Timeout to 0
Click Apply and OK
Windows will now automatically start without delay when you turn your computer on.
If you don’t see it, another utility you can use to remove unwanted boot entries is NeoSmart Technologies EasyBCD Creator. It provides a graphical front end to the BCDEdit Command line that makes it easy for you to define start-up settings and edit boot entries on the new Windows 7/Vista boot manager.
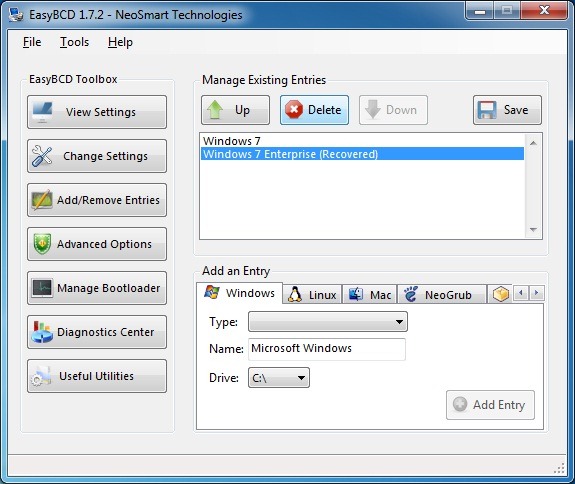
Once you have downloaded and installed EasyBCD, launch it, click the Add/Remove Entries button. Select the boot entry and click Delete.
Related Posts
-

Microsoft’s Windows operating systems let users do a lot of things. Every day, machines loaded…
-

Even though Windows 10 has made upgrading Windows easier than ever, sometimes you still need…
-

On August 2, 2016 the Windows 10 Anniversary Update came out with some cool new features…