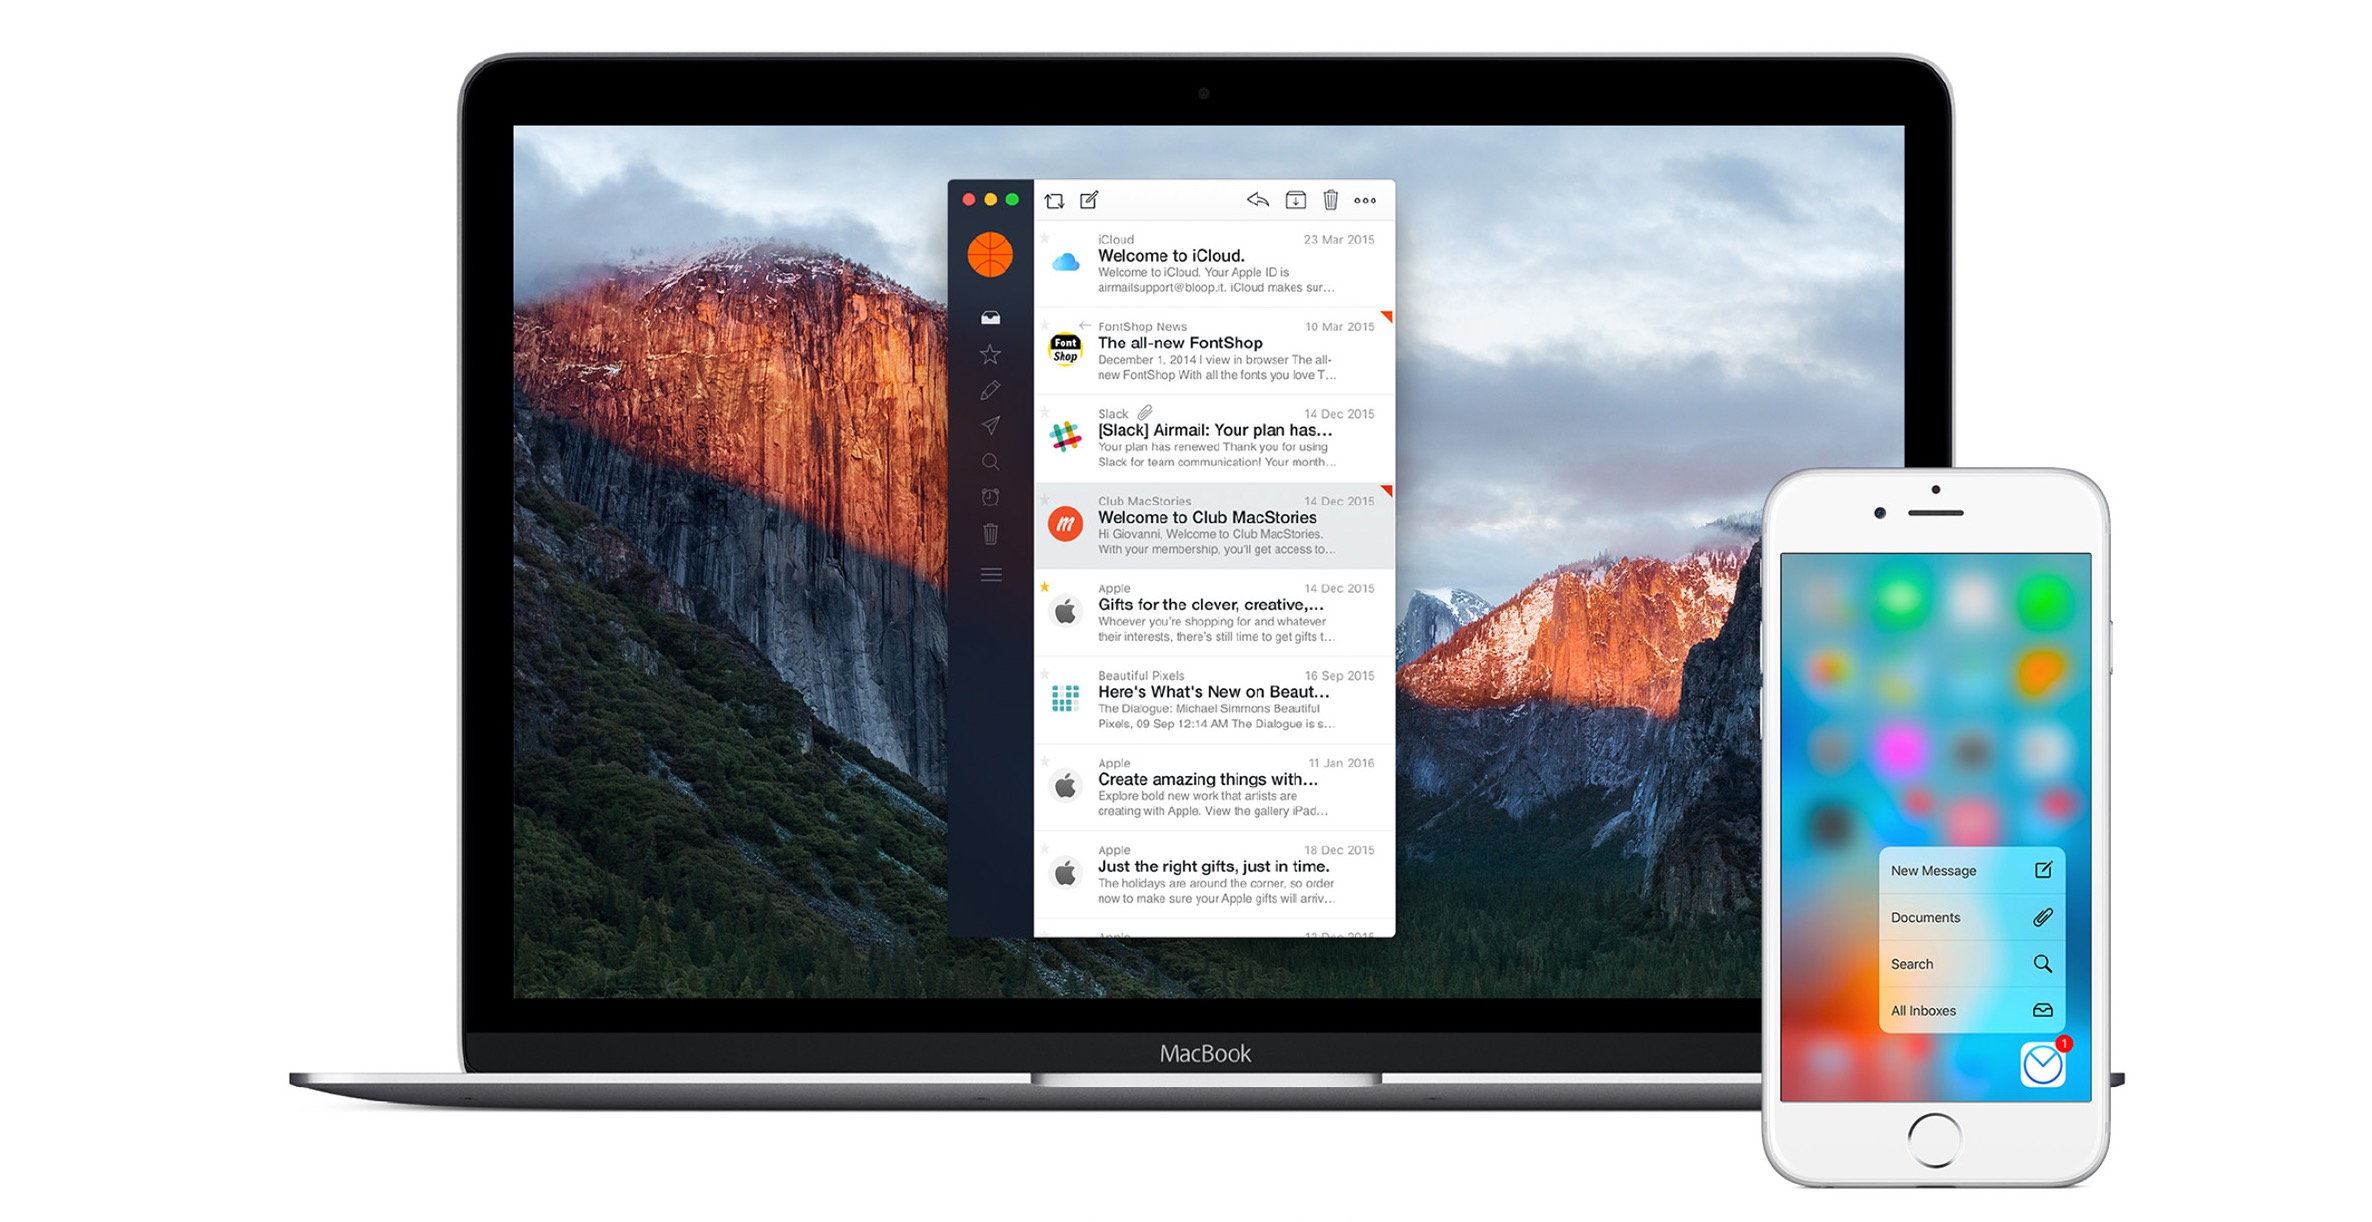
Gmail is wildly popular and for good reason. It is one of the most advanced email tools out there: it offers a huge amount of storage, has tons of time saving features, and maybe best of all, it’s free. If you don’t have a Gmail address, making one is simple. I’d highly recommend making one and using it as an email address for life.
But anyway… you are probably here because you already have a Gmail address and you’d like to rip your mail out of your university’s horrible mail manager and get it into your oh-so-awesome Gmail inbox. As long as your university’s email system supports the proper protocols, it will be possible to make this happen. You can even send mail from your school’s email address through Gmail! Ok enough telling you what it can do, and more showing you how to do it.
There are two steps to get everything working.
The first thing we want to do is to set up something called POP3 which will pull messages from your school inbox into your Gmail inbox. Note: This is not a fool proof process, these steps may not work for you depending on the configuration of your school’s email system. If you run into a problem, check the Troubleshooting section toward the bottom of this post.
Configure Gmail to receive mail from your university email address:
- Go to www.gmail.com and login
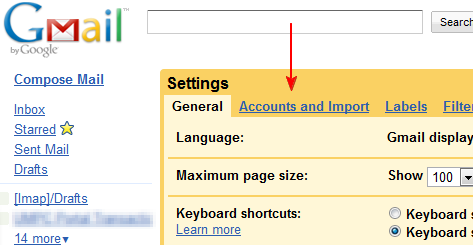
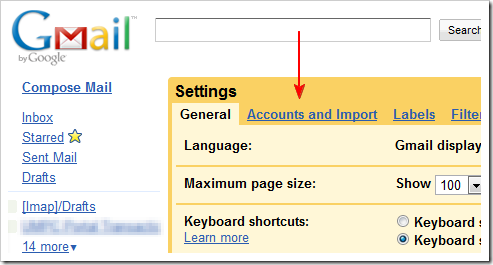
- Click on the Settings button at the top right of the screen
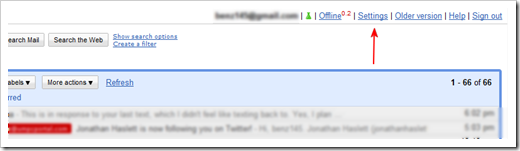
- Click on the Accounts and Import tab

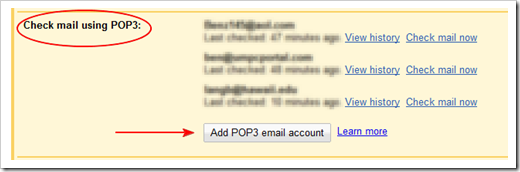
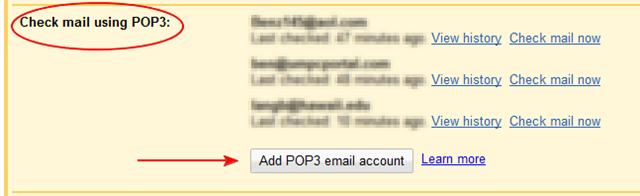
- Look down the page and find the Check mail using POP3 section and click Add a POP3 email account
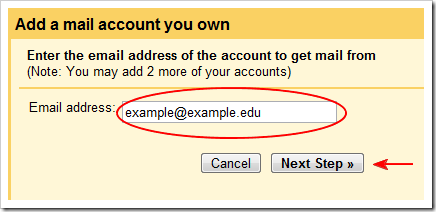
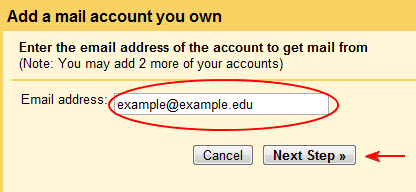
- Enter your school email address and click Next Step
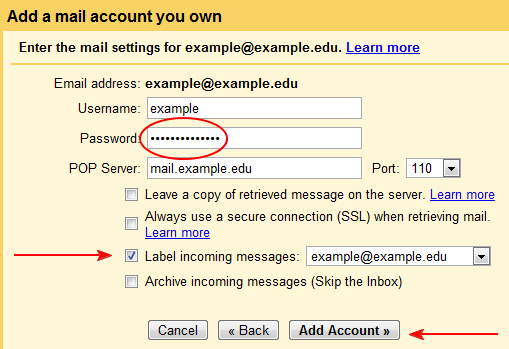
- Enter the password that you use to login to your school email, make sure that Label incoming messages: is checked, this will visually identify which emails are from your school address and which are from your regular Gmail account. Leave all other settings as they are, click Add Account

- If everything has gone smoothly up to this point, you should be all done for the first half of the process. Close any windows remaining from the Gmail setup, and check your inbox which should start to be populated with emails from your school inbox. If you aren’t seeing any mail come into your Gmail inbox, make sure that you actually have emails in your school’s inbox, or try refreshing and waiting a few minutes
What you just did was configure Gmail to download emails from your school email inbox and put them into your Gmail inbox. Gmail will automatically check your school email inbox every 15 minutes or so for new emails, and download them into your Gmail inbox without you needing to do anything. If you urgently need something from your school’s email inbox to get into Gmail, you can always click Check mail now by going to Settings > Accounts and Import > Check mail using POP3 > then click Check mail now next to your school email address.
Note: Depending upon how you configure it, Gmail deletes emails in your college’s email inbox after downloading it into your Gmail inbox. So just in case you don’t like how this whole Gmail and college email thing works and want to get everything back to the way it was, don’t permanently delete your school emails out of Gmail expecting them to still reside in your school inbox. (tip: remember to archive with Gmail! Archiving moves the message out of your inbox so that you can stay organized, but stores it so that you can find it later.)
Ok you are half way done. The next step won’t hurt a bit, I promise.
Configure Gmail to be able to send emails from your university email address:
- You should still be logged into Gmail, click on Settings at the top right of the page

- Click on the Accounts and Import tab
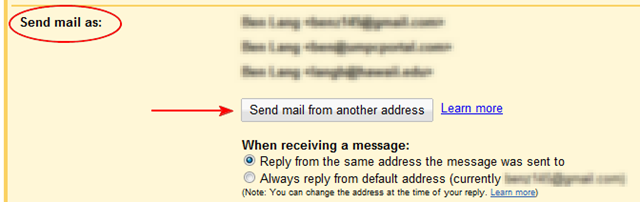
- Find the Send Mail As: section and click the Send mail from another address button

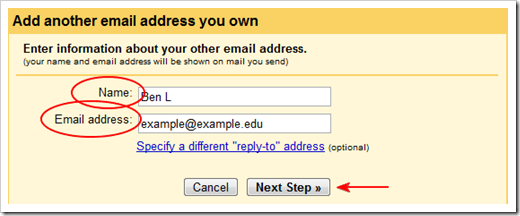
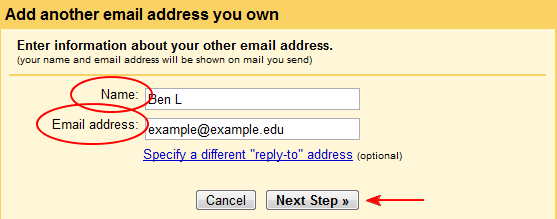
- A new window will pop-up. In the Name: field, specify the name that you would like to associate with the email address (ie: when you send an email, it will display your email address in addition to this name). In the Email address: field enter your school email address. Then click the Next Step button
- Leave the Send through Gmail radio button marked and click the Next Step button
- Click the Send Verification button. Gmail will send an email to your school email address to verify that you own the account. Log in to your school email inbox, open the verification email and click the verification link. If you can’t see the verification email in your school’s inbox after a few minutes, check your spam folder or try refreshing the page


What you just did was configure your email account to work with Gmail so that you can compose a message inside Gmail and send it ‘from’ your university email address. When you compose a new message, there will be a drop down list in the From: field; you can choose if your email is send from your regular Gmail account, or the newly configured school email address. You can also reply to emails that have been sent to your university address (that we’ve now configured to come into the Gmail inbox) from your university address.
And that’s about it, congratulations! The best part about this whole thing? You’ll probably never need to use your crappy school email inbox ever again!
Troubleshooting
So it is possible that the steps above didn’t work out for you. This is usually caused because some schools don’t like to support great standards like POP and IMAP, while others simply don’t have these features enabled by default, or use different configuration settings. If you had any issues with the above steps, you’ll want to verify some things. Try the following:
- Ensure that POP and IMAP are supported by your school: The easiest way to do this is often to log in to your school email and find a Help link. Browse around looking for keywords such as POP and IMAP. Hitting ctrl+f will bring up a search box in your browser so that you can search the current page. If you can’t find anything, contact the department that manages email and computer systems for your university (often ‘IT’ something or other), and email someone asking if POP and IMAP are supported.
- If your school does support POP/IMAP, it may be disabled by default: Some email clients require that you manually enable POP/IMAP. See if there is a settings page on your school email inbox. Search around for POP/IMAP or words like forwarding. Try to enable POP/IMAP.
- Some schools use different settings than Gmail sets up by default: Remember step 7 in the first section of this guide? We left all of the settings as they were. Sometimes, school’s need Gmail to connect in a different way than Gmail expects to. You may need to adjust the POP Server: and Port: fields in step 7 to values defined by your school. Again, the best way to find these would be searching through Help documentation, or emailing the people that manage your email and asking (first if POP and IMAP are support) what POP server and port email clients should connect to.
Related Posts
-
While most people can access their email via the web these days, having a dedicated…
-
Even when you have all the power and versatility of a full Mac at your…
-
Soon, students will return to school with many starting their college careers. Going off to…