Here is a guide on how to edit photos fast on a Mac using the Preview application.
When we are on the go with our laptop computers, often times we may need to make a small adjustment to a photo and don’t have a photo editor installed. Depending on the type of edit you need to make, you may be able to do so within Preview which comes pre-installed and free on any Mac.
Making simple adjustments the overall look and color of the photo can be done within the app and may save you time and data trying to download an app from the App Store.
How to Edit Photos Fast on a Mac
Here are the steps to take in order to make edits on photos using Preview on your Mac.
Watch the above video for more information on the tools available for photo editing in Preview.
Editing Image Files Using Preview
One of the main uses of Preview as a photo editor is its crop and resize features. There are many times when we are working with pictures for web work or publication and we realize they are not sized or cropped properly.
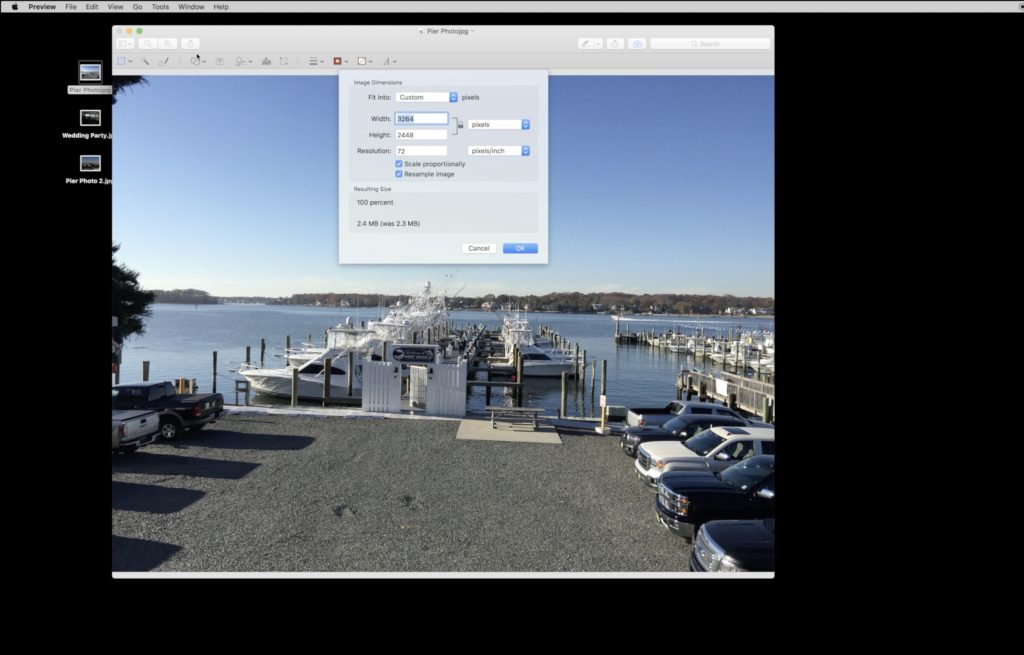
Using the cursor, you can drag the marquee to crop the image to any size or dimensions that are need and you will see the pixel number change as your change your dimensions. If you need to crop to 640×480, drag the marquee to reflect those numbers and then from the Tools menu, choose Crop (or shortcut with Command + K). You will instantly see the dimensions reflect on your image. You can also rotate or flip the image using the same menu if it is not facing the correct way.
You may need to resize your image if it is too big or too small and you can do so by clicking the Tools menu again and selecting Adjust Size. Keep in mind that blowing an image up more than it should be can cause pixelation or blurring. However, downsizing the image should preserve it’s quality. After you have made any changes to crop or re-size, saving the image will ensure your changes are kept and that the file is modified.
You are also able to adjust the color variables of the picture by using Preview’s Adjust Color tool, also available from the Tools pulldown. You will be presented with an Inspector which will give you many options for altering the color from Color Levels, Exposure, Contrast and even more options like changing the Sharpness of the image. All of these changes can be made by modifying the corresponding sliders to each adjustment and then seeing the changes happen in real time.
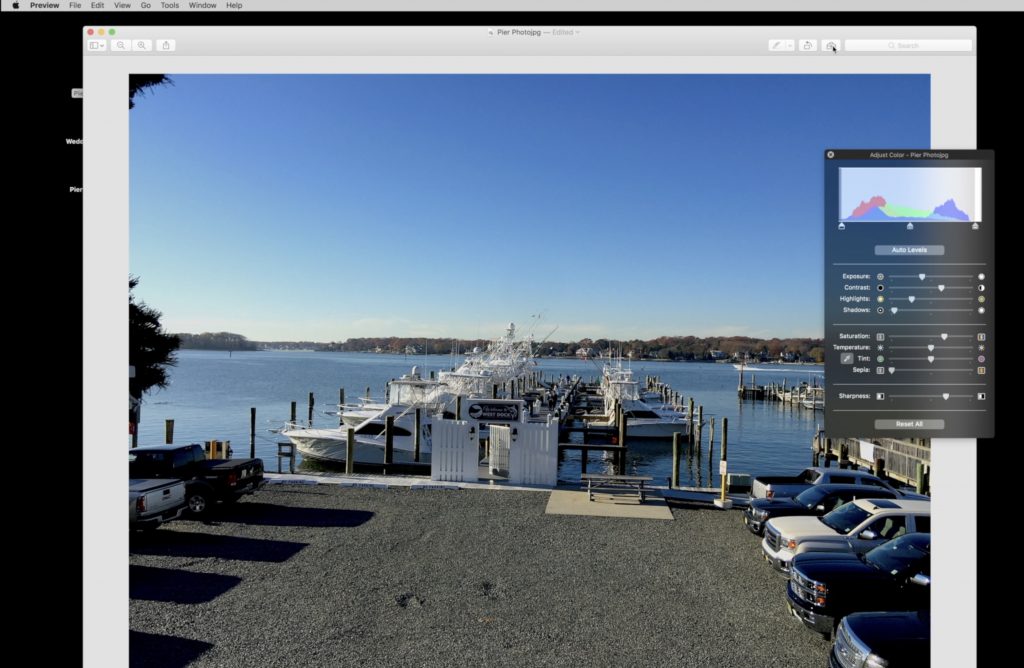
This control panel is nearly identical to any basic adjustments you could make in any other photo editor which is what gives Preview so much power. When you are satisfied with your changes, you again can save the file so that it reflects on the original document.
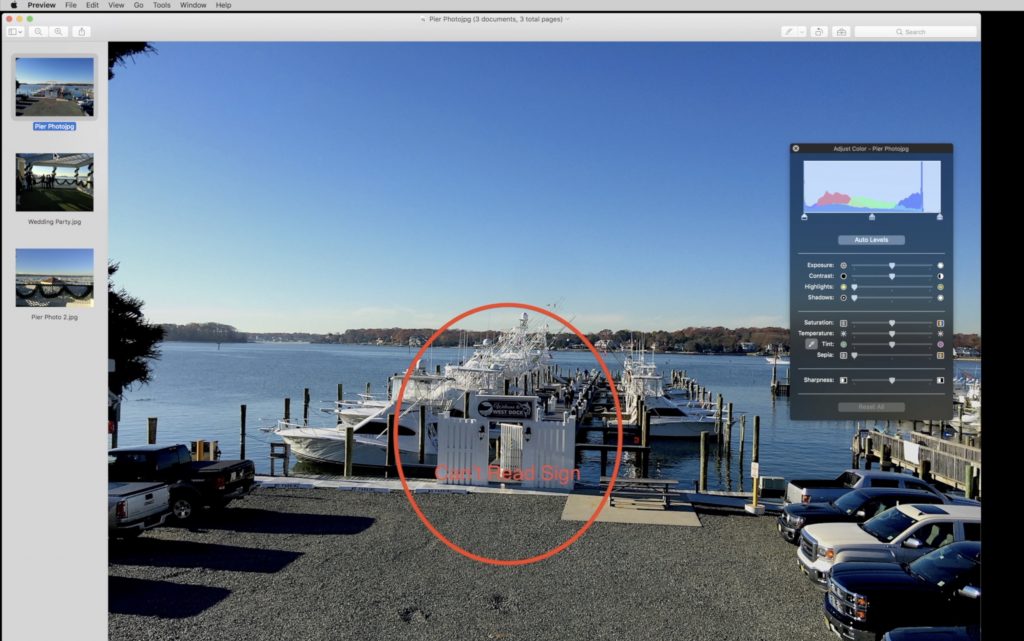
You can also use Preview to make annotations to an image or PDF file and this is extremely helpful when needing to perform a quick markup on the go. Using the Toolbox icon will reveal annotation tools including text, shapes and even a signature field. Any of these tools will save to the original document so that if you are sending it back to someone else, you can modify their original file or save it as a new one.
Preview is one of the most powerful free applications on your Mac and is honestly one of my most frequently used for my day to day work. If you are in a bind when it comes to editing a photo or PDF file, this application can save lots of time and has a very low usage footprint on your Mac so it is definitely a preferred option to Photoshop or more robust apps. If you need to make more advanced adjustments, those applications are definitely more recommended yet Preview should not be underestimated with its many practical uses.
Related Posts
-
Here is a guide on how to detect Mac malware and safely remove it from…
-
Here is a guide on how to remote access a Mac from another computer to get…
-
Here is a guide on how to create a bootable external Mac hard drive to run…