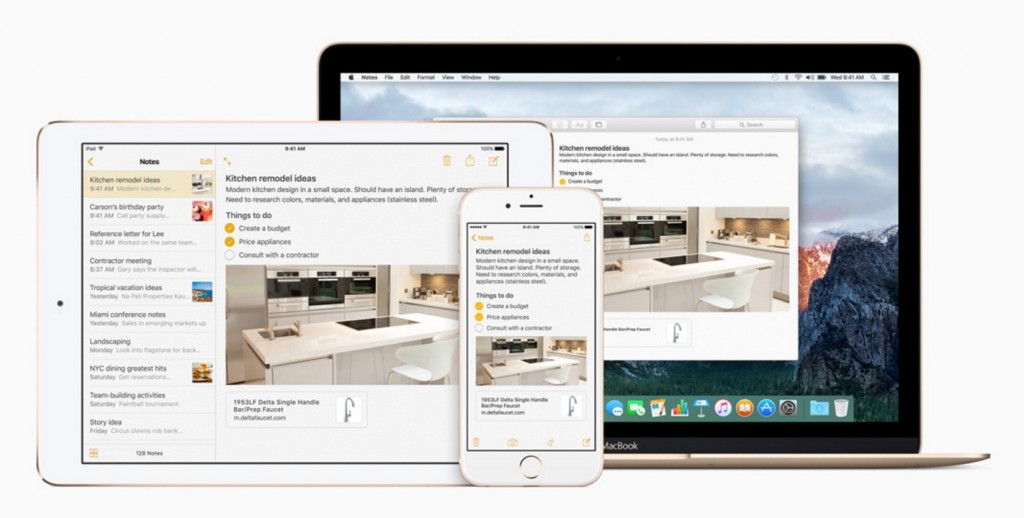
The OS X Notes app got more powerful in OS X El Capitan and iOS 9. Putting the two together makes the OS X Notes app a useful tool that makes users productive at home or on the road with an iPhone or iPad.
We’re going to show you 20 tips and tricks to make better use of OS X Notes so you can become a Notes Ninja – wielding it for powerful use at home, work or school.
Sync Notes with iCloud
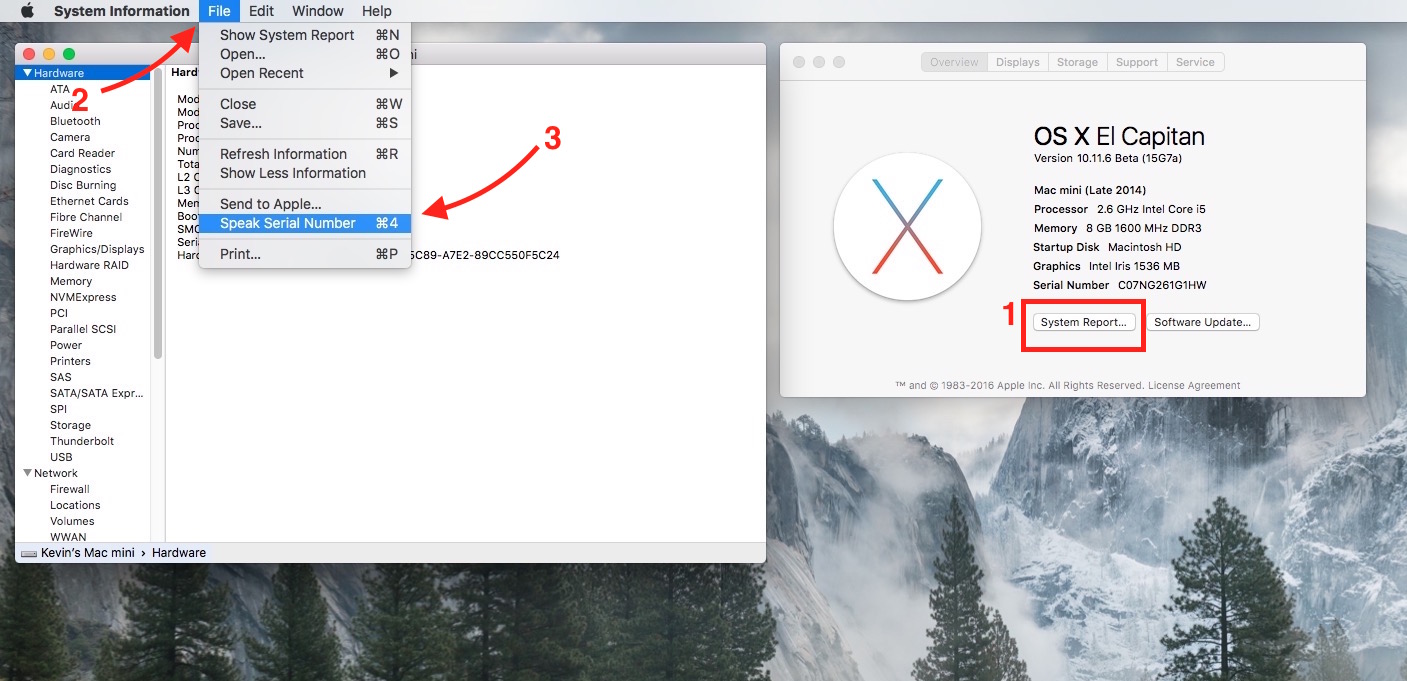
First, set up iCloud to sync your notes so that you always have a good backup copy of all your notes. Open System Preferences by clicking on the Gear icon on your dock or by clicking the Apple icon in the upper left corner of the OS X screen. From the menu click on System Preferences.

Click on iCloud to open the iCloud settings in System Preferences. Make sure there’s a check mark next to Notes in the list. You’ll probably have to scroll down to see it. Check anything else you want to sync via iCloud and close the System Preferences dialog box.
Sync Notes with an Email Account Instead of iCloud
If you don’t like or trust iCloud for some reason, you can sync notes with an email account. This works with Gmail and Yahoo accounts. The example below uses Gmail.
To sync with an email account, open System Preferences like you did above, but this time open the Internet Accounts setting next to iCloud on the third row.
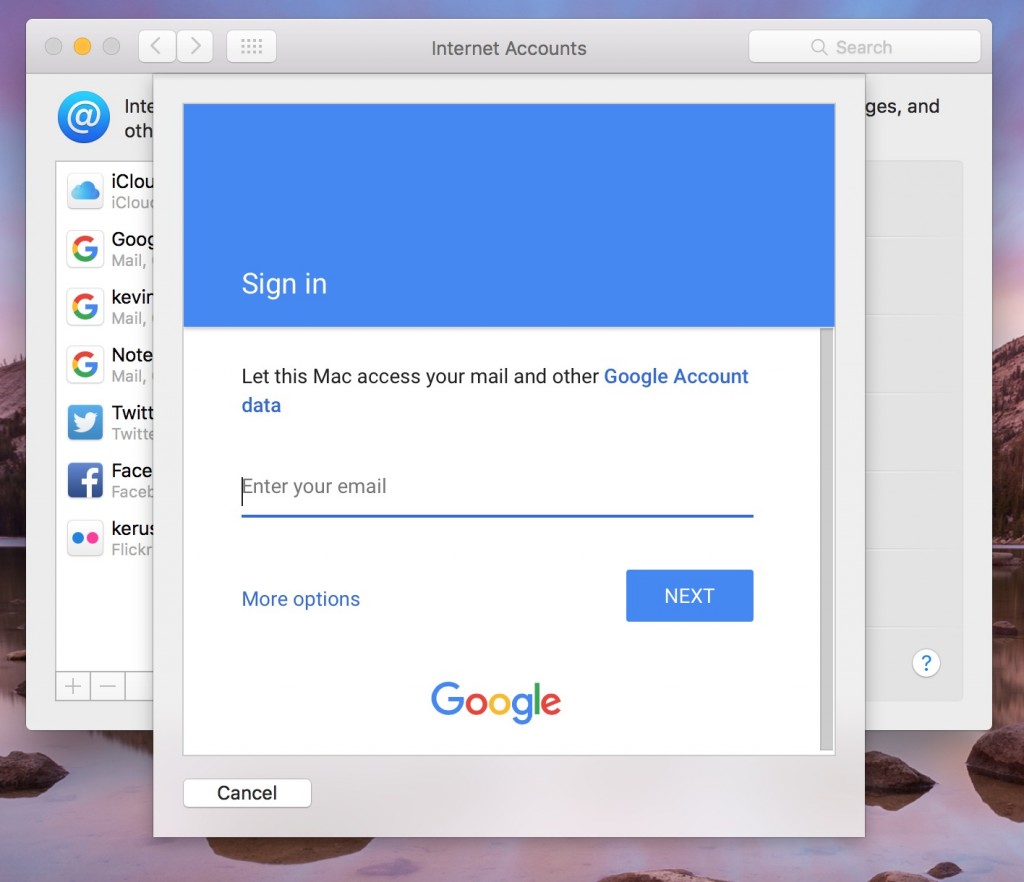
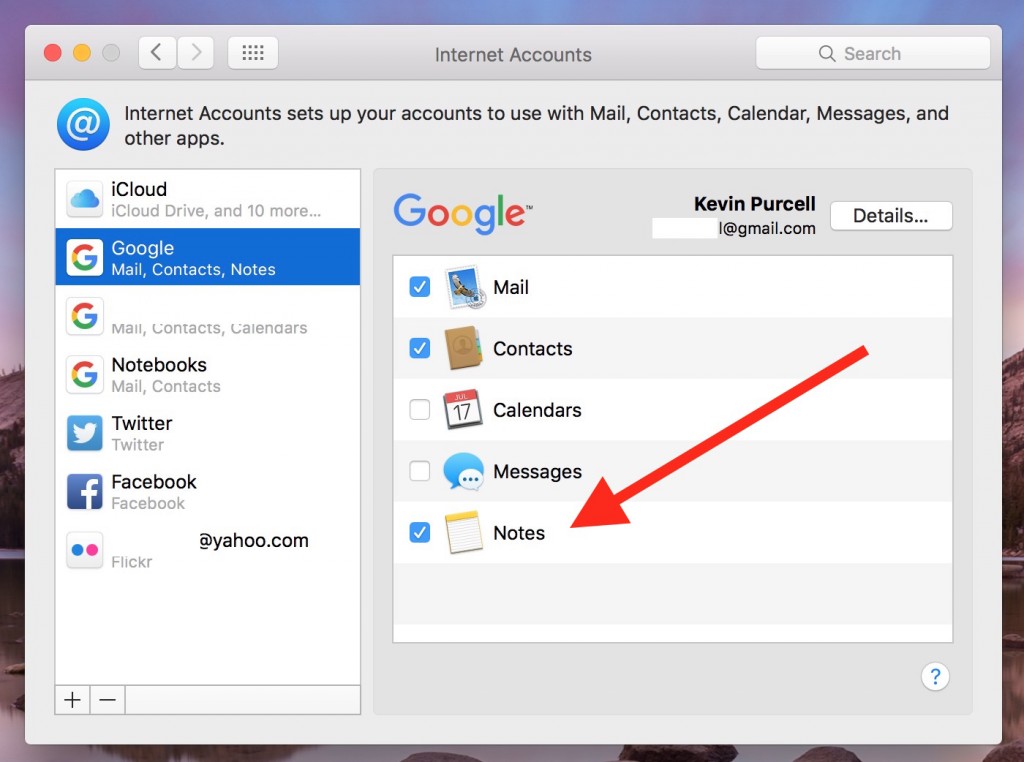
If the Gmail account’s not already set up, add it by clicking on the plus icon at the bottom left of the dialog box for Internet Accounts. Click on the Google icon in the list of Internet Accounts on the right side pane. A sign in box slides down out of the Internet Accounts title bar. Enter your Gmail address and click Next. Enter your account password and choose Next. OS X sets up the account. You can now choose what you want to sync using this account. Make sure there’s a check mark next to Notes in the list of data that will sync via the Google account.
If you want to also sync the Notes with your iPhone or iPad, follow the How To posted at GottaBeMobile.
Yahoo works similarly, but you enter your email address and password on one page.
Organize OS X Notes in Folders
If you use OS X Notes a lot, you’ll start to collect a massive number of notes. One way to organize them is by folders. I created folders for my writing online, my preaching, personal notes and drawings on my iPad Pro.
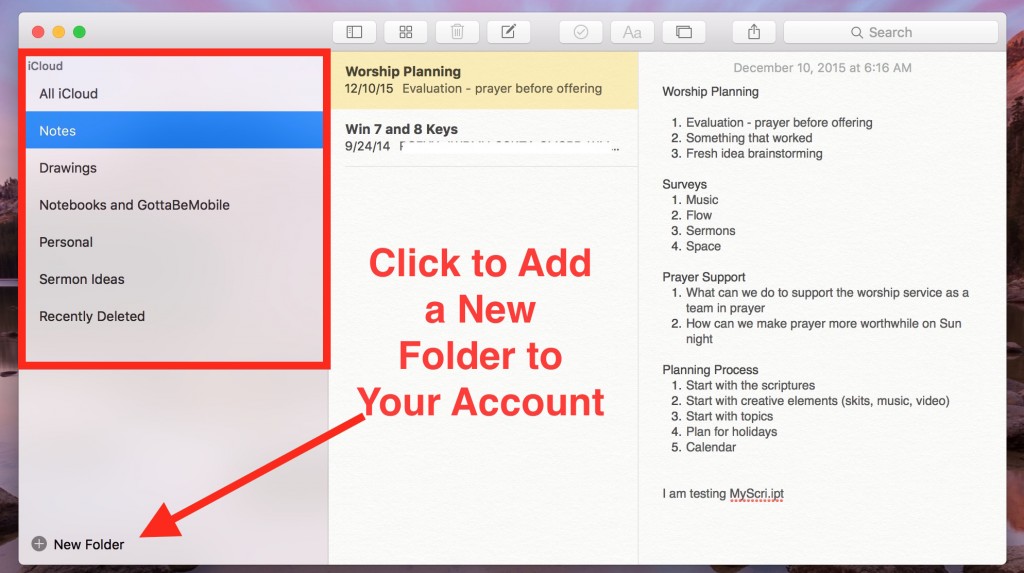
To create a folder, click on the New Folder button and give it a descriptive name.
Make sure you create the folder in the right account. I only use iCloud to sync my notes, so that’s all you see in the image below. People who created a Gmail or Yahoo account and chose to sync their notes with one or both of those accounts will also see sections for Gmail and Yahoo along the left hand column. Choose your account and make sure you create the folder under that account.
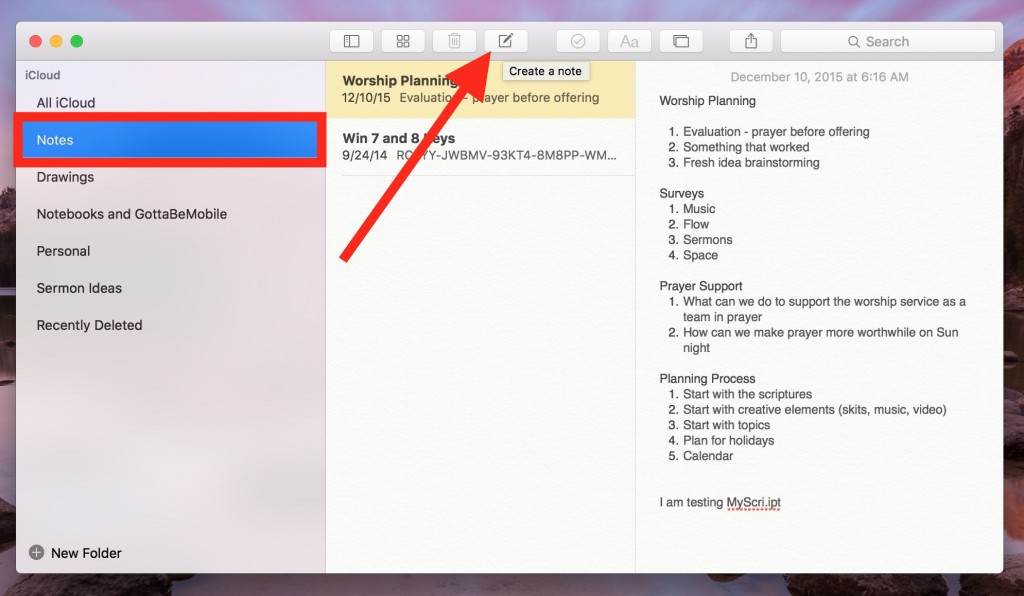
Start to create notes inside that folder using the new note icon from the toolbar. Select the folder on the left and then click the button on the top toolbar.
Give OS X Notes a Title on First Line
The first line of each new note becomes the title for your new note by default in OS X Notes. This may annoy some, but get used to it. You can’t change it. Notice the “Things to do” note in the image below. The first line of the note reads “Things to do” as well.
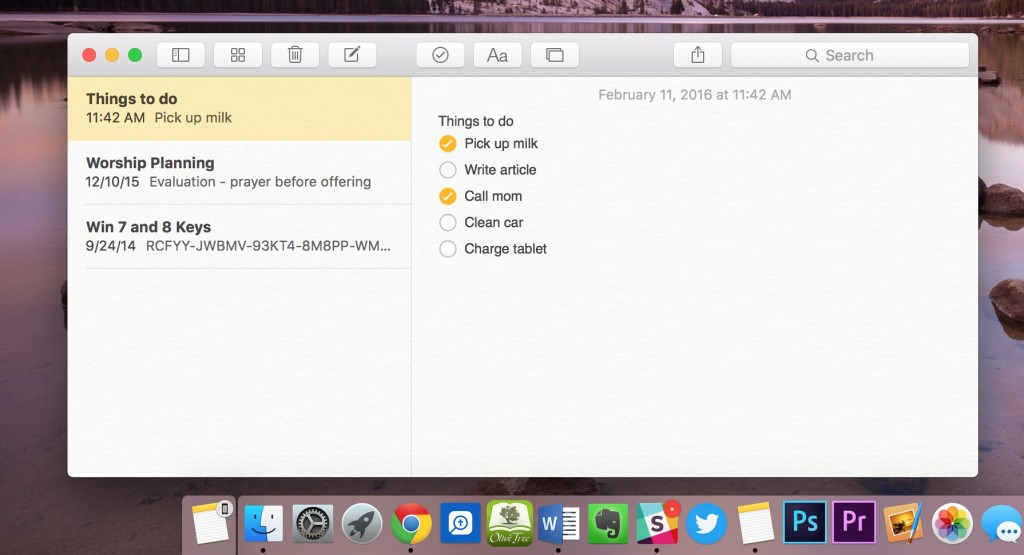
Create a Checklist to Track To Do Items
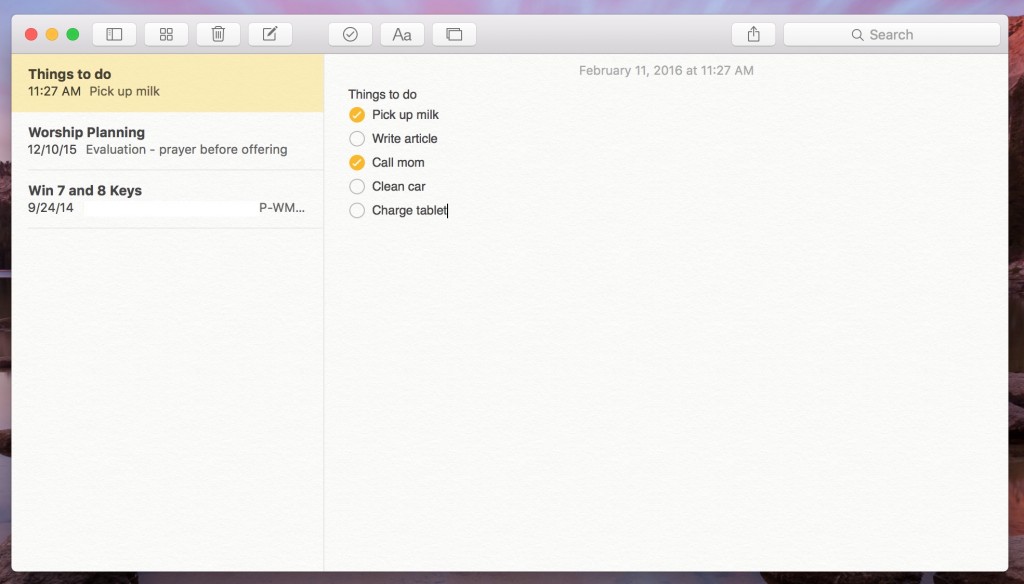
If you want to use Notes to track your tasks for the day, create a new note and then give it a descriptive title by typing on the first line. I use “Things to Do” for my checklist.

Now you can click on the new checklist button on the toolbar. You’ll find it in the center of the toolbar left of the font button. It has a circle with a check mark in the middle of it (see above). This creates a checklist item. You can click on it to put a yellow check mark inside the circle when you’ve completed the item on the list.
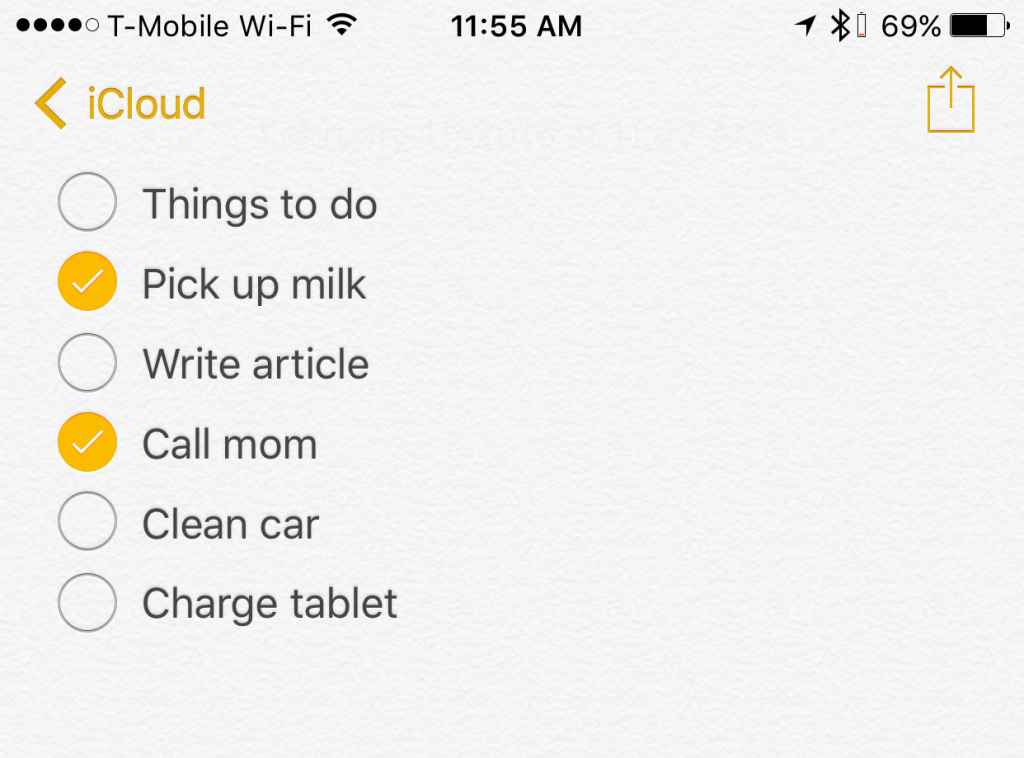
Now, thanks to iCloud sync, you will find the checklist on your iPhone or iPad (see a synced note above). Tap to check off the item on the phone when you finish it and this syncs back to the computer.
Use Styles for Quick Formatting
With styles, users can create Titles, Headings and Body text as well as three kinds of lists.
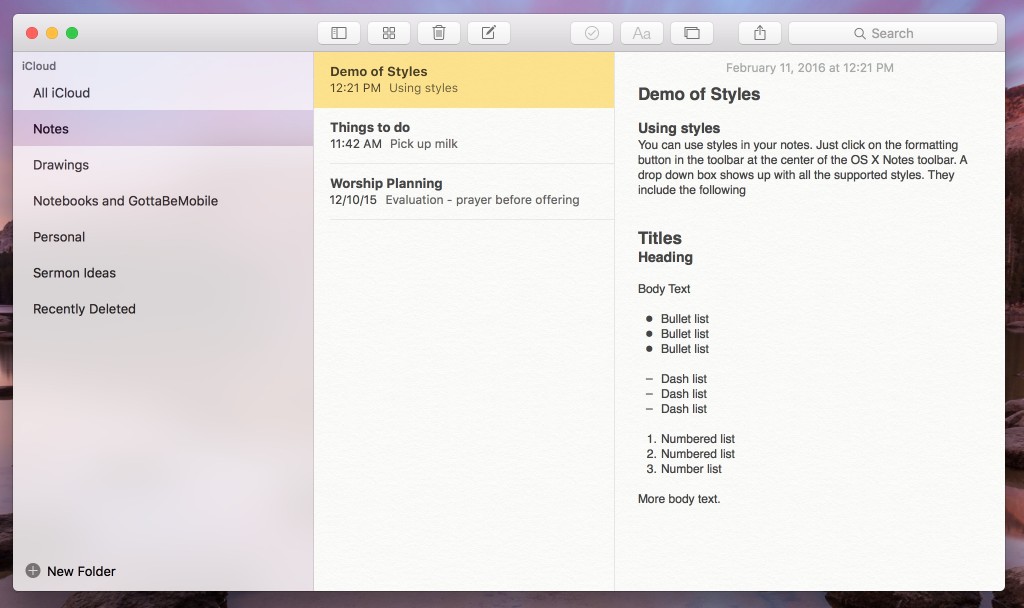
Above you’ll see examples of the different formatting font styles available. Notice the Title, Heading and Body Text. You also get a Bulleted list, Dashed list and Numbered list.
Click on the formatting button at the center of the toolbar. A drop down box shows the kinds of styles available. You can’t edit these styles in OS X Notes, so your stuck with the styles Apple provides.
Start New OS X Notes with the Same Style
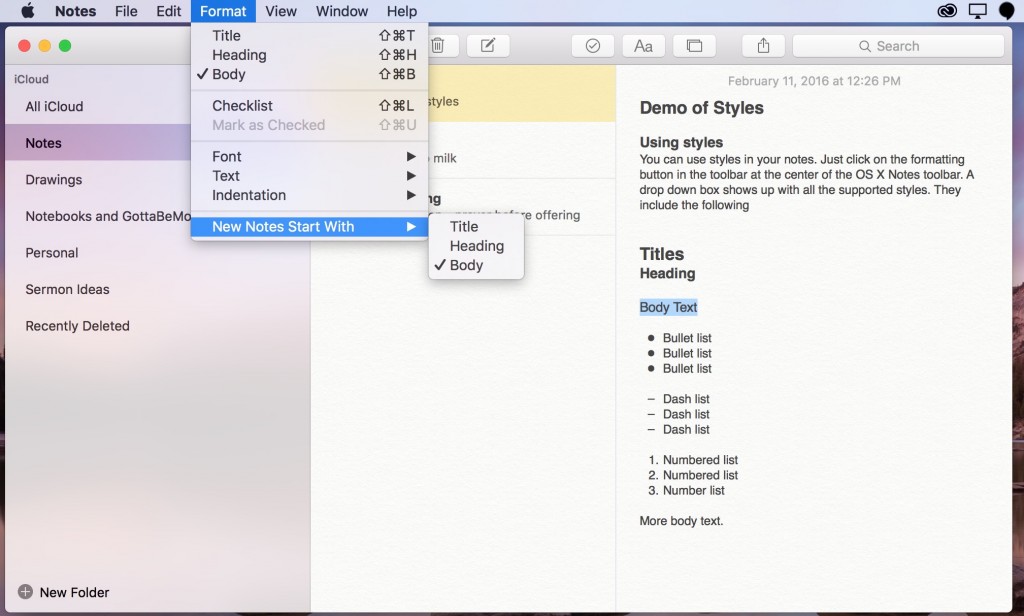
Users can change what style your notes start with when you create a new note. For example, you can start a new note with the first line formatting using the Title, Heading or Body font styles. From the Format menu, click on New Notes Start With and the menu will fly out with those three options listed. Click one of them and new notes will start with the selected Style from then on.
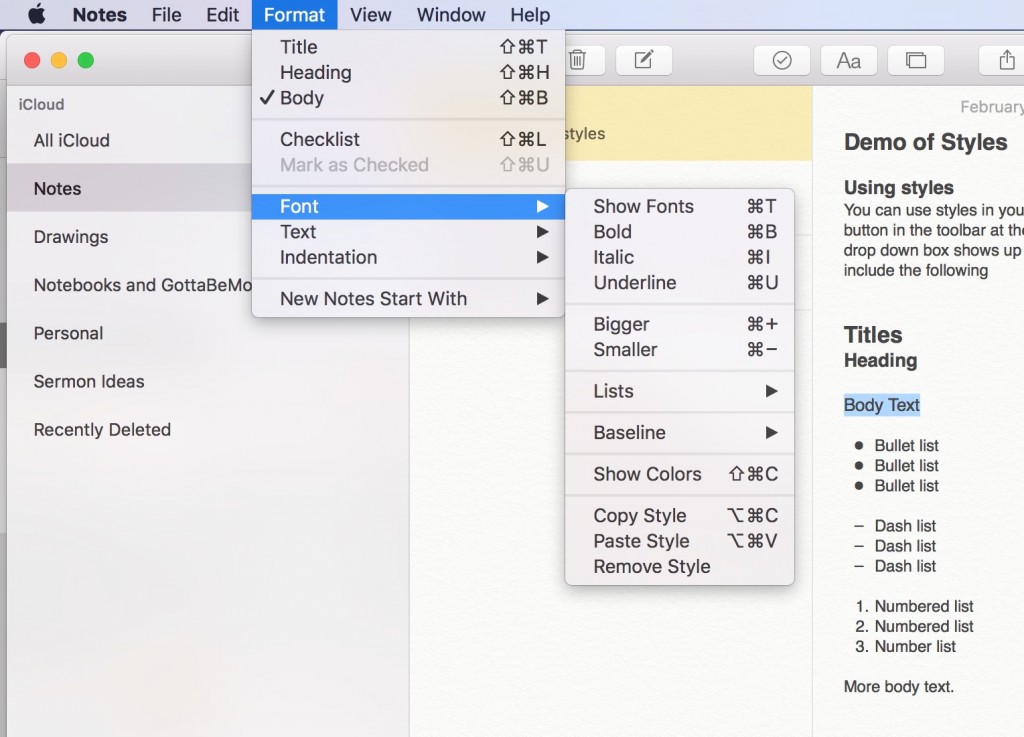
Change Font Formatting in OS X Notes
You can’t customize the styles, but you can change the font formatting in Notes. Select the text that needs changing. Select Format from the menu. Click on Font to show the fly out menu of formatting options. This also shows the keyboard shortcuts available so you don’t have to take your hands off the keyboard.
Here’s the list of keyboard shortcuts available in OS X Notes.
- ⌘ + T = Show fonts
- ⌘ + B = Bold
- ⌘ + I = Italics
- ⌘ + U = Underline
- ⌘ + + = Bigger font size
- ⌘ + – = Smaller font size
- ⇧⌘ + C = Show colors
- ⌥⌘ + C = Copy Style
- ⌥ ⌘ + V = Paste Style
The user can also remove all formatting using the last item on the Format menu labeled Remove Style. It doesn’t come with a keyboard shortcut. We also see two more menu items. One shows the three kinds of lists (bulleted, dashed and numbered). The other shows superscript, subscript and default baseline font.
Create Drawings on iPhone or iPad for Use in Mac Notes
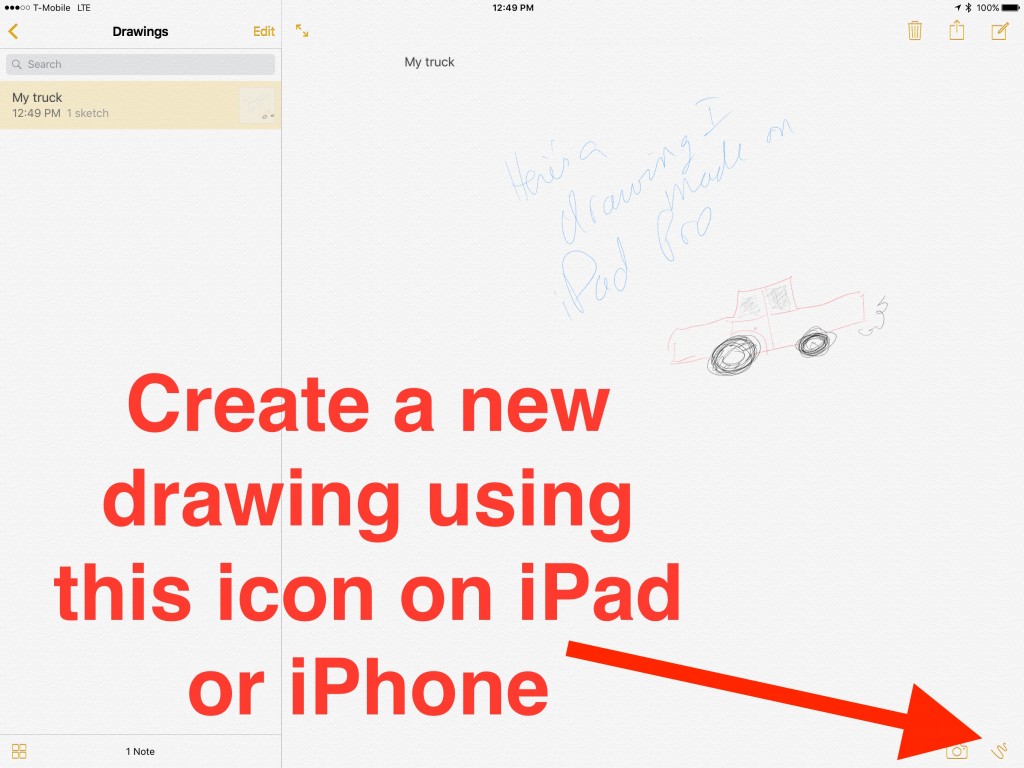
You may want to create a note with both drawings and text. You want to type the text on your Mac but draw something like an illustration or pie chart. Use iCloud sync to work on the same note on an iPad or iPhone and on a Mac.
Create a new note and add any text and then open it on the iPad or the iPhone and draw your masterpiece. This will sync back using iCloud or the email account you set up above.
To create a drawing in Notes on iPad or iPhone, click on the drawing icon in the lower right corner (as seen above).
Add Pictures from iPhone or iPad
Use the same trick in the previous tip to add photos to your notes on iPad or iPhone and sync it back to the Mac. Open the note on the iPad or iPhone and add the photo using the Photo icon which looks like a camera. Then take a new photo or insert a photo from the camera roll. Close the note and it syncs back to the Mac.
Share Notes Using Continuity
Continuity puts a shortcut to supported apps left of the OS X Dock as in the image above which shows the Notes app with a tiny phone icon. Click it with the Mac mouse or trackpad to open Notes with the iPhone or iPad note open. Work on the note and then close it and it will save and sync over iCloud or your email account.
Hide or Show Folders in OS X Notes
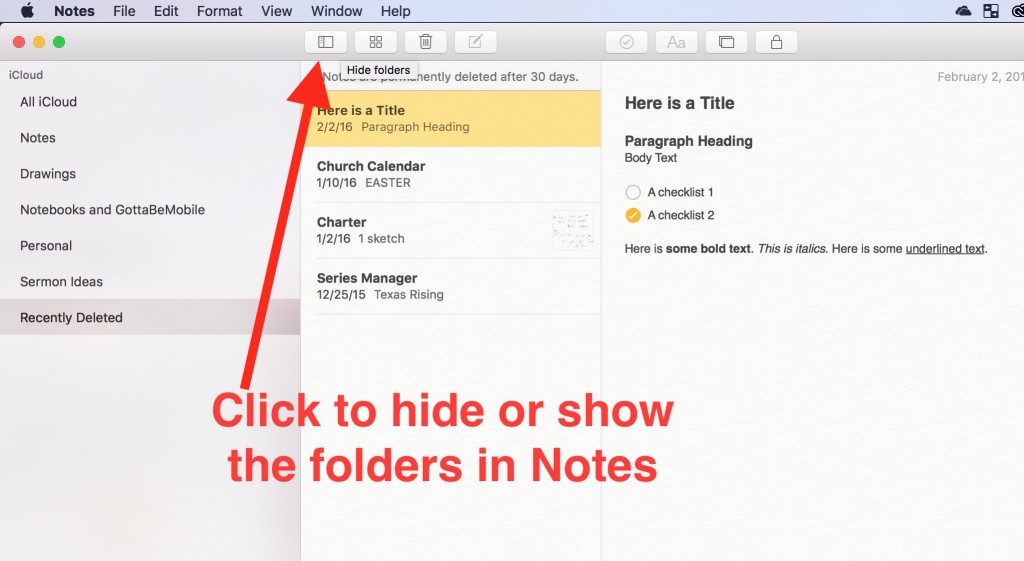
Get more screen real estate by hiding the OS X Notes folder. It’s as simple as clicking the folders icon on the toolbar.
Add Emoji and Shapes
Insert Emoji and Shapes into a note using the keyboard shortcut ⌘ + CONTROL + SPACE. This opens a small dialog box showing options to insert into Notes or any place in OS X that accepts text entry.

Across the bottom of the box you’ll see icons representing the kinds of Emoji or Shapes that users can enter. Click on the icon representing the style of Emoji or Shape and then click on the Emoji or Shape to enter it at the insertion point. A double arrow at the end of the bottom row slides the toolbar over to see more styles of Emoji or Shapes.
Make the Emoji or Shape bigger using the keyboard shortcut ⌘ + SHIFT = (the shift key turns the = into a + so the short is actually ⌘ + +).
Scroll up and down to see all the Emoji and Shapes in each style. The most used Emoji and Shapes show up at the top of the box.
Export Notes as PDF Files
Export all notes as a PDF file clicking File and then Export as PDF…. This opens the file save dialog box. Use it to put the PDF file anywhere on the Mac’s drive.
Find Notes Attachments with Attachments Browser
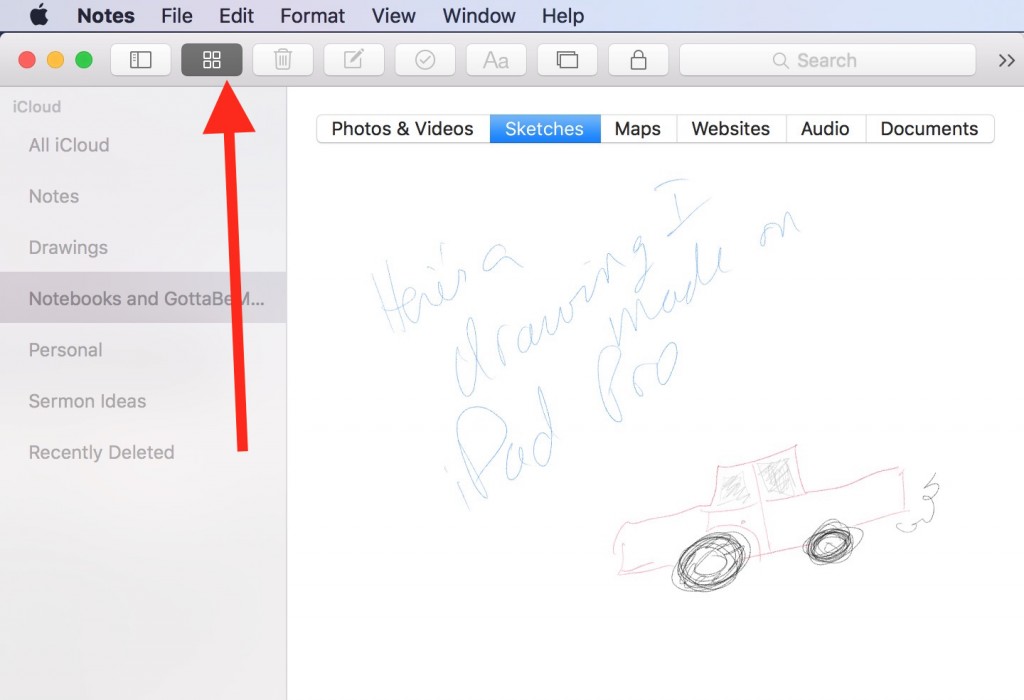
Any drawing created in a note or image inserted into a note is actually an attachment. The Attachment Browser shows all attachments in OS X Notes. Click on the Attachment Browser icon, which looks like a four squares in a 2 x 2 grid next to the trash can icon, on the toolbar to show your attachments. Alternatively, click on View and Show Attachments Browser or use the keyboard shortcut ⌘ + 1.
Users can find photos, videos, sketches, maps, websites, audio and documents. Click the corresponding tab to see each kind of attachment.
Add Photos or Video from OS X Photos
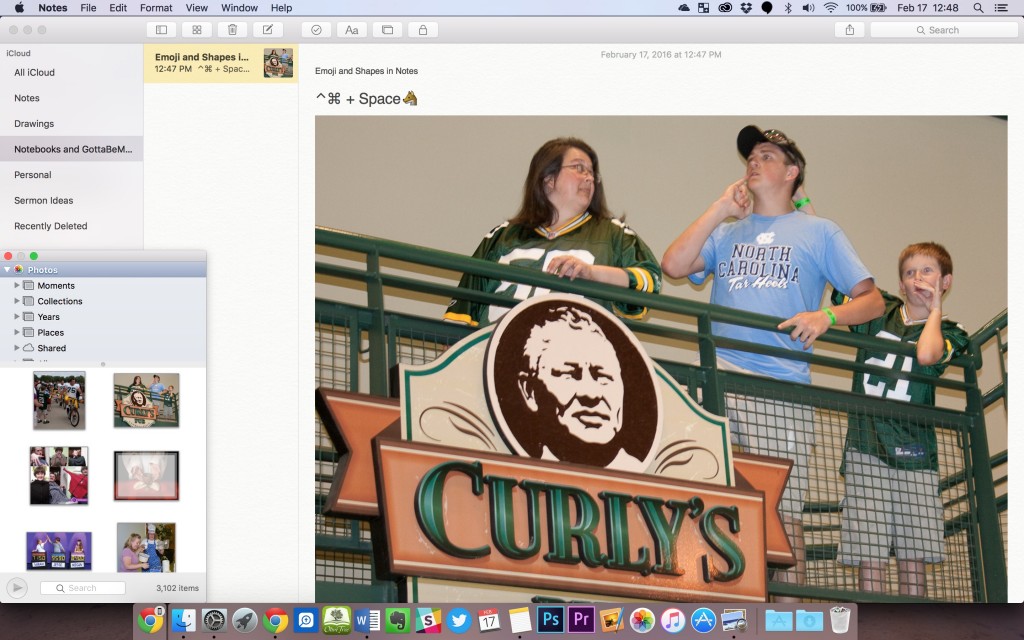
Add photos or videos from the OS X Photos application using the Photo Browser. Open it from the toolbar by clicking the icon that looks like a file drawer to the right of the font button. You can also click on Window and then Photo Browser. The Photo Browser pops up. Click the photo or video to insert it. Use the folders at the top of the browser to find images or videos. Find images or videos inserted into Notes using the previous tip.
Sort All Notes by Date or Title
If you can’t remember the name of the folder you stored a note in, you can find it easily by sorting the notes. OS X Notes offers three sorting filters: date edited, date created and title.
Click on View and then Sort Notes By. A fly out menu appears listing the three options.
- Date Created – lists notes with the newest note created first.
- Date Edited – lists notes with the newest note edited first.
- Title – lists them alphabetically by title.
Password Protect Notes
Do you have sensitive date in a note? Lock it to password protect the note.
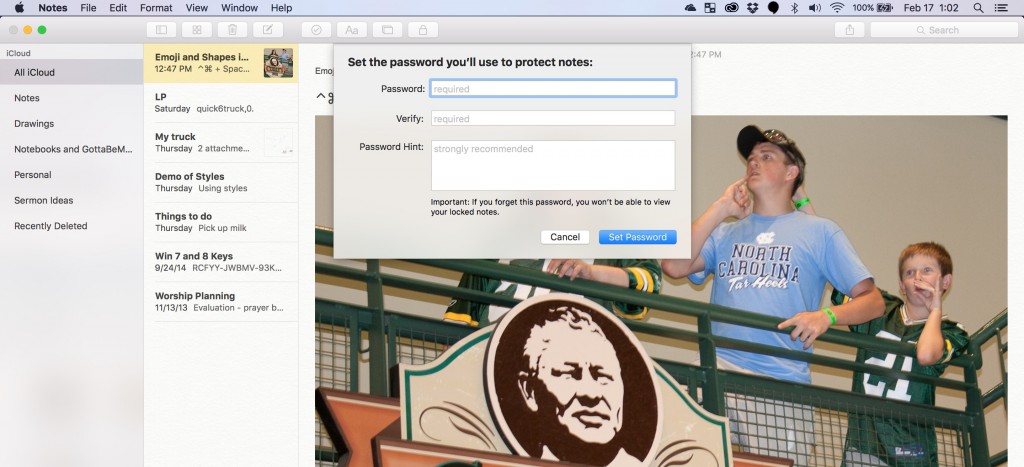
Select the note you wish to lock with a password. Click on File and then Lock Note. The app shows a dialog box asking the user to enter a password. Then enter it again in the second box to confirm the password. Type in a password hint if you want and click OK.
Unlock notes using the same steps above. Instead of Lock Note, you’ll see Remove Lock in the menu.
The OS X Notes toolbar also includes a lock button at the right end of the buttons in the center of the screen when in full screen mode.
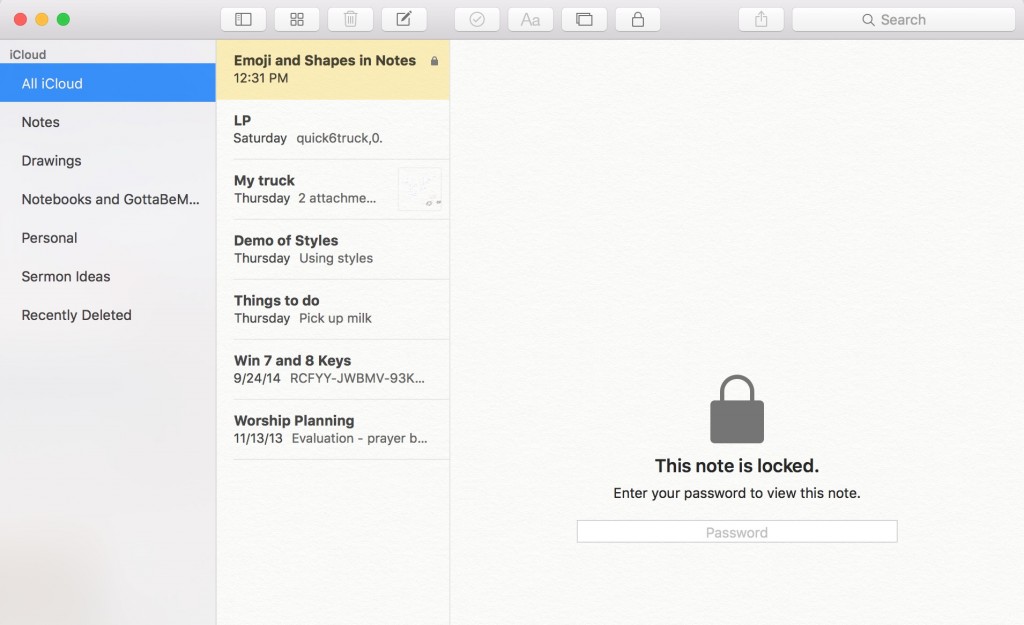
A locked note won’t show the contents on the screen when the user selects it. The preview line below the note’s title also goes away in the notes list left of the note. Click on the Password button and enter the note’s password to unlock it.
Share Notes with Others
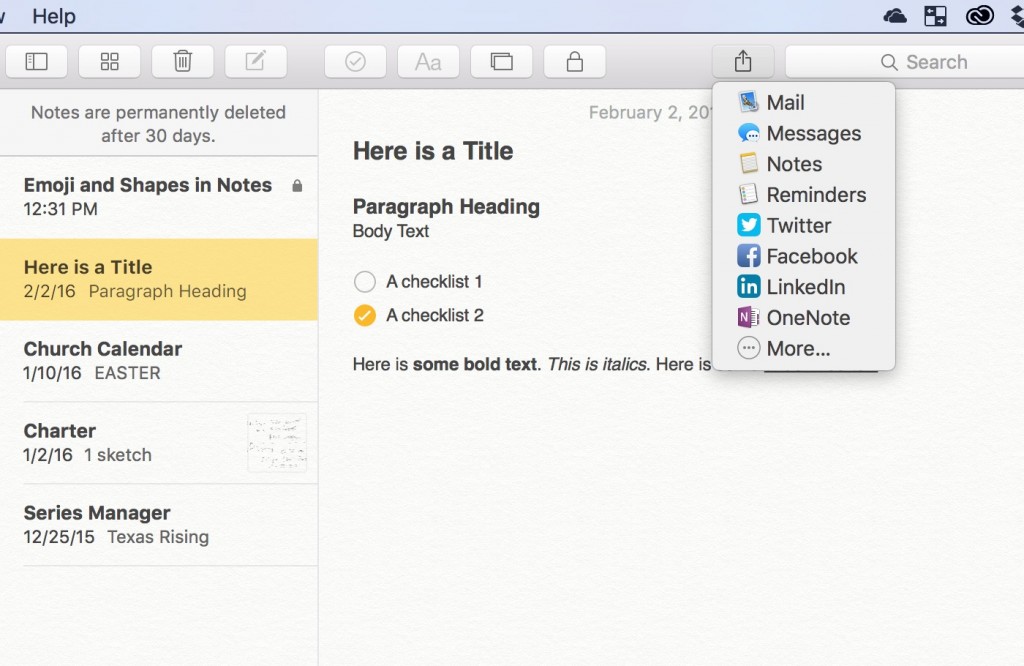
Select a note and then choose the Share button on the toolbar left of the Search box in OS X Notes. A box pops up showing options to share the note. They include things like Facebook or Twitter, Mail, Messages, or other apps that support the OS X sharing feature.
Click on the More… button to customize the OS X sharing feature. This affects other apps that support OS X sharing. Be careful what you check or uncheck the box that opens when you click on the More… button.
Find Notes Without Opening OS X Notes Using Spotlight Search
OS X offers something called Spotlight Search. Use it to find Notes without even opening the OS X Notes app. Click on the search button on the OS X menu bar towards the right end of the menu bar. It looks like a magnifying glass. Alternatively, you can use the keyboard shortcut ⌘ + SPACE.
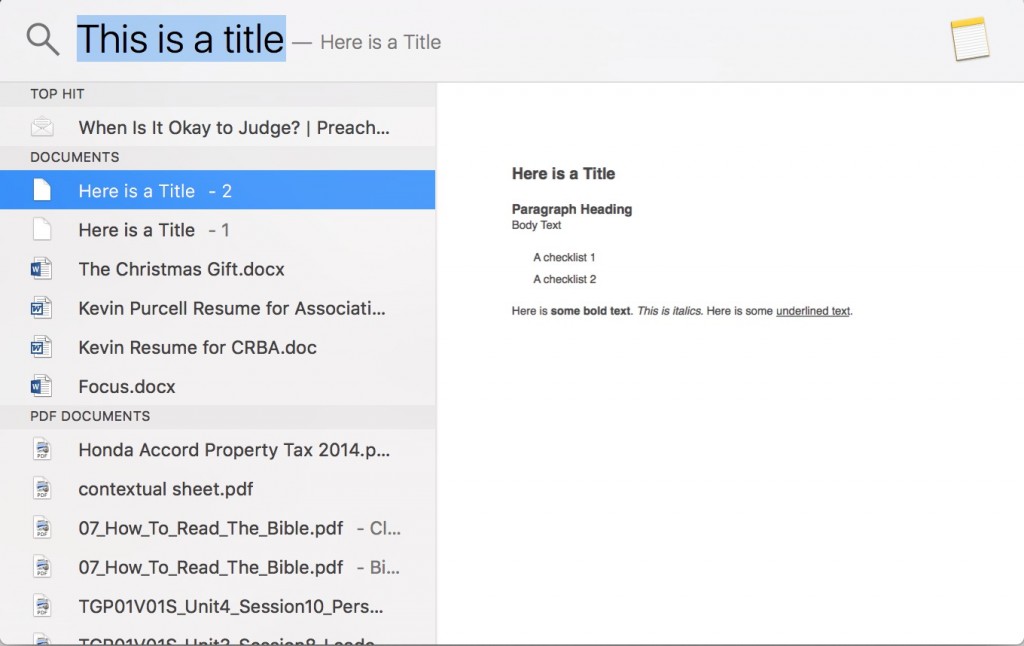
A box opens up on top of whatever apps you have open. Type your search string into Spotlight Search’s box to search all the places Spotlight Search looks. These include installed apps, websites, Mail, Messages and of course Notes to name a few.
You can tell the selected item in the list in Spotlight comes from OS X Notes because it shows the Notes icon when the user selects an OS X Notes item in the list (see in the upper right corner above).
Related Posts
-

With recent updates to the Mac's OS X El Capitan, and the new iOS 9.3,…
-
OS X El Capitan is Apple's best Mac operating system and it comes with so…
-
Apple has a long history of sprinkling Easter eggs, shortcuts, and other hard-to-find tricks throughout…