While many people choose to buy a Mac for one reason or another – Apple’s hardware design is an oft-quoted reason – there comes a time for many of those people when they have to run some sort of PC application, and that requires Windows. Do you have to run out and buy a full copy of the OS, just to install it on your Mac? Nope, you can run Windows on Mac for free; here’s how it works.
Back in the day, Apple computers ran on a different kind of CPU than all the computers running Windows. As a result, Microsoft software couldn’t easily run on Apple computers, and Apple software couldn’t really run on Windows computers (technically, it still can’t, but an eager community of users have found a few ways around that limitation). In 2005, however, Apple made the difficult decision to transition from CPUs made by IBM, to CPUs made by Intel. This was a difficult choice, because it meant that no OS X software would work nearly as well, or at all, without significant retooling.
Virtualization to the rescue
Part of the way they accomplished this was through the use of what’s known as virtualization. Virtualization is when you use a piece of software to mimic an entire computer – you can even install new software on this mimiced, or virtualized, computer. These virtual computers are known as virtual machines, or VMs, for short. This process is how we’re going to run Windows on your Mac – it’s a great way to run Windows apps on your MacBook without the frustration of installing Windows in Boot Camp and physically rebooting your computer.
Step 1: Install software to run the virtual machines
First, you’ll need to install an app capable of running virtual machines. There are a lot of options to choose from, some with more features and a better interface than others. We’re going to use VirtualBox, however, which has the most important feature of all: it’s free. You’ll need to go to the VirtualBox website to get it: https://www.virtualbox.org/wiki/Downloads. Click on the little link to the right of the Mac entry to download the VirtualBox installation file for Mac, or just click here to get it (this link might be out of date several months down the line).
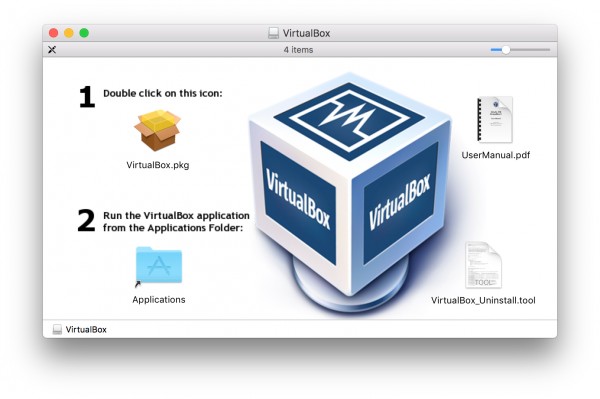
Once you have VirtualBox downloaded, just double-click on the installer and follow the instructions. They’re pretty straightforward, and when you’re finished, you can eject the VirtualBox installer and delete the original .dmg file.
Step 2: Download and unzip an Internet Explorer test VM from Microsoft.
Remember how I said that you can snag a free copy of Windows to run on your Mac? Well, you can thank Microsoft. They understand that developers and designers won’t always want to pay for or maintain all the hardware and software necessary to test their websites in every version of IE running on the last several versions of Windows.
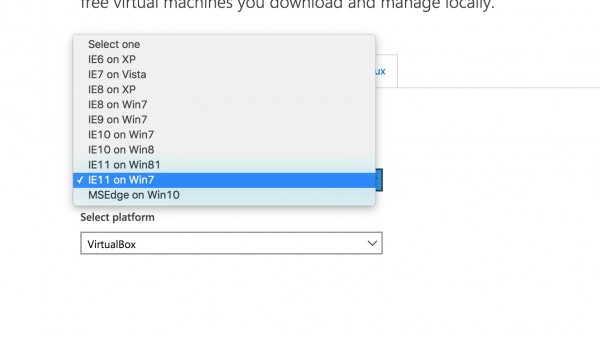
To that end, they provide free VMs for testing purposes: https://dev.windows.com/en-us/microsoft-edge/tools/vms/. At the date of writing, you can download one of 10 different virtual machines, each with a different flavor of either Internet Explorer or Windows itself. Depending on what you need Windows to run, you’ll probably want to grab whatever version of Windows you need that has the latest copy of IE. If you’re unsure, the version of Windows 7 with IE 10 is a quick download and runs well even on older hardware.
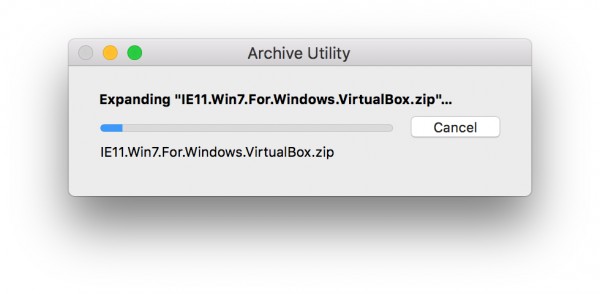 Select the version of the virtual machine you want from the top drop-down menu, then select ‘VirtualBox’ from the bottom one. A link to the .zip file will appear on the right for you to download. Once the download is complete, double-click the zipped VM to decompress it; the final result should be a file that ends in .ova.
Step 3: Open VirtualBox and ‘Import’ your new virtual machine.
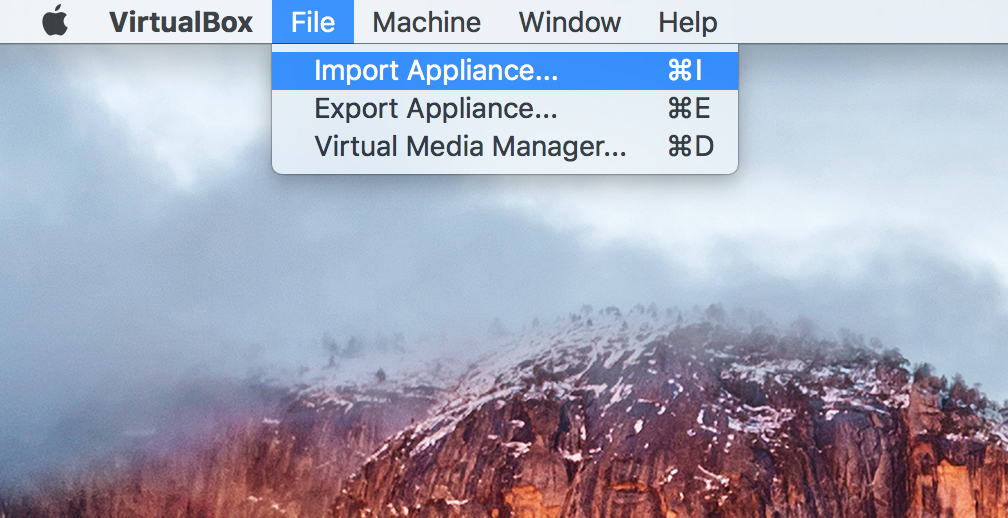 We’re almost done! Now you’ve got all the files you need, and it’s time to put them all together. Open your newly installed VirtualBox software. You’ll see a pretty sparse interface, but completely ignore it for the time being. Instead, go up to the menu at the top of the screen, select file, and click on ‘Import Appliance.’ You can also hit Command + I from the main VirtualBox screen.
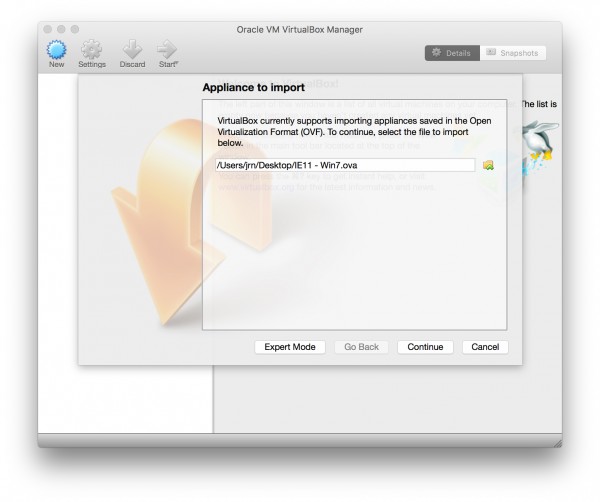
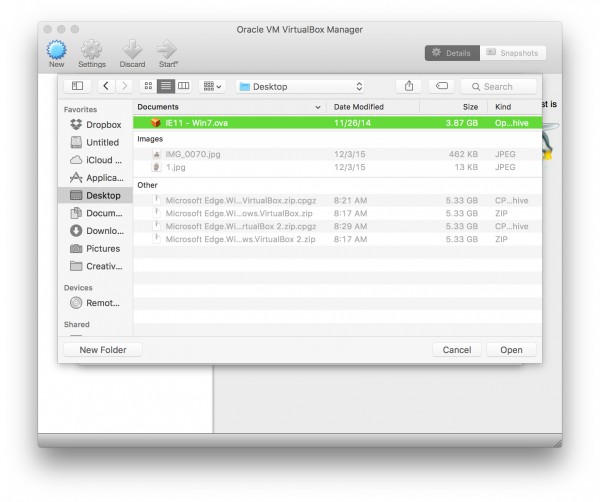 A screen will appear asking you to tell it where the virtual machine you wish to import is – click on the little folder icon to the right of the empty box. You’ll see Finder pop up with all of your files. Navigate to where you unzipped the VM, or wherever it is that you put the .ova file we talked about in the last step. Once you’ve got it, just double-click on it and press continue to start the import process.
 You’ll see a screen pop up with all sorts facts about the virtual machine. How many CPUs it has, how much memory, etc. You can safely ignore this and just press import. If you’re running this on a Mac with 8 or gigabytes of RAM, however, it is worthwhile to increase the amount of memory you dedicate to running Windows by clicking on the number and entering in 1000MB. This can make your Windows VM run a little bit better. If this sounds confusing, however, don’t worry about it for now. Click on ‘Import’ when you’re finished.
Step 4: Double-click on the virtual machine that’s listed in the left-hand pane.
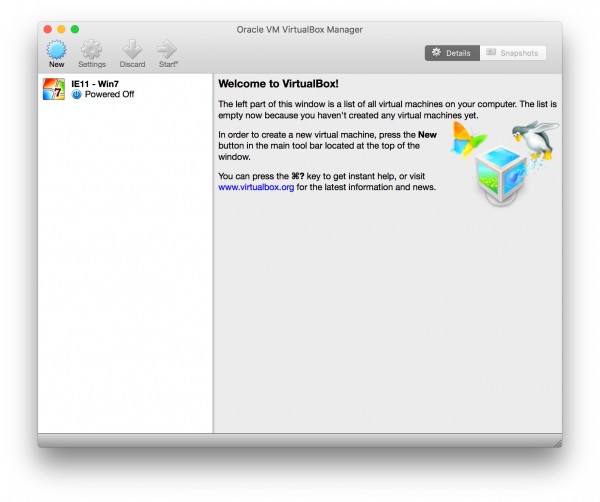
It might take a few minutes to import the virtual machine depending on how fast your Mac is. Once it’s finished, however, you’ll see a listing appear on the left-hand side of the VirtualBox window. This is your copy of Windows, whichever version you decided to download – it’ll have a name that reflects the version of IE and Windows you chose. You can double-click it to start the the software, or just select it and press the green start arrow right above.
 After a couple of seconds, you’ll see a boot screen appearing, just like you would if you were running Windows on a regular PC. As far as Windows is concerned, you are. After Windows loads, you’ll be able to interact with it, and do pretty much anything (gaming is mostly not possible) with it that you would on a normal PC or Boot Camp installation. You’ll want to treat Windows pretty normally – click on the Start menu to shut it down when you’re finished, and be careful to back up any individual files you work on to keep them safe. If you use it on a regular basis, you’ll want to keep it updated and be sure to install Microsoft Security Essentials if you’re running Windows 7 (Windows 8 and above come with Microsoft Defender).
 It’s worth pointing out that Microsoft builds expiration dates into these copies of Windows – after a couple of resets, you’re ultimately limited to a 90-day trial. If you’re just using the VM to run whatever you need to run for the moment, that’s probably fine for you. If you need more time, however, just keep the original .ova file and re-import it into VirtualBox whenever you need to start the 90-day period over (at four times a year, it’s not too much of a hardship). If you do, you should delete any older VMs just to save the disk space and confusion.
That’s it! Enjoy your free copy of Windows!
Related Posts
-

Microsoft’s Windows operating systems let users do a lot of things. Every day, machines loaded…
-
Android may be shipping on most of today's mobile devices, but finding it on the…
-

Even though Windows 10 has made upgrading Windows easier than ever, sometimes you still need…