Yes, I said effectively, there is always a right way to do something and installing Windows 7 is no different. I have discussed many times the virtues of using system imaging in Windows 7, but sometimes you just want to start things from scratch with a clean slate. This can be beneficial by removing any gunk that has built up in the OS since you upgraded to it, especially if it’s an in place upgrade from a previous version.
For me personally, I decided to do a clean install on my laptop since I have been beta testing the Service Pack 1 release of Windows 7 for a while now. Instead of restoring my Windows 7 RTM image, I would instead create a Backup and a Windows Easy Transfer .MIG file with all my personal files and settings. For me this was also an opportunity to re-evaluate my current setup. Do I need all the applications I now have installed? For you, it could be a great way to setup Windows 7 the best way, configure it the way you want to and create a nice backup of the installation for future purposes. Well, lets jump into it!
Step 1: Find all those applications disks, serials and hardware drivers
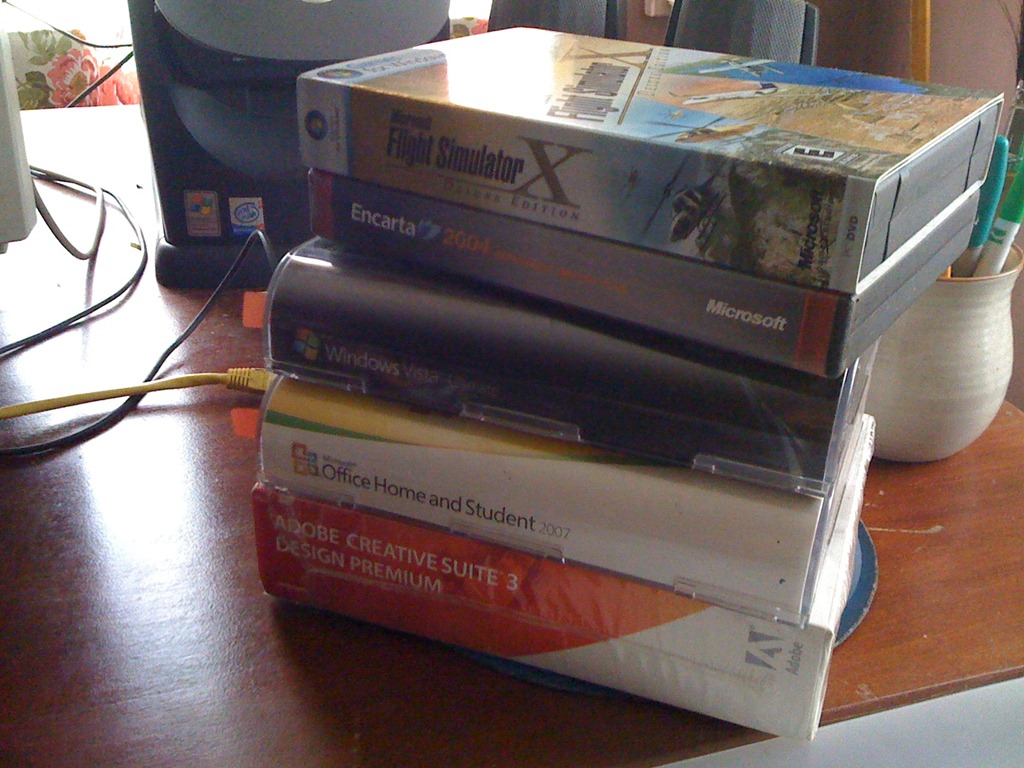
When planning a reinstallation of Windows, gather all important software first
This is a common mistake people make when they decide to reinstall Windows. They often just pop the Windows upgrade disk in and blow out the current installation, call it a day then complain the next day that Windows lost all their programs and they can’t get their current programs and hardware to work.
The first thing you should do before starting a reinstallation is to make a small inventory of all the current applications you have installed, the ones you use the most and the ones you think you can discard. You can use Programs and Features in Windows 7 to see a list of all the applications you have installed, then you can categorize by Last Used On, see below.

Right click the Column bar, then click More…

Then click the check box for Last Used On then click OK
The next step is to click the Last Used On header column to show a list of all your most recently used applications. You can make an exception for driver related software such as Modem or Video driver utility programs. Select the programs you no longer need and click Uninstall/Change on the command bar.
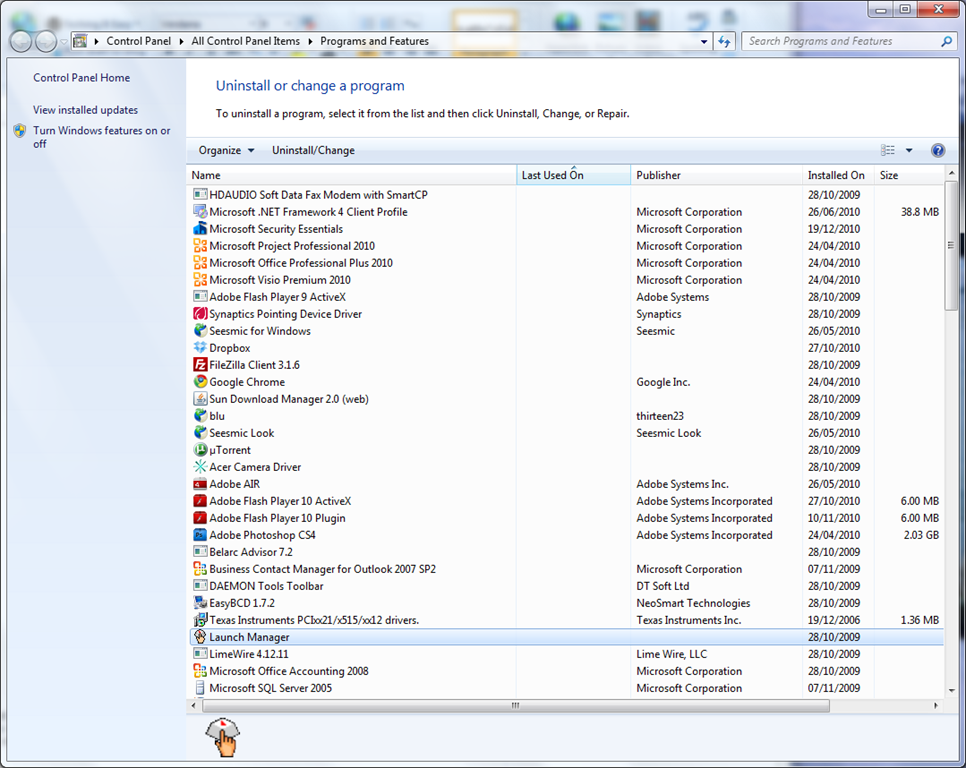
A list of all my most recently used programs.
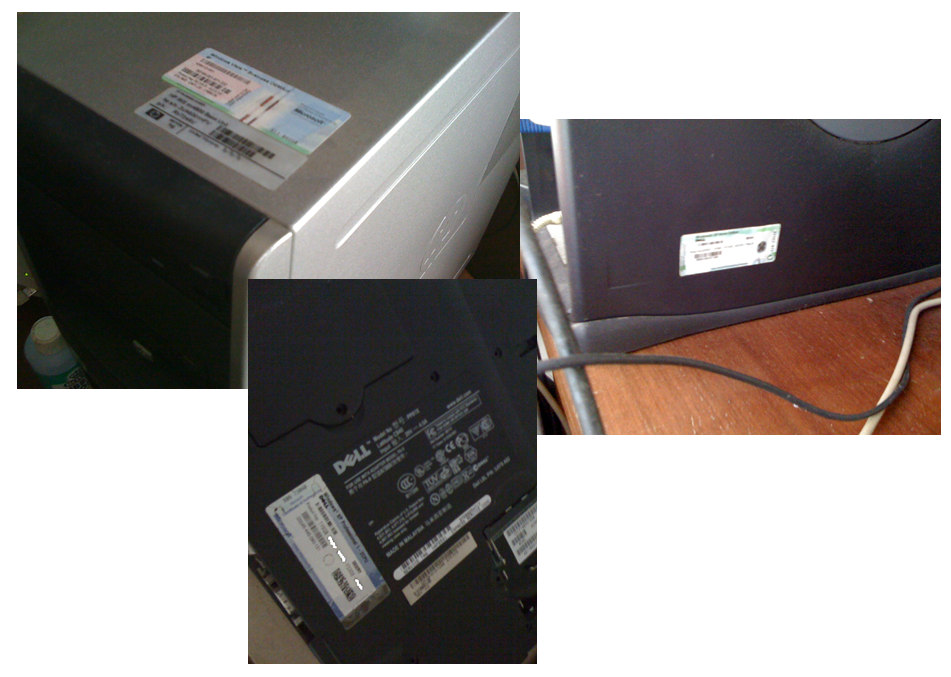
Common locations on the system unit where you can find your Windows product key
Step 1A: In regards to Windows, if you purchased an Upgrade license and not the full version license, you might need to reinstall the qualifying license first. For example, if you upgraded from Windows Vista, you will need to reinstall Windows Vista then upgrade to Windows 7. It’s a chore because Windows needs to do a validation check to see if you qualify for the upgrade rights. I will be looking at a workaround in a future article. If Windows 7 came with your computer or you need to find the qualifying product serial, look on the chassis of the machine, either side, the top or the bottom (for laptops).
The same principle applies to software such as Microsoft Office. If you purchased a Microsoft Office upgrade license, when you decide to reinstall it, you will need to present the qualifying product as proof of purchase to qualify for the upgrade. So if you were previously running Office 2003 and purchased an upgrade license for Office 2007, you will need to have that Office 2003 disk nearby to do the validation check. Another common mistake users make is thinking that you can use a Windows product key to install and activate Microsoft Office and vice versa. You cannot do this, Microsoft Windows and Microsoft Office are two distinct products developed by Microsoft Corporation. Both products use their own unique product keys for activation.
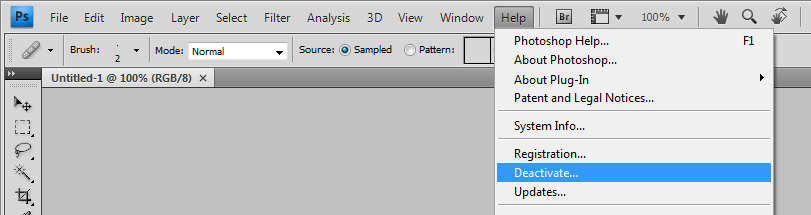
If you use programs such as Adobe Creative Suite or Apple iTunes, you should consider deactivating and deauthorizing each respective program first. Also, make sure your iTunes Library is backed up.
To deactivate an Adobe program, open the application, click Help > Deactivate… follow the on screen instructions
To deauthorize Apple iTunes, open the application, click Store > Deauthorize This Computer… follow the on screen instructions to complete the deauthorization. The reason why you should do this, iTunes might think you have installed iTunes on another computer. The software provides up to 5 authorizations, not deauthorizing can cause problems when you decide to authorize additional computers in the future since there will be no way authenticate that previous systems are no longer being used.

Additional resources for iTunes users
iTunes: Back up your iTunes library by copying to an external hard
How to back up your media in iTunes
Where to locate product keys?
Product keys can often be found inside or on the back of the product packaging. If you purchased Microsoft Windows or Microsoft Office digitally, check your email since it would have been emailed to you. If you have somehow lost the email, you will need to contact the Microsoft Store to find out if they have a record of your purchase. If the programs are installed and you had entered your Windows product key during activation, you can use one of the following programs to retrieve the product keys before you attempt the reinstallation:
Here are four utilities, all of which will may display your product keys if they are still there:
- Belarc Advisor – It does a good job of providing a wealth of information.
- Magical JellyBean Keyfinder
- Nirsoft CD Key Viewer
- RockXP – Includes many additional features.
If none of these options are available to you, then the unfortunate truth is, you will need to purchase a new full version license.
Where to locate Hardware Drivers?
A very important part of setting up Windows successfully is having the right drivers. Windows 7 installs the most common out of box drivers, but if you have unique hardware devices such as a multi-function printer or other devices, make sure you have drivers on hand to reinstall when needed.
Some common drivers I recommend you obtain prior to reinstalling are Network Interface Card (NIC) drivers such as Ethernet, Wireless Adapter, Wireless/Wired Router, Video Drivers and Audio Drivers.
After you setup Windows, you will most likely need to connect to the Internet to download updates for Windows and your programs. Ethernet and Wireless Adapter drivers may be needed in this case which is why I recommend putting those on a thumbdrive for easy access.
To make sure you have the right version, check the manufacturer’s website. If you are using a name brand laptop such as a Dell, just go to the manufacturer’s website, look for the Drivers and Downloads section of the website, enter the computers model number or service tag and click search. This will present all the drivers for your system model. Download all necessary drivers and store them safely until needed.

Examples of popular driver disks you will need
Other drivers such as your chipset driver might be handy too, especially if you are using integrated graphics, network and onboard audio, the chipset driver provides the communication between all the components in your system with processor and memory such as your audio device, video card and network interface card. You can often found this on the motherboard or recovery disc that came with your computer. If you are not able to find updated or Windows 7 native drivers for some of your hardware components, you can also try Windows Vista native drivers which will work most often.
Step 2: Do some house cleaning.
Over the years, we tend to store a digital copy of almost everything we own. While we enjoy archiving and having instant access to the information from years ago, sometimes its best to re-evaluate the need to have it all stored on our hard disk. Instead, storing some of those old documents you rarely access or those old digital photographs you only look at once in a while on an external hard disk might be best.
This is also a good time to look for redundant files. Do you need to have 4 different versions of your resume? My recommendation is to just delete the older ones and keep the latest version. Another area to look at is email, do I need to have 10 years worth of email on my hard disk? Do I need to have all those contact files? What this also does is reduce the complexity and time it takes to backup your most important files which we will discuss next and guarantees that you will restore just what you need after setting up Windows.
Duplicate files are also an issue, I use this handy program called DoubleKiller to weed them out.
Step 3: Backup, Backup, Backup!

An External Hard disk is an important investment when planning a backup
I can’t stress enough how important a step this is. Losing access to programs or drivers can be an inconvenience, even a temporary one, but to lose years of work such as documents, photos, videos, emails is not a good thing. Make sure you have all that information backed up safely.
The best way to do this by using an external hard disk. Just leave CD’s and DVD’s out of the options for backup, they are inconvenient, unreliable and can be easily damaged. External hard disks are affordable, robust and offer lots of storage to backup GB’s or even TB’s of data you might have accumulated over the years.
There are multiple methods of doing a backup in Windows 7. The first one I recommend is the standard Backup which backs up all your personal files and settings. The next one is System Image, another reason why External hard disks are recommended because what it does is creates an exact replica of your installation. So, if something goes wrong with the reinstallation, you can always restore your backup and you are back in business. The other option is Windows Easy Transfer, this is quite similar to Backup, but is narrow in its capabilities. I have also discovered it has issues backing up Microsoft Outlook .PST folders and you cannot specify specific locations in the system you want to backup, it only does common directories such as the User folder and shared folder. I recommend you use both Backup and Windows Easy Transfer to compliment each other. For instance, you can use WET to do the backup of common user folders and Backup unique directories where you might have data stored.
You can learn more about how to do a back up here
You can learn more about how to use Windows Easy Transfer here
How to backup your Microsoft Outlook email, calendar and contacts
- Using the Microsoft Outlook Personal Folders Backup tool
- How to back up Outlook e-mail messages
- How to Backup Personal folders in Outlook 2007/2003/2002 – The Personal Folders Backup download creates backup copies of your .PST files at regular intervals, in Outlook 2002 and later versions, making it easy to keep all of your Outlook folders safely backed up.
- Outlook Backup Tutorial
- Outlook Password Help
Step 4: Decide which architecture of Windows 7 you want to install (32 or 64 bit)
Like I have been saying, the opportunity to reinstall Windows 7 gives you some choices. If you initially installed the 32 bit version of Windows 7, you might have upgraded your installed memory since then or plan to. If you are running 4 GB or more RAM, you can effectively take advantage of it by using 64 bit Windows 7. First you must ensure that all your drivers and applications are compatible.
To determine this, use the free Windows 7 Upgrade Advisor provided by Microsoft. Also check the manufacturers/developers website for all your applications and hardware devices. If your computer came with 64 bit Windows 7 installed or you installed that initially, you might not be seeing the immediate benefits and would prefer to downgrade to the 32 bit architecture. This is especially true if you only have 1 to 3.2 GBs of RAM installed. It’s also likely that system performance can greatly improve running the 32 bit version.
Note: If you do decide to downgrade to Windows 7 32 bit, you will need to backup your files manually to an external hard disk, not by using Windows Easy Transfer. This is because Windows Easy Transfer backups from within Windows 7 64 bit are not backward compatible with Windows 7 32 bit.
Step 5: Starting the installation.
The first thing you should do is disconnect any non-essential devices. This might interfere with setup. So things such as printers, external hard disks, scanners or any other device that is not needed (apart from your mouse and keyboard) should be disconnected. If you plan on moving from one architecture, 32 to 64 bit or vice-versa, insert the Windows 7 disk, restart the computer, make sure your DVD drive is set to boot from the disk.
In this case, I will be reinstalling the same edition and architecture.
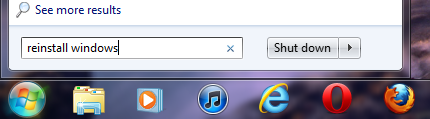
Click Start, type: reinstall windows
Hit Enter on your keyboard
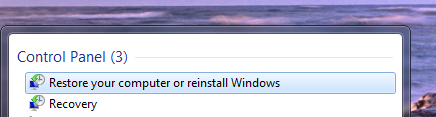
This will open the Recovery Control Panel item.
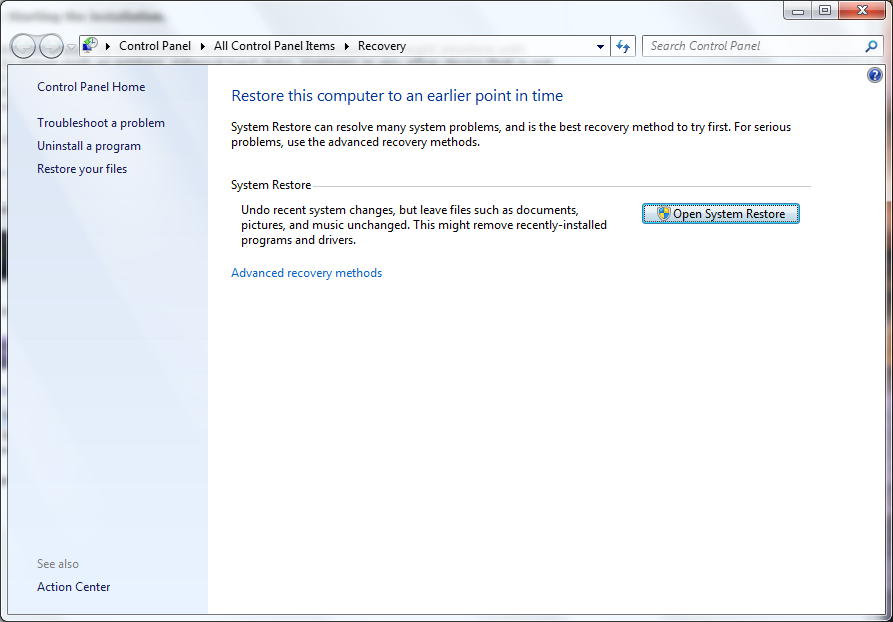
Next, click the link Advanced recovery methods
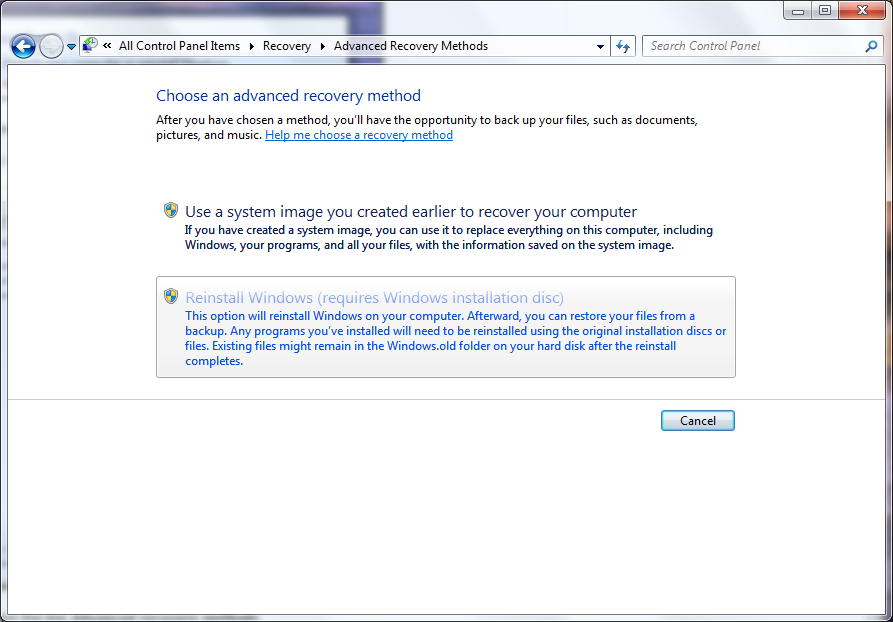
Click the option ‘’Reinstall Windows (requires Windows installation disc)’
This process will do a standard clean installation, I won’t go over the entire process since Notebooks.com has already documented the process here. Our intention though is to do a clean install, which means, nothing will be left on the drive. To be clear Programs, Drivers will need to be reinstalled and your personal files and settings will need to be restored. If you have not backed up your files and downloaded your drivers, please go and do it first and remember, back up to an external hard disk.

Make sure you have your Windows 7 installation disk, insert it when prompted, then click Yes.
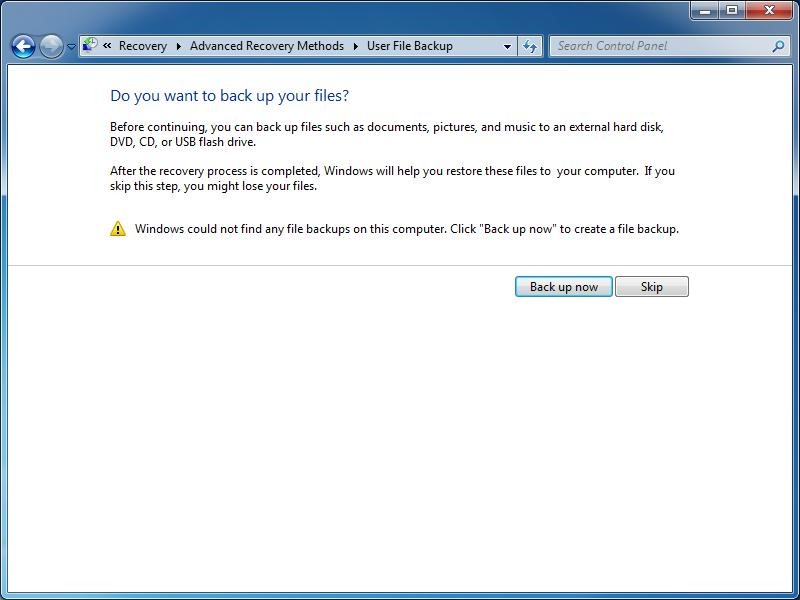
You will be asked if you want to backup your files first. Windows 7 will intelligently detect if there were any backups done as you can see in the above screenshot.
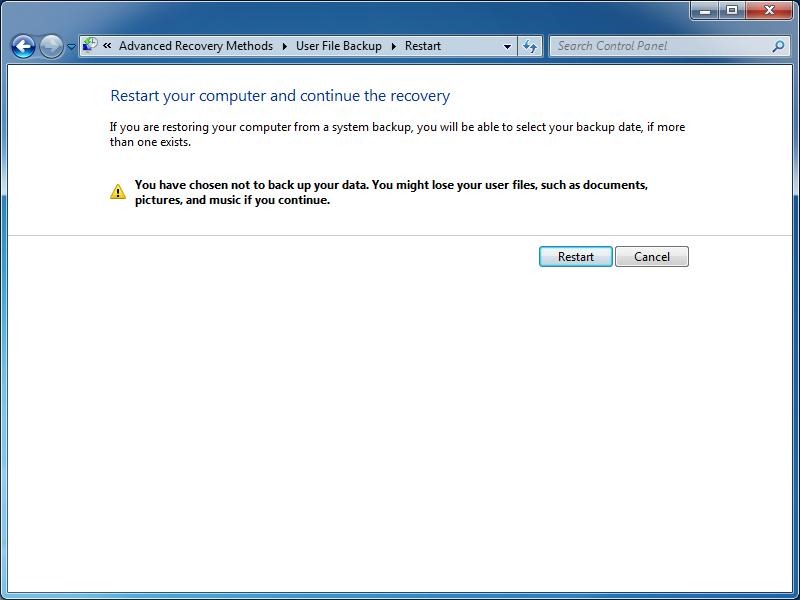
When you are ready, click Restart to begin the reinstallation process.

When the computer starts, you will be prompted to boot from the Windows 7 DVD, click any key to do so. Windows 7 will load files on your hard disk to assist with the installation.

We have now arrived at the Setup screen, here you will select your Language if the option is available, time and currency and keyboard. After doing this, click Next.
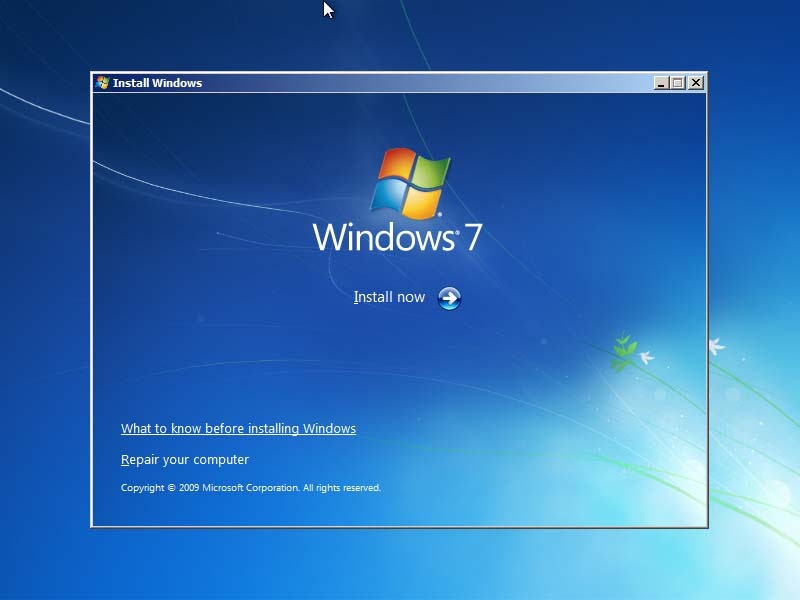
To begin the installation, click Install Now
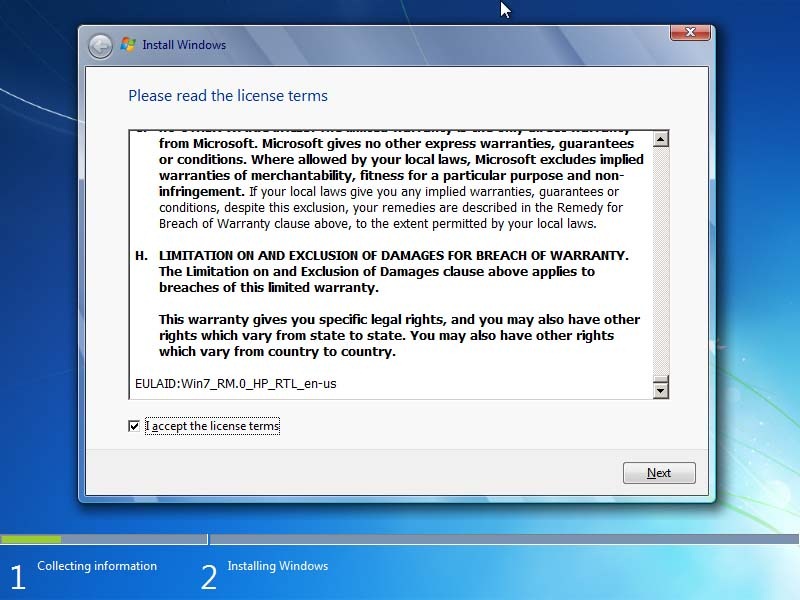
Accept the End User License Agreement then click Next
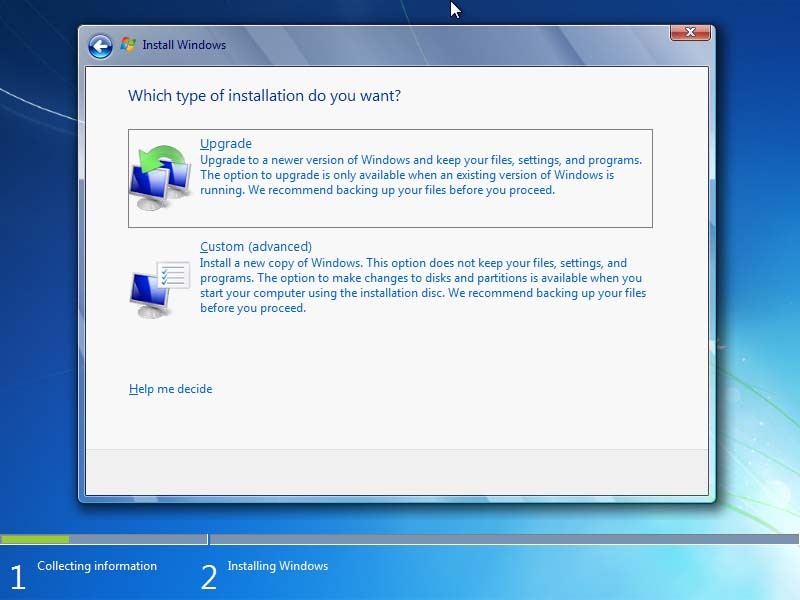
Click the Custom (advanced) option, we will be configuring the hard disk.
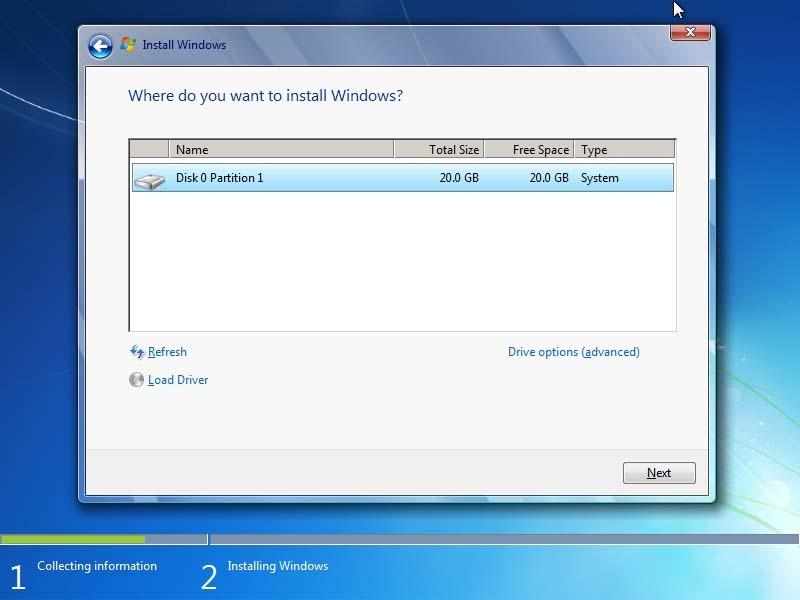
Select the partition on which Windows 7 will be installed, then click Drive options (advanced)

If there is more than one drive listed, it likely means, one is a Recovery partition and the other is the System Partition. Avoid formatting or deleting the Recovery partition, select the system partition where Windows 7 is installed and click Format.
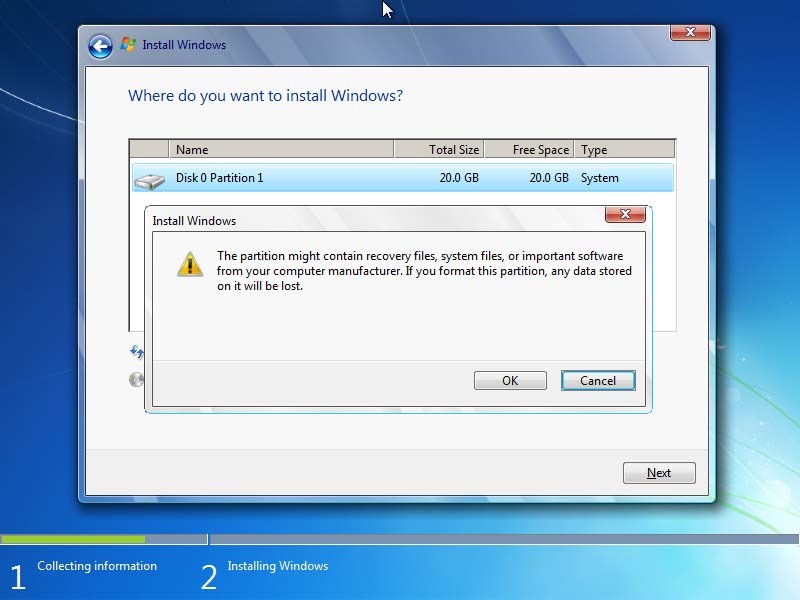
You will be warned that all data on the drive will be destroyed. Again, make sure all your files, settings are backed up. Make sure you have downloaded all necessary drivers, have all application disks near by. If you are unsure, click cancel, and then click Next. This will do is create a Windows.old folder with the previous installation still intact so you can recover any missing files.

The installation is now in progress. Once complete, you will go through the Out of Box Experience which involves joining a wireless network, a homegroup if available, entering your user name, password, name of computer, date and time and configuration of common settings. Please see previous Notebooks.com article for instructions here
After installation is complete
-
The first thing you should do is install an Antivirus Utility. I personally use the free Microsoft Security Essentials, but there are others out there such as AVAST! Home or AVG. Make sure it is the most up to date version.
-
If you are unable to connect to the Internet, make sure your Network Interface Card, Wireless Adapter, Router drivers are installed. Again, these drivers should have already either been downloaded or you have the driver disc ready for reinstallation.

Run Windows Update, a fair amount of updates have been released for Windows 7 since it came out. I recommend, just for convenience purposes, if you must reinstall Windows 7, wait until Service Pack 1 is released which should be very soon. This can reduce a significant amount of downtime, since all you will need to do is reinstall Windows 7 form your disk, then install the Service Pack.
Avoid installing driver updates for hardware, just install security updates first. If you encounter problems installing updates, you can learn more about resolving it here
-
Finish installing any addition drivers needed to have a functioning system. I would recommend you do next after this is to create a System Image of the installation. What this will do is create a backup of the installation, so you could use it in the future as a way to reinstall Windows 7 quickly without starting from scratch. You can learn more about doing this here
-
After you have backed up the installation, you can start restoring your personal files and settings, either from a Backup or from a Windows Easy Transfer file, whichever method you used. Windows Easy Transfer should give you a report of which applications you will need to reinstall. Learn more here
-
Reinstall your applications. I suggest you try creating system restore points in between each configuration. So, after you had installed the drivers successfully, restored personal files and settings, create a new system restore point each time, it can be a life saver, trust me.
-
Reconnect any external devices you were using, try doing it one at a time then restart, just in case one causes a system instability. If it does, it likely means you need to update the driver.
-
Reactivate Windows, this can be done by Internet, especially if you are reinstalling Windows on the same machine, the same applies for Microsoft Office. If you encounter any problems reactivating Windows, please review the following Notebooks.com article here for tips and solutions to common activation problems in Windows.
Now, this is a lot to digest when considering a reinstallation, so its best you don’t do this when you are in the middle of a project or working on something important. Do it when you have some off time, focus on certain things over a period of time such as gathering reinstallation disks, drivers, backing up files and settings. It is also best if you can have a backup system on hand you can use during the down time. With careful planning, this should be a fun and easy to do project itself and it will save you some money compared to carrying your computer to a repair company and it will enhance your computing skills.
Related Posts
-

Microsoft’s Windows operating systems let users do a lot of things. Every day, machines loaded…
-

Even though Windows 10 has made upgrading Windows easier than ever, sometimes you still need…
-

On August 2, 2016 the Windows 10 Anniversary Update came out with some cool new features…