If you use Windows Virtual PC with Windows XP Mode on any of the supported editions of Windows 7 (Professional, Enterprise, or Ultimate) you might realize that the default allocated memory (256 MBs), just might not be enough for your needs. There is a quick solution for that, give it more RAM.
Now this all depends on your system, as you need to have enough memory to run both the Host operating system (Windows 7) and the Guest (XP Mode) so this tip might not be an option until you install additional physical RAM in the system.
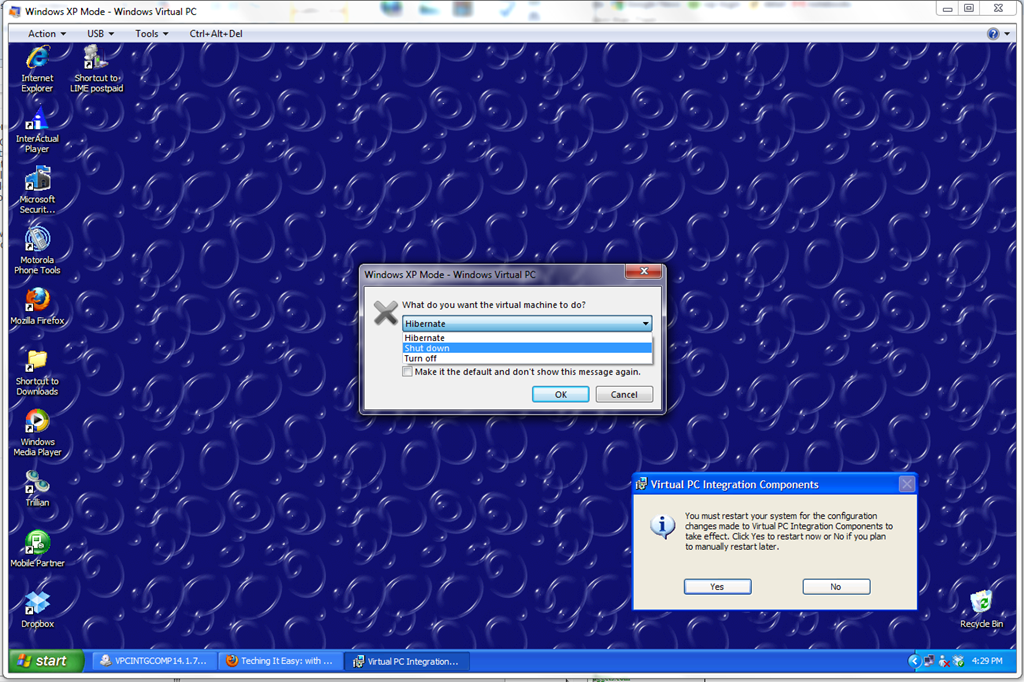
If you do have the additional memory to allocate, here is how you do it. First, you need to make sure you have shutdown the Virtual Machine entirely or else the option to give it more memory will be grayed out. To do that, close the Virtual Machine, click in the list box and select the option to Shutdown, click OK.
If you don’t get that option, then it means your virtual machine has not been set to prompt you for an action. To change this setting, click Start in Windows 7 > All Programs > Windows Virtual PC > Windows Virtual PC.
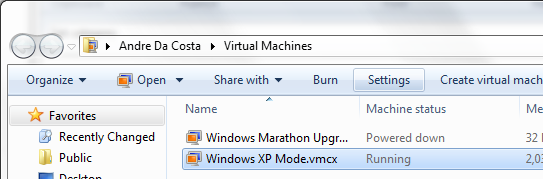
Select the Windows XP Mode.vmcx file and click Settings on the Command Bar.
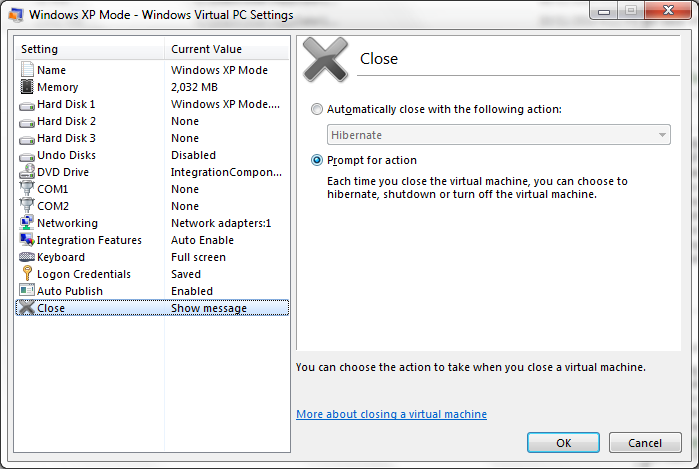
On the Settings dialog, select Close, then select the Prompt for action radio box and click OK to apply. This will now give you the option to shutdown the virtual machine.
Once you have shutdown Windows XP Mode, go back to the Windows XP Mode – Windows Virtual PC Settings window and select the Memory option.
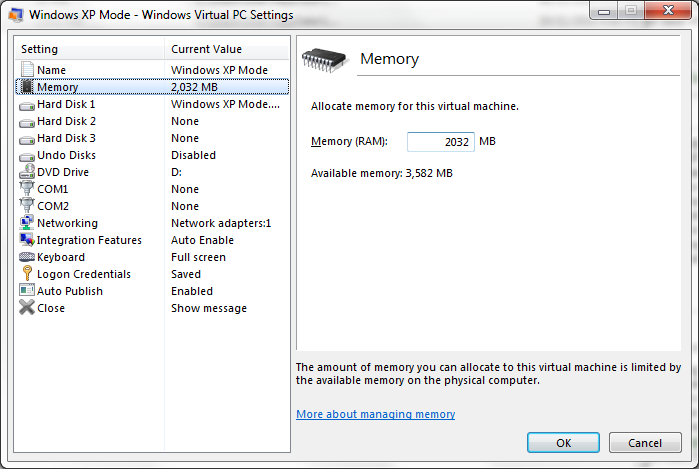
You will now be able to enter additional memory in the Memory (RAM): box. Again, this depends on the total amount memory you have installed in the system. Allocating too much can adversely affect the performance of the Windows 7 host. The good thing about this though is, you will be able to increase the performance the the Virtual Machine and applications running in it. That’s it!
Related Posts
-

Microsoft’s Windows operating systems let users do a lot of things. Every day, machines loaded…
-

Even though Windows 10 has made upgrading Windows easier than ever, sometimes you still need…
-

On August 2, 2016 the Windows 10 Anniversary Update came out with some cool new features…