One of the things you might encounter after upgrading your computer or starting a new computer for the first time is the amount of stuff that might make the operating system start a little groggy at first. This article will show you some of the common tasks you can do to speed up that old computer or squeeze as much performance as possible out of that new PC.
If you are using an old computer, there are some things you should take into account if you are upgrading to Windows 7. First off, you will need to make sure your computer meets the Windows 7 System Requirements and second, you should be aware that housecleaning may not be enough to speed up an old computer. Instead a hardware upgrade of components might just be what you need to achieve better performance.
The first three things that come to mind are Memory, Processor and Storage. These three components can add a dramatic improvement to your computers performance. One of the great things about running Windows 7 is the memory foot print is about the same as Windows Vista and its more efficient because of a lot of complex low-level changes the Windows Team made to the operating system with how it loads programs, services and devices.
Anyway, if you do upgrade to Windows 7, here are few things you can do to speed things up even more.
Preparing Disk cleanup
Disk Cleanup – This is always a favorite place to start, because it list many of the common locations where old unused files that are often not needed any more are stored. To find Disk Cleanup, click Start, type: Disk Cleanup. Alternatively, you can find it under Start > All Programs > Accessories > System Tools. When Disk Cleanup is started, you are prompted to select the drive on which you would like to do the cleanup. In this case, it’s the operating system drive where Windows 7 is installed, usually C:. If you are running Windows 7 in a dual-boot configuration with another operating system, click in the list box and select the drive on which it is installed. Click OK.
Disk Cleanup dialog
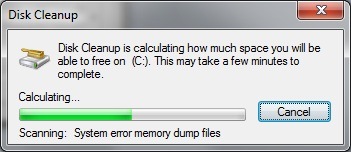
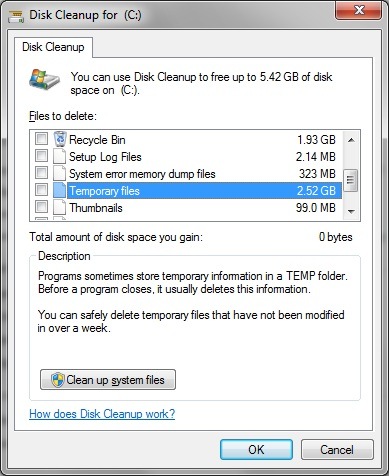
An initialization wizard will scan you hard disk to check for areas of the system you will be able to run the clean up on. After the scanning is complete, the Disk Cleanup dialog appears. This window provides a list of areas of the system you can clean up safely. The most common locations are Temporary files, Temporary Internet Files, Recycle Bin to name a few. Other not so common locations include the Thumbnail Cache which stores previews of your images allowing you load them faster when you open the Pictures Library or Windows Live Photo Gallery. This I do not recommend you delete for obvious purposes. Lets dig a little deeper. Disk Cleanup provides a list of areas where you can free up disk space and gain additional speed in some cases.
| Location/Type | Description | Safe to Delete |
| Downloaded Program Files | Downloaded Program Files are ActiveX controls and Java applets downloaded automatically from the Internet when you view certain pages. They are temporarily stored in the Downloaded Program Files folder on your hard disk. | YES |
| Temporary Internet Files | The Temporary Internet Files folder contains webpages stored on your hard disk for quick viewing. Your personalized settings for webpages will be left intact. Personally, I suggest you keep this if you are on a slow connection and need the basic elements of web pages you often visit to load faster. | Keep It |
| Offline Webpages | Offline pages are webpages that are stored on your computer so you can view them without being connected to the Internet. If you delete these pages now, you can still view your favorites offline later by synchronizing them. Your personalized settings for webpages will be left intact. I also recommend you leave this alone since you might be on a slow connection and need quick access to a webpage with some specific content. | Keep It |
| Recycle Bin | The Recycle Bin contains files you have deleted from your computer. These files are not permanently removed until you empty the Recycle Bin. Sometimes you might inadvertently delete a file that you didn’t intend to delete permanently, so before you empty the contents of the Recycle Bin, do a thorough check before. | YES |
| Temporary files | Programs sometimes store temporary information in the TEMP folder. Before a program closes., it usually deletes this information. You can safely delete files that have not been modified in over a week. You can view the contents of the temp directory and see if there is anything in there you might need. Open the Run Command (Windows key + R), type in %temp% > hit OK. Sometimes program installers for common applets are stored there that you can use to reinstall such as Adobe Flash for instance if you don’t want to redownload it every time. | YES |
| Thumbnails | Windows keeps a copy of all your picture, video, and document thumbnails so they can be displayed quickly when you open a folder. If you delete these thumbnails, they will be automatically recreated as needed. I don’t see any problems deleting it if its gonna be recreated, but deleting it sometimes can correct problems with previews of photos and videos. | YES |
| Debug Dump Files | When your computer experiences a system hang because of a poorly written application or device driver, Windows intelligently creates a log of what happened. This log can be used along with other logs such as System error memory dump files to help diagnose the problem when sent to Microsoft or the developer for review. | Keep It |
| System error memory dump files | Similar to the Debug Dump files, memory error dumps happen when poorly written drivers or applications crash. It is very handy for utilities built into Windows such as Troubleshooters which help in diagnosing problems that occur in Windows. | Keep It |
In addition to these common locations, Windows will also store information related to Error reporting and solution checking, leave these for diagnosis that can help resolve issues with applications or devices. Also, if you do an upgrade from Windows Vista or clean install, Windows 7 might store information related to servicing which are logs used to assist the installation of the operating system. Once you have checked these locations for clean up, click the OK button and these locations will be cleaned out.
A folder you might be familiar with is the Windows.old, in a future article I will be taking a closer look at this directory. It’s basically a backup of your old installation of Windows, which you can use to reinstall Windows if you decide to return to your previous installation. Also, it’s used as a last resort in case you didn’t backup your files and need to recover personal files and settings. The Windows.old folder can use up a considerable amount of your hard disk space and reduce the systems performance. It’s normally stored at the root of your hard disk where Windows 7 is installed. Before you delete it, make sure you check through the directories and ensure that everything migrated successfully to Windows 7. How to delete Windows.old.
System Restore – The Windows Team has added some nice enhancements to Windows 7’s System Restore feature, allowing you to keep a larger collection of System Restore Points in addition to storing them in your System Images of Windows 7. A friend had recently upgraded to Windows 7 and he asked me why he was low on hard disk space. He had a 320 GB drive and only had about 70 GBs of free disk space left after doing a disk cleanup. It was then I discovered that System Protection had been configured to use about 200 GBs of disk space to keep System Restore Points.
Configuring System Protection settings
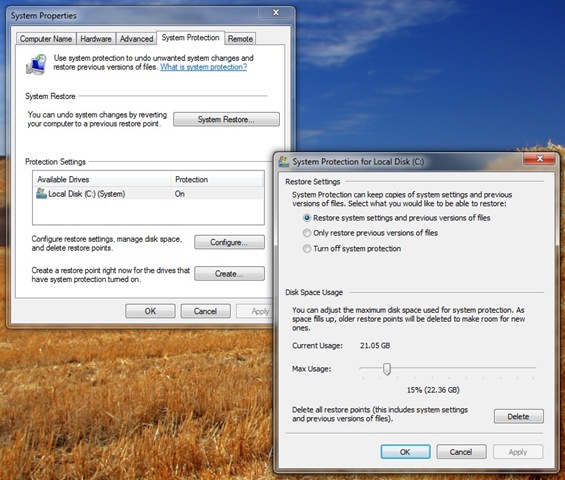
To configure System Protection, click Start, type: System Protection, hit Enter. Under Protection Settings, click the Configure button. A dialog will appear with various settings for configuring Restoration and Disk space usage. Under the Disk space usage tab, you will see the current amount of space in use by System Restore while the Max usage displays the amount allocated. Use the Max usage knob to configure how much disk space you want to allocate to System Protection. In the above screenshot, you will see that I am using 21.05 GBs for Restore Points, while I have allocated 22.36 GBs of disk space for System Protection. You also have the option of deleting all Restore Points which stores System settings and previous versions of files. I suggest you leave this, since you will be able to individually restore changes to files you are working on. For instance, if you edited an image and would like to restore it to a previous version or original version of the file, you could do it so long as you don’t delete these restore points.
This is the beginning of our look at how to speed up your Windows 7 computer. You can check out future installments by checking out our Speed up Windows 7 Series.
Related Posts
-

Microsoft’s Windows operating systems let users do a lot of things. Every day, machines loaded…
-

Even though Windows 10 has made upgrading Windows easier than ever, sometimes you still need…
-

On August 2, 2016 the Windows 10 Anniversary Update came out with some cool new features…