Ever get annoyed with switching through tabs in your web browser or creating multiple browser windows to keep track of your favorite websites? Fluid, a free application for Macs, allows you to turn those websites into desktop applications that sit on your Mac’s dock or in the menu bar, sort of like apps on an iPhone.

Fluid is a freeware application for Macs that allows the creation of Site Specific Browsers (SSB). Basically, SSBs create a simplified browsing experience by eliminating menus, toolbars, and anything else that is external to the workings of a specific website, like Facebook or Gmail. This is particularly useful when trying to keep children from straying away from safe websites. Also, I know my grandparents struggle with browsing the web. Creating simple, specific apps for their frequently used websites could keep them from getting lost.
In this how-to guide, I will show you, step-by-step, how to create your very own applications, based on your favorite websites. The website I will be creating an app for is Facebook. Note that Steps 2-5 are shown in video form at the end of this article.
Step 1 Download Fluid for your Mac
- Visit Fluid’s Website and click on the “Free Download ” button, located on the right side of the page. Your download manager should pop-up and begin the download.
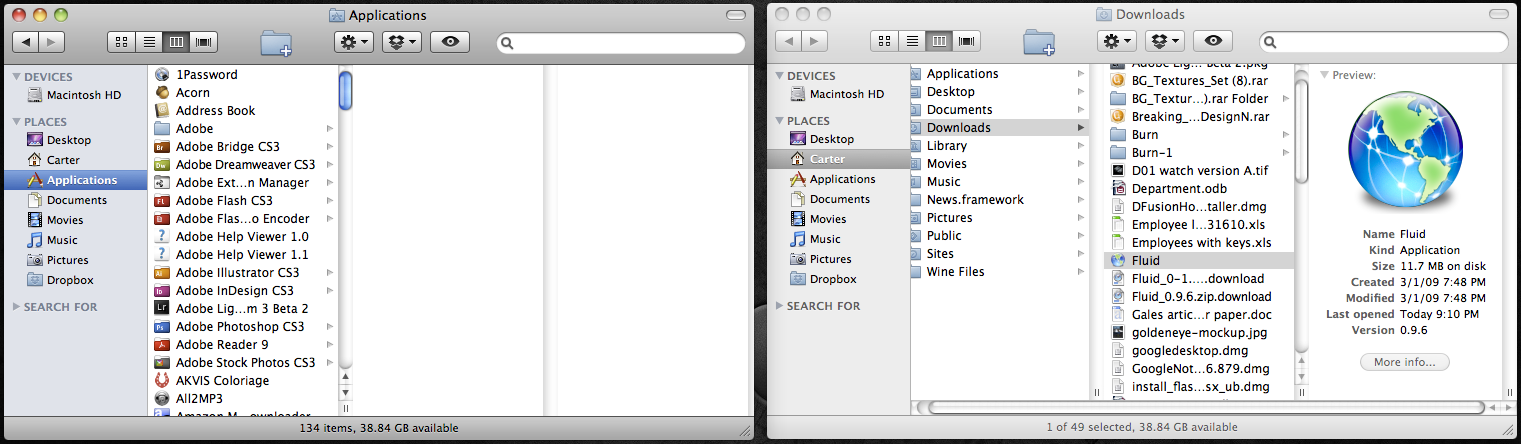
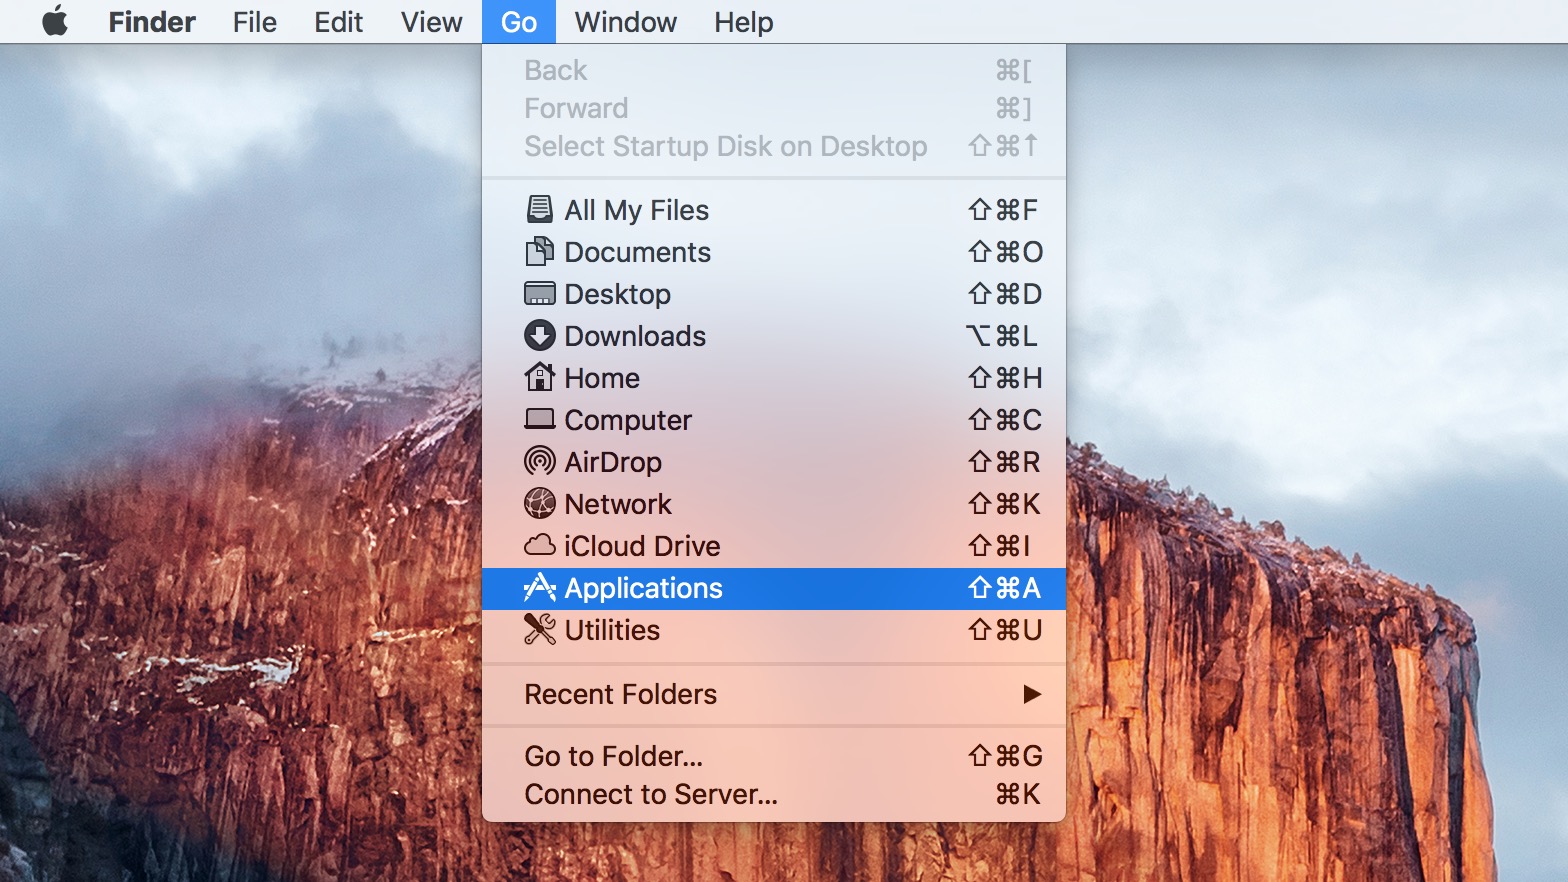
- Locate the Fluid application in your downloads folder. Open up a second Finder window and drag Fluid from the downloads window to the Applications folder to the second Finder window.


Step 2 Create an Application
- Open Fluid from your Applications folder.
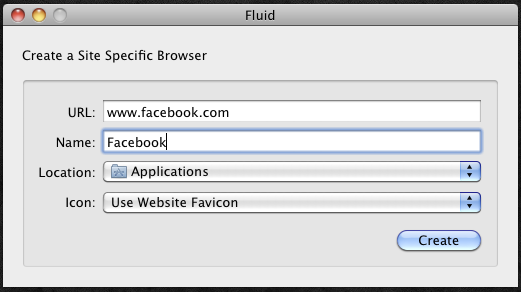
- When Fluid opens, enter the URL of the website you want to create an application for.
- Give it a name.
- Select where you would like the application to be stored. By default, Fluid will save your app to your Applications folder.
- By default, Fluid retrieves the website’s icon (if available). If the icon is really grainy, or you just want a different icon, you can search for one at iconsPedia, or create your own and select the file under “Other…”. For this example, I left the Facebook icon as the default “Use Website Favicon”.
- Once everything is set to how you would like it, click “Create”.
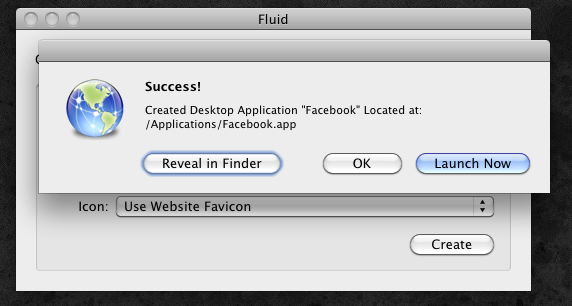
- If it was successful, the following options appear. “Reveal in Finder” will take you to where the application is stored. Clicking “OK” will allow you to create another application. “Launch Now” will launch your newly created application.


Step 3 Use Your New Application
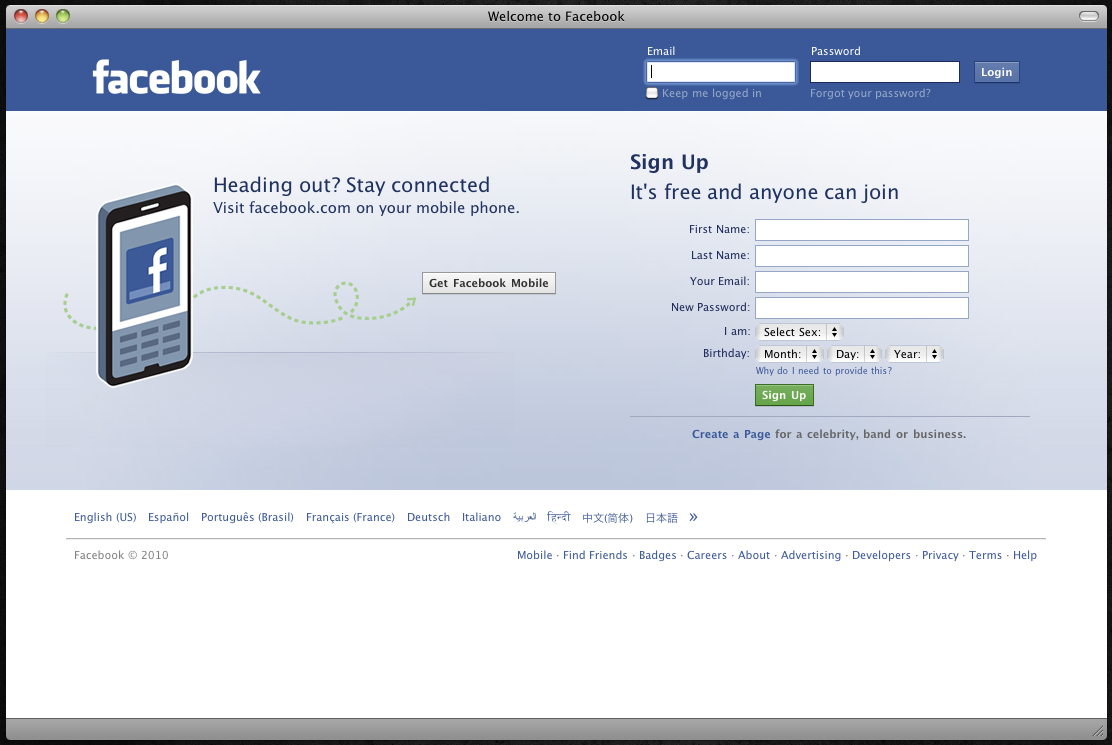
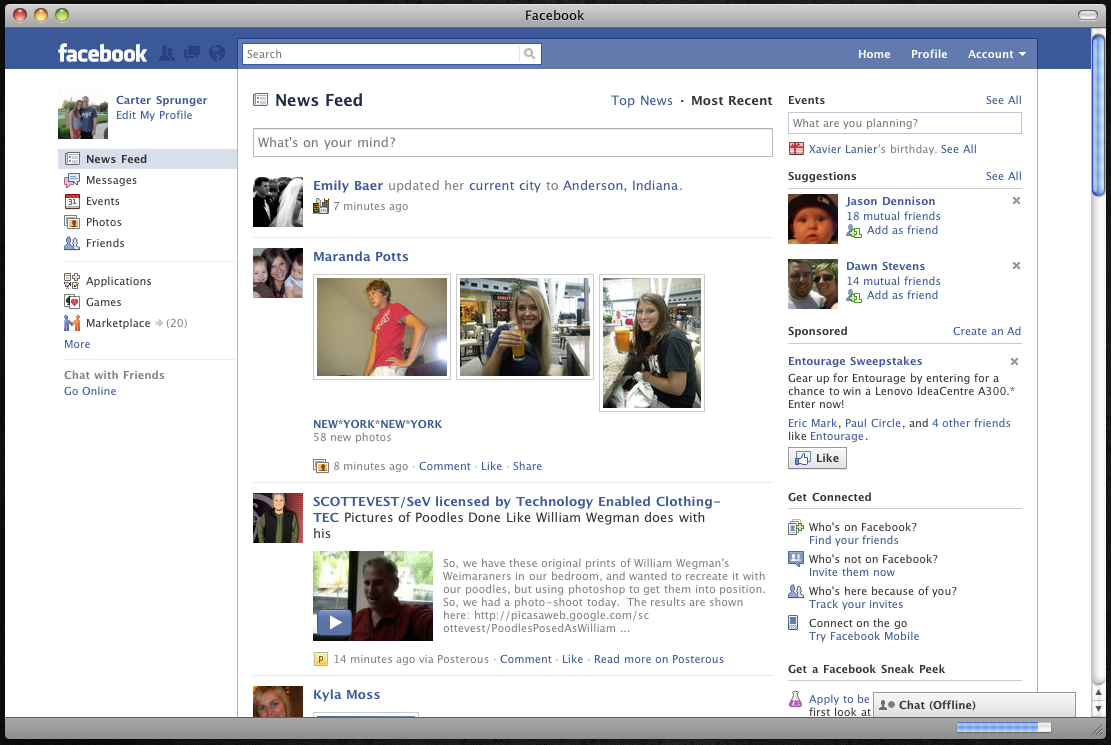
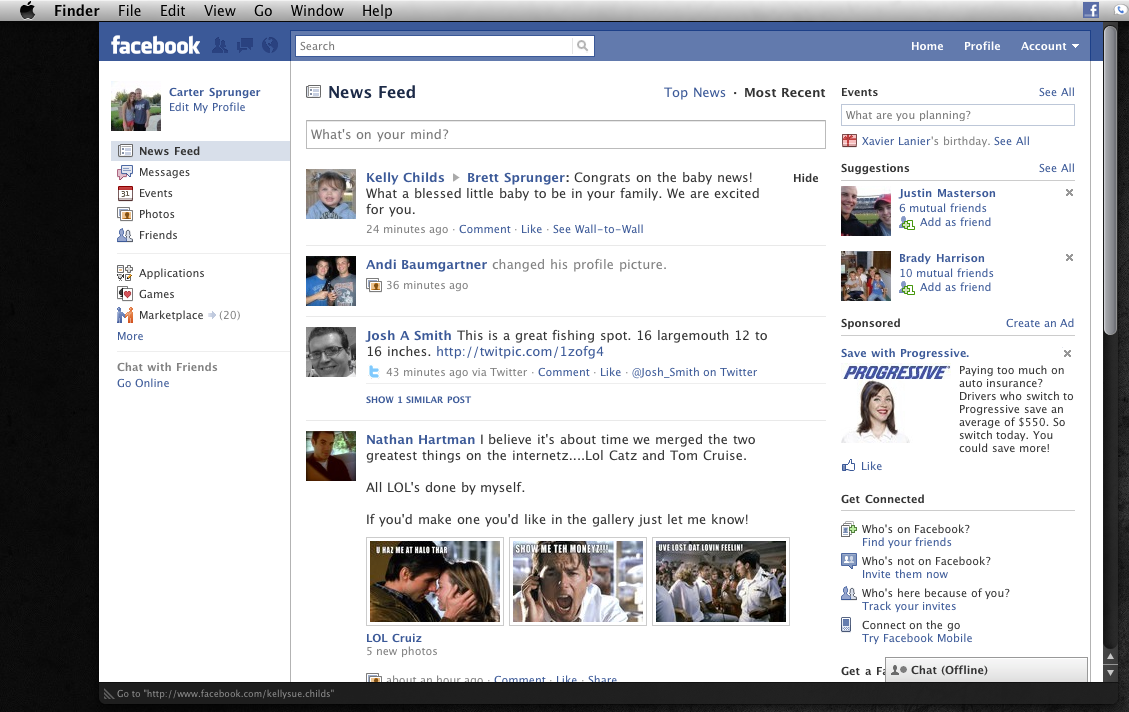
- If you are not set-up to be automatically logged in, your Facebook application will look like this:
- Once you enter your log-in information your application will sign you in as normal, giving you the full functionality that you would find visiting Facebook through your web browser.
- If you would like to keep this application in your dock, right-click the application icon in the dock and select Options > “Keep in Dock”.


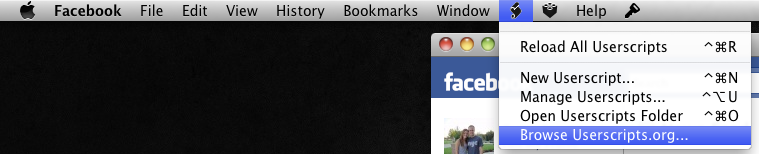
(Optional) Step 4 Install UserScripts
Certain websites have UserScripts that you can download and install in your new app. These UserScripts allow you to add badge updates, Growl notifications, and a lot more. For full functionality, Userscripts.org recommends that you download the Firefox browser and GreaseMonkey. For the sake of time, I will be using Apple’s Safari, though not all UserScripts are written for Safari.
- With your created application open, click on the scroll icon in the menu bar.
- Select “Browse Userscripts.org…”
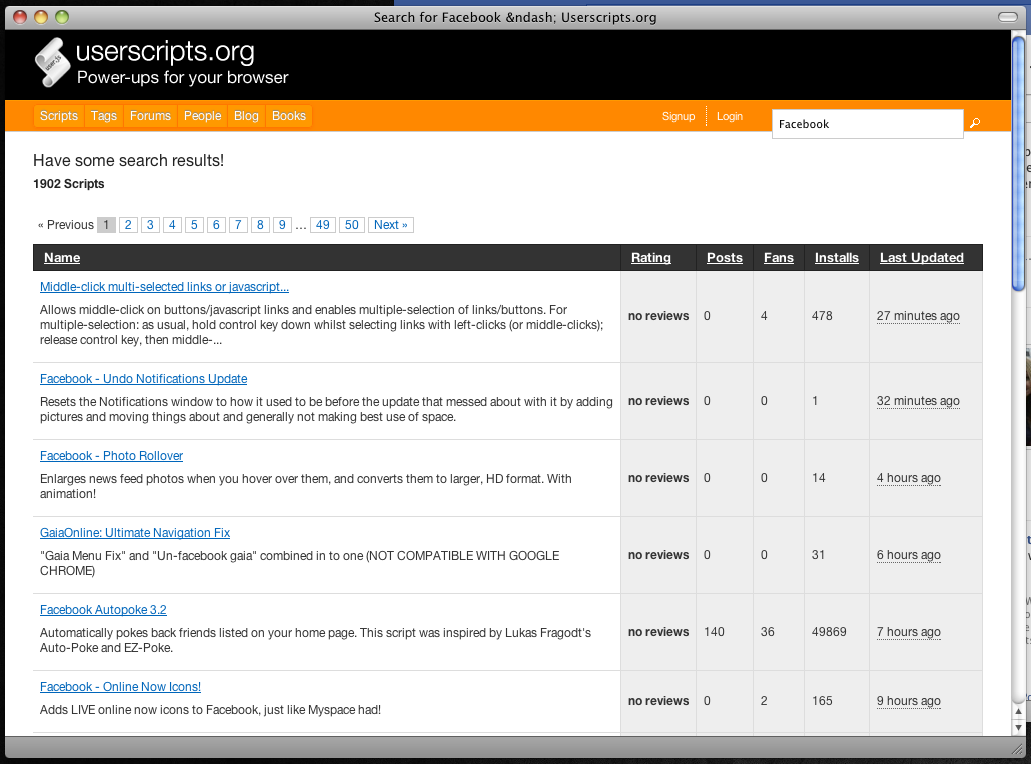
- In the window that pops up, search the name of the website your application is based on. For example, I searched “Facebook”.
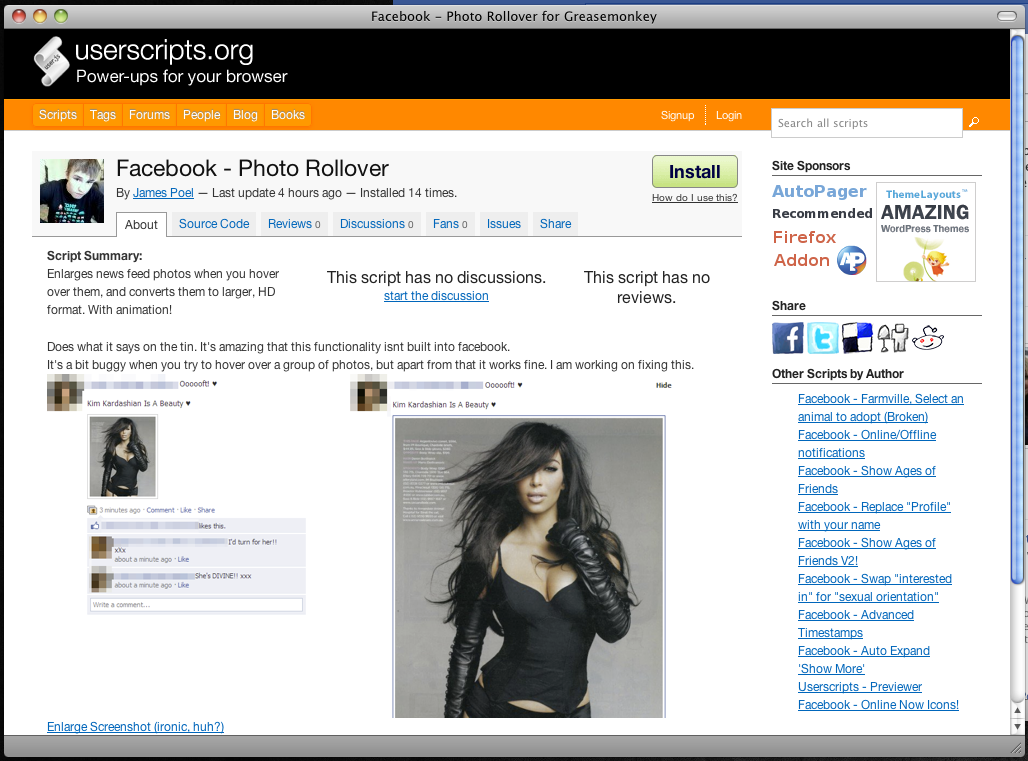
- A list of the available UserScripts for that website will appear. To install one, click the name of the UserScript. For this example, I’m installing the “Facebook – Photo Rollover” script.
- Click the Green Install Button.
- This window should pop up, in which you click “Install”.
- Quit the application and relaunch it.
- The new UserScript should now work. Even in Safari, the Facebook – Photo Rollover works as described.
- To manage your UserScripts, click the scroll in the menu bar > “Manage Userscripts…” Here, UserScripts can be added, edited, or deleted.


(Optional) Step 5 Convert to Menu Bar App
If you want, you have the option of putting the application in your Mac’s menu bar, allowing easier access.
- Open your newly created application (Facebook).
- Click “Facebook” in the menu bar.
- Click “Convert to MenuExtra SSB…”
- Click OK to the Prompt asking if you really want to do that.
- A Facebook icon will appear in your menu bar. When clicked, the Facebook application will drop down. You can resize the window that drops down by dragging the bottom left corner.
- If you would like to convert the menu bar app back to a normal app, right-click the menu bar icon.
- Select “Convert to Normal Application…”
- Click “OK” to the pop-up confirming that you want to Convert the MenuExtra SSB back to a Normal Application. Note that you can only do one, or the other. You cannot have a normal application AND a menu bar application, UNLESS you create two separate applications for the same website.


Video Tutorial of Steps 2-5
(less a few minor sub-steps)
Be sure to watch this in either 720P or 1080P so that the text and icons are readable. Note: When the Facebook – Photo Rollover UserScript is installed, mine says Override because I had already installed it. Yours should say Install.
https://www.youtube.com/watch?v=3JaVyTN_QLw
In addition to creating a Facebook application, like I did, Fluid can be to create many other useful website-based applications. A few ideas to get you started are Gmail, YouTube, and Pandora. Let your imagination run wild and have fun feeling like a computer programmer while you create your very own applications for Mac OS X.
Related Posts
-

We've put together a list of some of the best Mac apps anywhere: if you're looking…
-
Starting with OS X Mountain Lion, Apple introduced Gatekeeper so users couldn't easily install downloaded…
-
Like on a PC, most of your Mac's software lives in the same place on…