Windows 7 is more stable than many of the earlier operating systems, but like all computers is can still have issues. Thankfully, if you create a Windows 7 system repair disc, you can fix many common Windows problems like a computer that won’t boot and other issues. This disc will allow you to boot into a Windows recovery environment to fix a Windows 7 boot problem, run memory diagnostics and restore the computer from a system image.
Creating a Windows 7 system repair disc is even more important today because many new notebooks and desktops do not come with a disc to perform common repair and recovery options in Windows 7. The good news is creating one is very straightforward and this guide will walk you through how to create a Windows 7 system repair disc.
When you finish you may want to make a system image of your computer so that you don’t have to install Windows 7 from scratch if something goes wrong. For more information please see how to create system image.
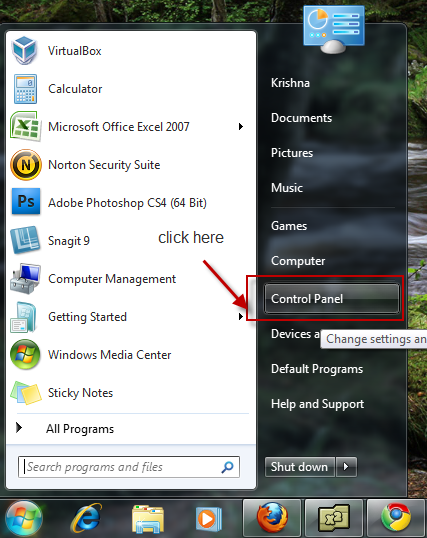
Step 1: Click on control panel under the Start Menu.
Step 2: Click on System and Security.
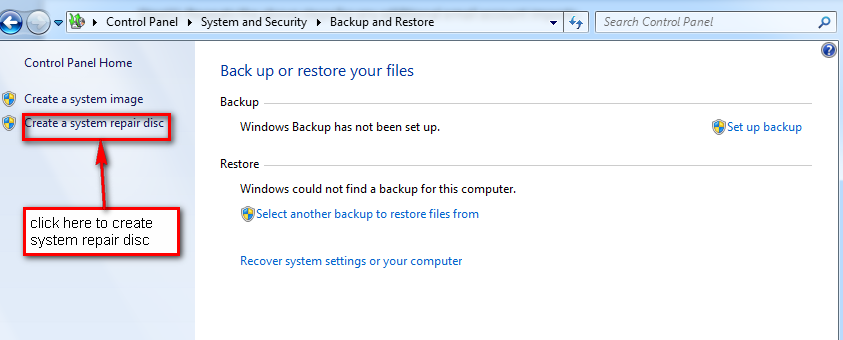
Step 3: Click on Backup and Restore.
Step 4: Click on Create a system repair disc.
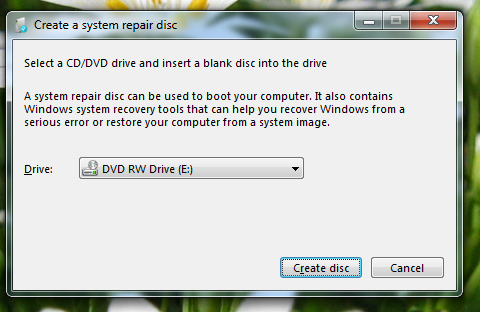
Step 5: After clicking on create a system repair disc, a window will pop up and ask you to select the CD/DVD drive you want to use to create the disc. It will also ask you to insert a blank disc into the drive.
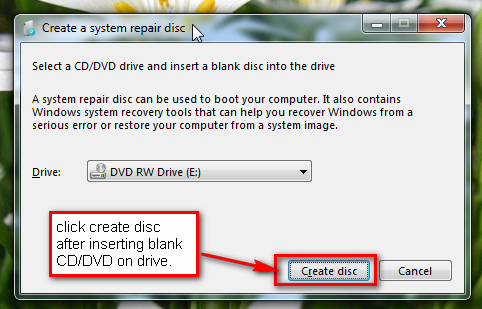
Step 6: Click on create disc after inserting blank CD/DVD.
Step 7: After you click on Create disc, Windows will check whether CD/DVD is valid and will start writing the disc.
Step 8: Wait for Windows to let you know that the disc was completed successfully. This may take a few minutes to complete.
Step 9: Your system repair disc is ready to use. We suggest that you keep this disc in a safe location (where you can find it) in case you have trouble with Windows 7 in the future.
When you finish, you’ll be able to boot into the system repair disc and work on your computer.
How to start the Windows 7 system recovery option:
Step 1: Insert the Windows 7 system recovery disc inn your DVD/CD drive
Step 2: Boot through CD/DVD (You may need to enable this by changing the boot order of your computer by pressing an F-Key when it boots up).
Step 3: Select the recovery tool that fits the problem your computer is experiencing.
