OS X El Capitan is Apple’s best Mac operating system and it comes with so many features it’s hard to remember them all. We’ve all seen the ordinary list of cool apps or hidden tips and features. However, if a user digs deeper, they can find some amazing tips and apps that will help OS X El Capitan run better, work faster or smarter and make us more productive. Here’s our list of 25 amazing OS X El Capitan tips and apps.
Amazing OS X Tips
We’ll start with tips since they work without downloading or buying any apps.
3 Ways to Access System Preferences
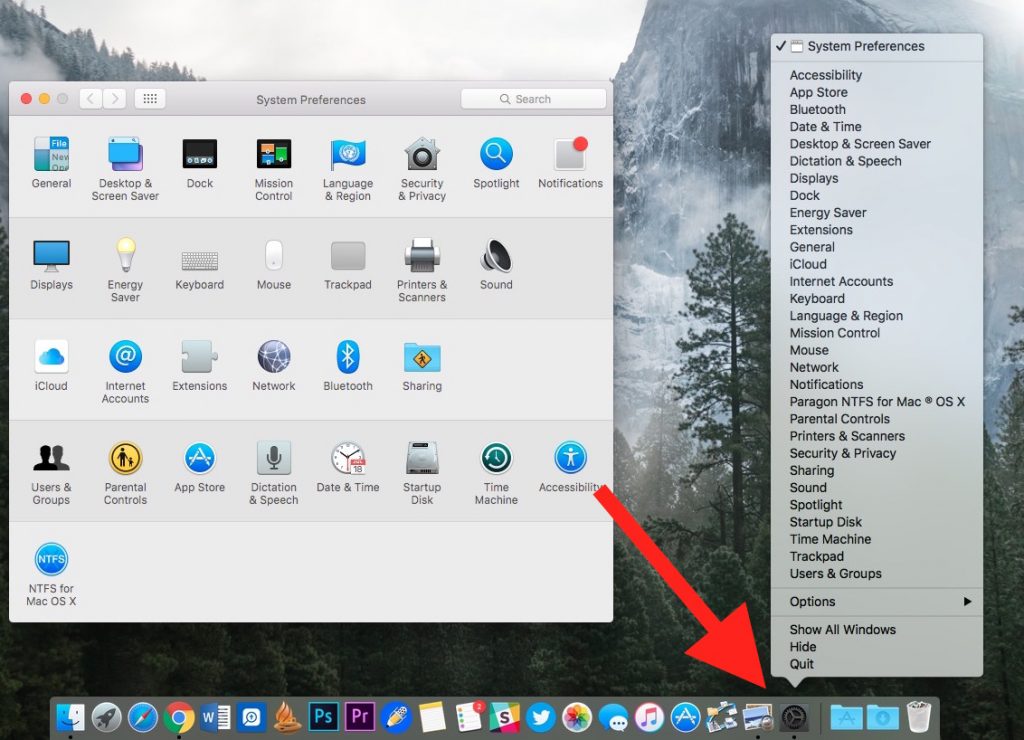
Users must often access their System preferences to adjust things like monitor settings and sound. Apple offers different ways to get to System Preferences. The app icons looks like a black and gray gear and sits by default on the OS X Dock towards the right side. It includes a lot of settings users can change. First, to quickly get to it, double-click the icon and the app launches. However, there’s a second faster way to get to a specific section inside System Preferences. Click and hold on the icon and a menu pops up listing all the System Preferences sections. Click one to open it. A third way to open System Preferences exists. Click the Apple icon in the menu bar at the top left of the OS X El Capitan screen. Then click on System Preferences to open the app.
![]()
Combine PDFs in Preview
I have a multi-function printer that will scan one side of paper at a time, but I have a book that I want to scan so I can read it in PDF format on my iPad instead of physical paper form. I took the book down to my local office store and had them cut off the binding. I don’t care about destroying the book. Then I scanned the pages to a PDF file using my multi-function printer. Unfortunately, this created two PDF files, one for the odd pages in the book and one for the even pages.
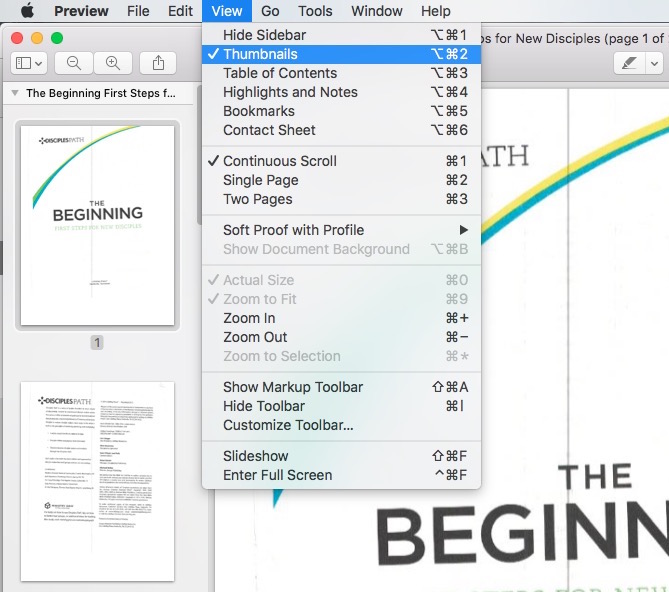
A simple way to combine PDF files uses the Preview app in OS X El Capitan. Open both PDF files and arrange them on-screen so you can see both. Then make sure the document’s thumbnails show up to the left of the document. Preview opens this way by default, but if you don’t see them click on View and then Thumbnails or use the keyboard shortcut COMMAND+OPTION+2.
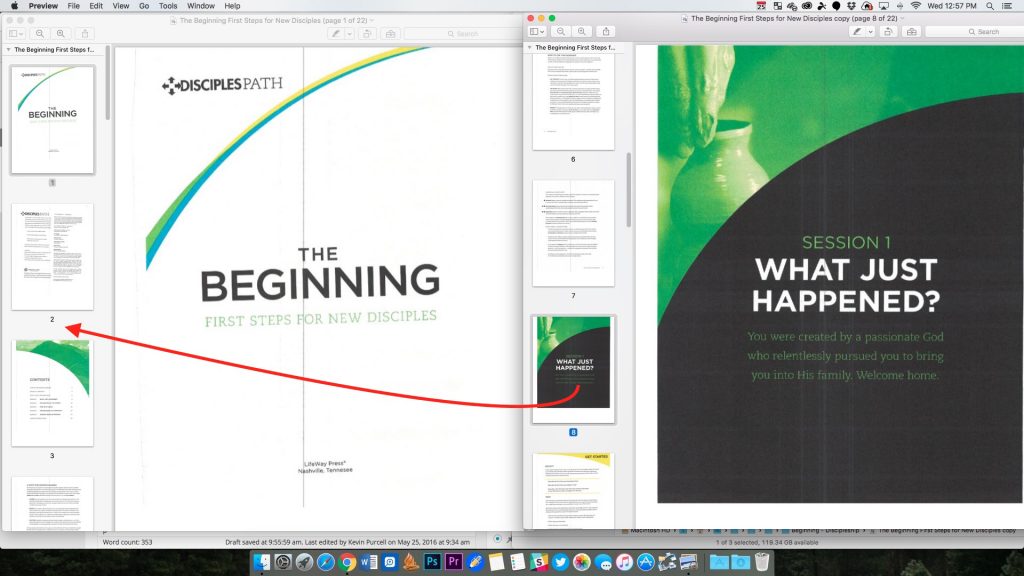
You’re ready to start copying the pages from one PDF file to the other. Grab page 2 from one file and drag it over and place it just below page 1 from the other file (see above). Keep doing this till all the pages are in place. Check the pages to make sure you properly arranged them in the proper order.
Speak OS X El Capitan Device Serial Number
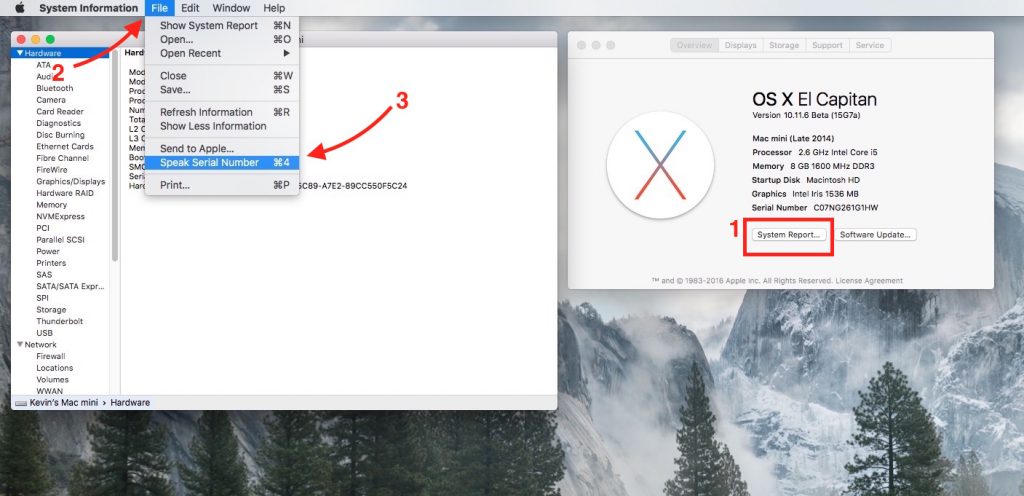
Have you ever needed to write your serial number down or tell Apple Care support what it is while on the phone with them? Maybe you want to type it into an eBay auction to sell it. Instead of looking up and down repeatedly, go to the Apple menu in the upper left corner and click on the icon. Choose About This Mac. You’ll see it there in the ensuing window or you can click on System Report… and then File and Speak Serial Number. You can also use COMMAND + 4 while the System Report windows is active.
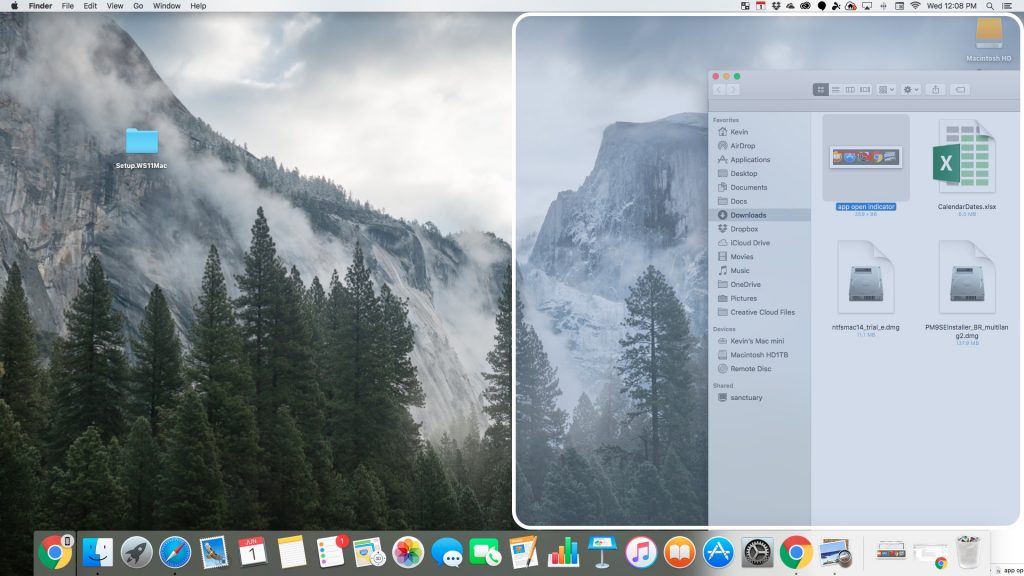
Use the OS X El Capitan Split Screen Mode

A new feature in OS X El Capitan called Split Screen will help users arrange two windows on the screen at one time, much like Windows started doing a long time ago. To use it, click and hold on the green dot in the upper left corner of supported apps and programs. Half the screen will turn a different shade, as seen above. Drag the window to that side or the other side depending on where you want to put it. Let go and it will offer to put another open app in the other side. If you let go of the green dot and then click again the app window you held with the green dot, that window will fill the screen instead of just the half you dragged it to.
Go Full Screen with an Application Window
Using the tip above, drag the green dot in the upper left corner of a Window to put it in one half of the screen. Instead of clicking a second app to fill the other, just click on the first app window again and it will fill the entire screen.
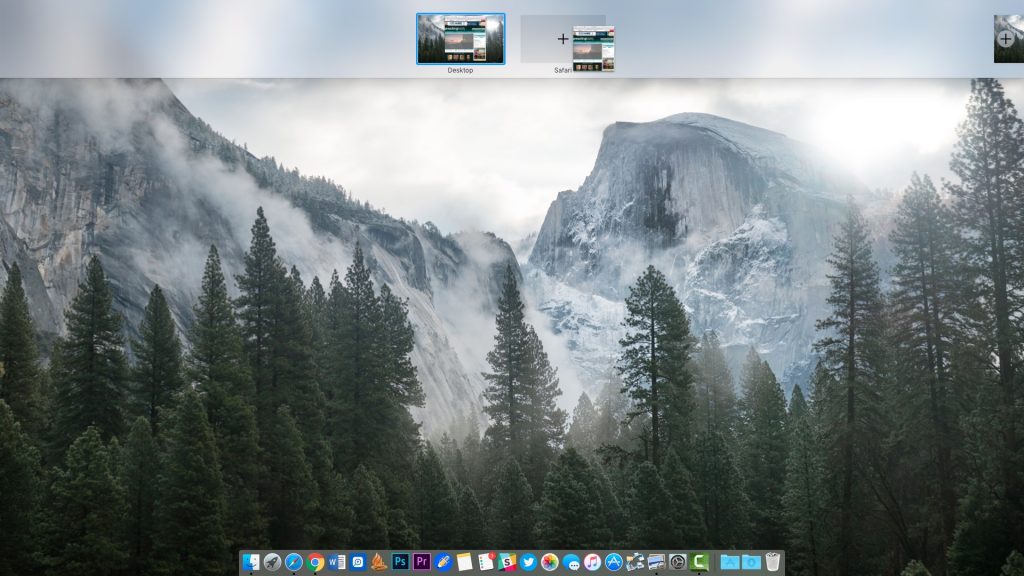
Alternatively, the user can drag from the top edge of an open Window that’s not in fullscreen mode and drag it up to the top center of the screen. This shows the Desktop organizer in El Capitan. Drag the Window’s thumbnail to any of the showing Desktop thumbnails. This will put the Window into half screen mode with any app on that Desktop. Or drag the thumbnail to the plus icon at the far right to create a new Desktop. This will put that app window in full-screen mode by itself.
There’s a better way to put apps in full-screen mode or split screen mode using an app called BetterSnapTool. See the tip about that app below.
Use Tabs in Finder for Faster File Browsing
Apple added a new feature in Finder for faster file browsing. We still want dual pane view in Finder, but you can get that with a great app (see Commander One below). Until Apple adds dual panes, we can use multiple tabs to open a few folders and work with them in Finder at the same time.
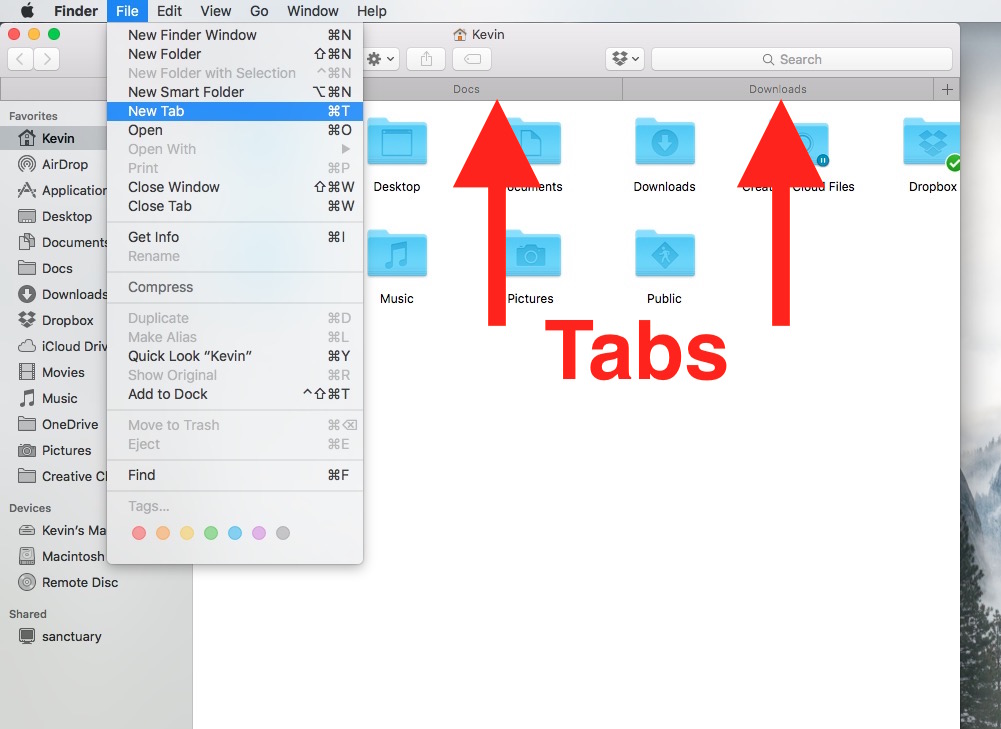
To open a new tab, use one of three methods.
- Use menus – Click on File and then New Tab
- Keyboard shortcut – COMMAND + T
- Right-click – use your mouse or trackpad to right-click on a folder and choose Open in New Tab
Once you open a few tabs, you can reopen the Finder window by clicking on the Finder icon on the Dock and all the tabs will still show up unless you close them individually.
Take Control of the OS X Dock
The default OS X Dock shows a lot of the built-in programs. It also includes a pair of folders for Downloads and the Trash on the right end. A lot of users don’t use all the built-in apps and do use installed software instead.
![]()
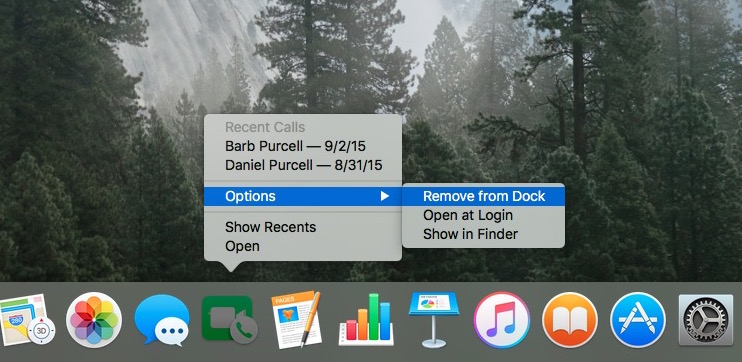
To remove apps from the Dock, drag the icon to the Trash icon. Another way is to right-click the icons and choose Options and Remove from Dock.
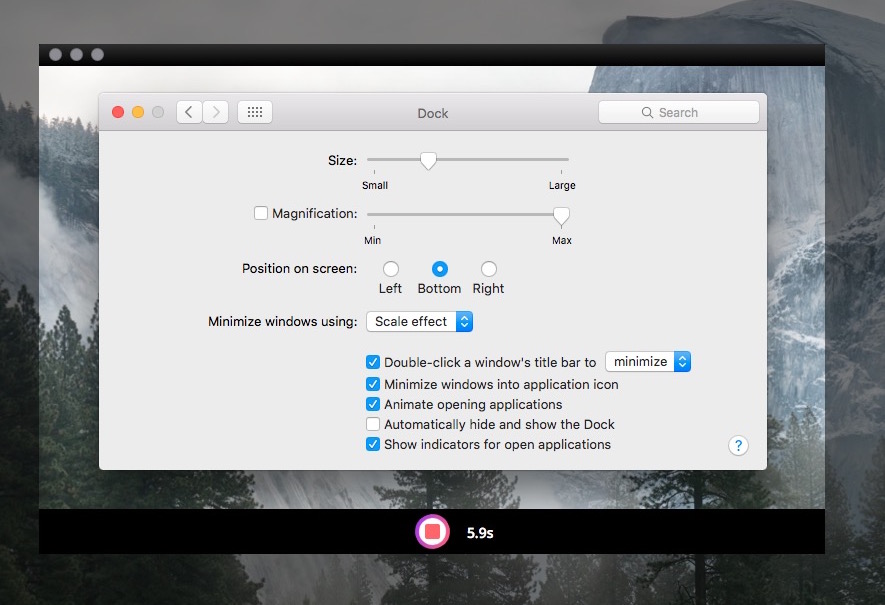
Now, open the Settings for the Dock from inside System Preferences using the steps above.
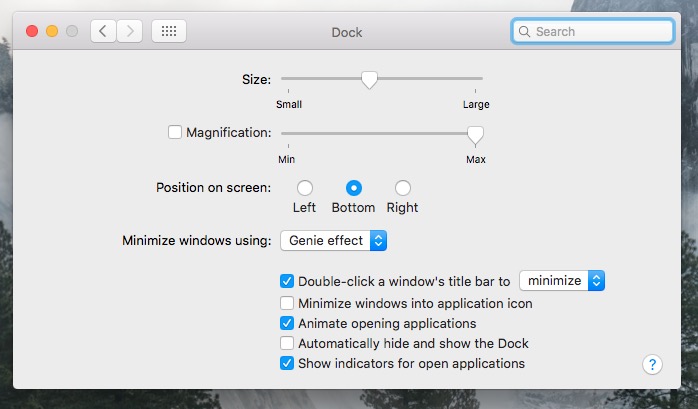
Change the Dock by using the settings in this dialog box to set things up the way you prefer.
- Size – drag the slider to make it smaller or bigger depending on your preferences.
- Magnification – put a check mark in the check box and then change the size of the magnification, which controls how big the icons grow to when you mouse over the Dock.
- Position on screen – some people prefer to put their Dock on the left or right instead of the bottom, which is the default.
- Minimize windows using: – this changes the way open windows transition down to the Dock. This is an animation and the options are as follows:
- Genie effect – the lower part of the window shrinks first and flows down into the Dock icon.
- Scale effect – the windows shrinks down into the Dock icon.
- Double-click a window’s title bar – controls what happens when you double-click the window menu bar on the title. Click the drop down box to choose your preference with options listed below:
- Minimize – disappears to the Dock.
- Zoom – fills the screen or shrinks down to previous size before maximizing it.
- Minimize windows into application icon – check this and instead of putting a new icon next to the trash icon on the Dock, the window minimizes down into the app’s Dock icon and you’ll have to click and hold on the Dock icon to see the app’s windows open.
- Animate opening applications – turns on/off the bouncing icon animation when you click an app icon to open it.
- Automatically hide and show the Dock – you can hide the dock and only show it when you mouse down or over to the edge of the screen.
- Show indicators for open applications – shows a black circle below an app icon to show that it’s open (see below).

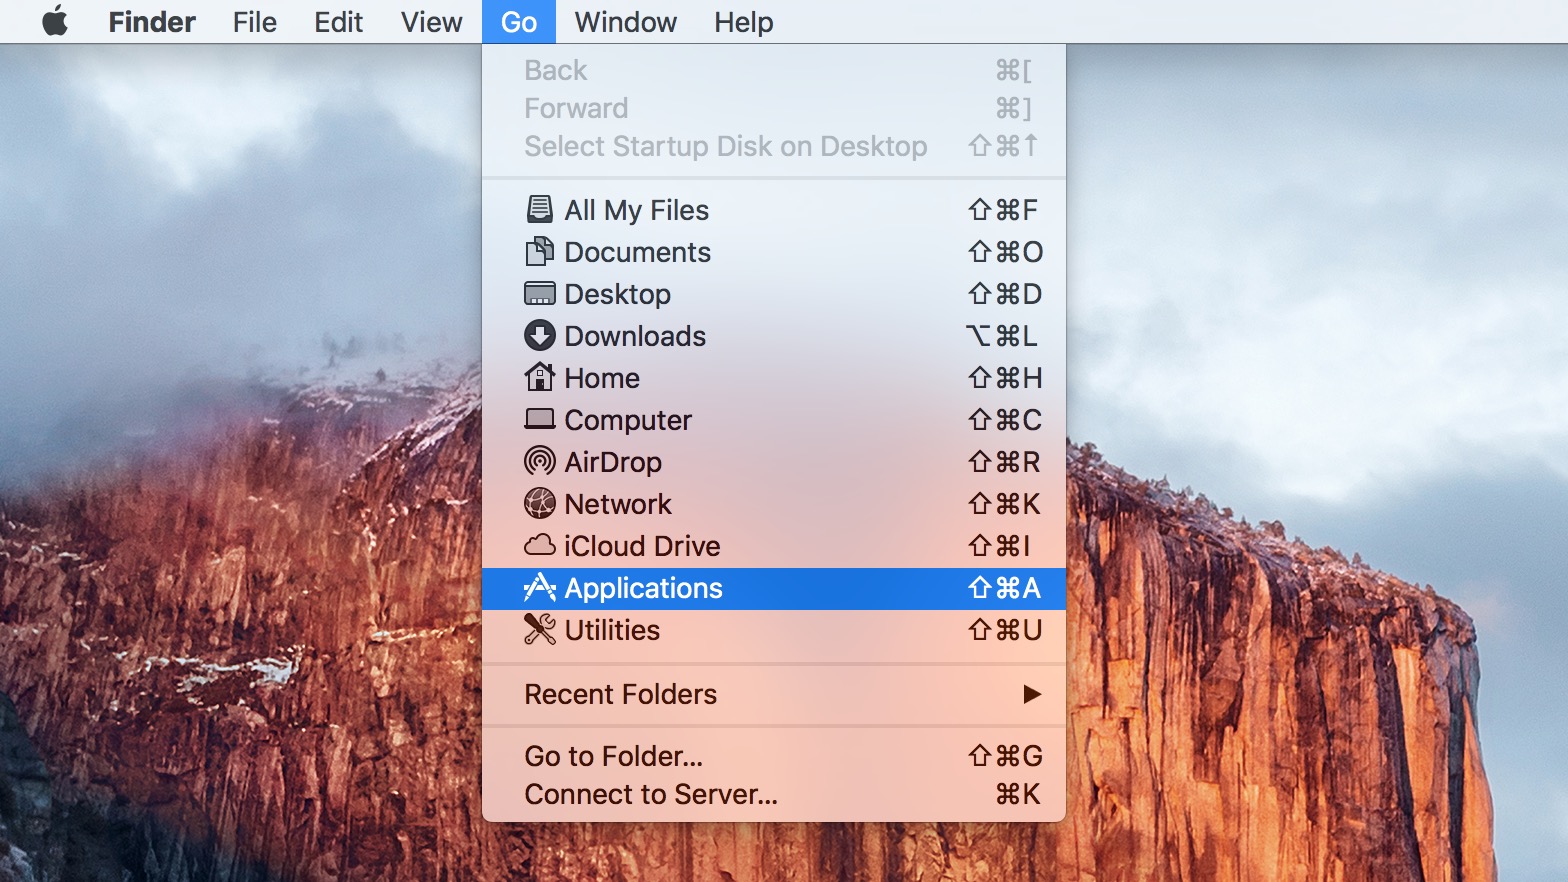
Add an Applications Menu to Dock
Windows users moving to Mac might long for the day of the Start menu which holds all the application icons ready for users to click to start the app. You can create a menu like this on the Mac Dock too.
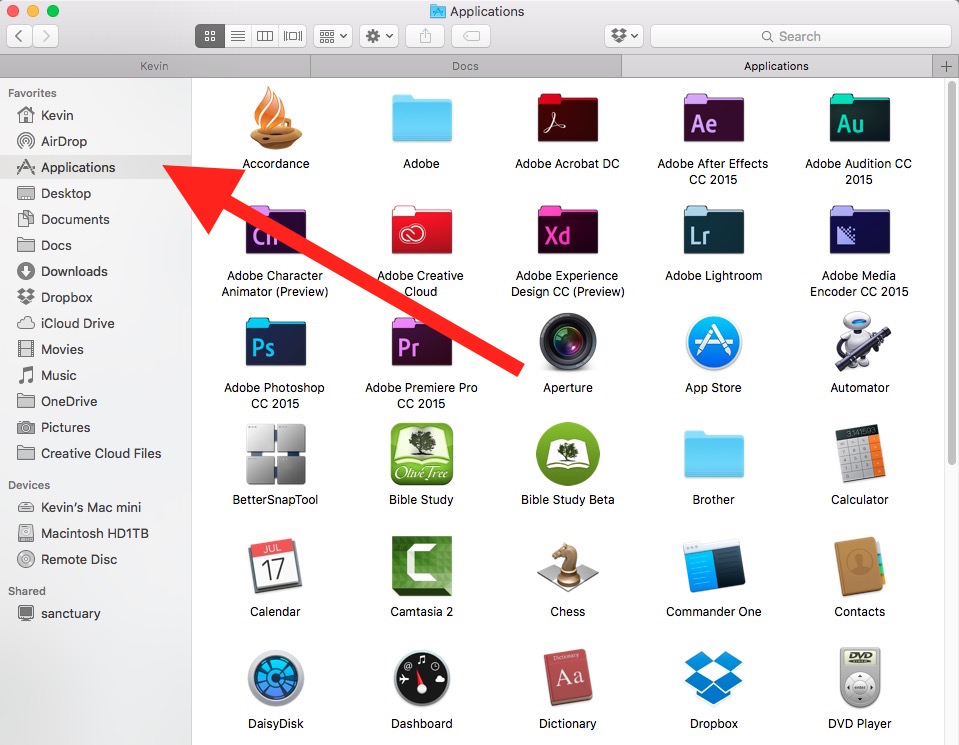
Open Finder and look for the Applications folder under your default user’s home folder. Drag that folder to your Dock. You can’t put it on the left end mimicking where a Start menu on Windows shows up. I put it first in the section sharing space with the trash can as seen below.
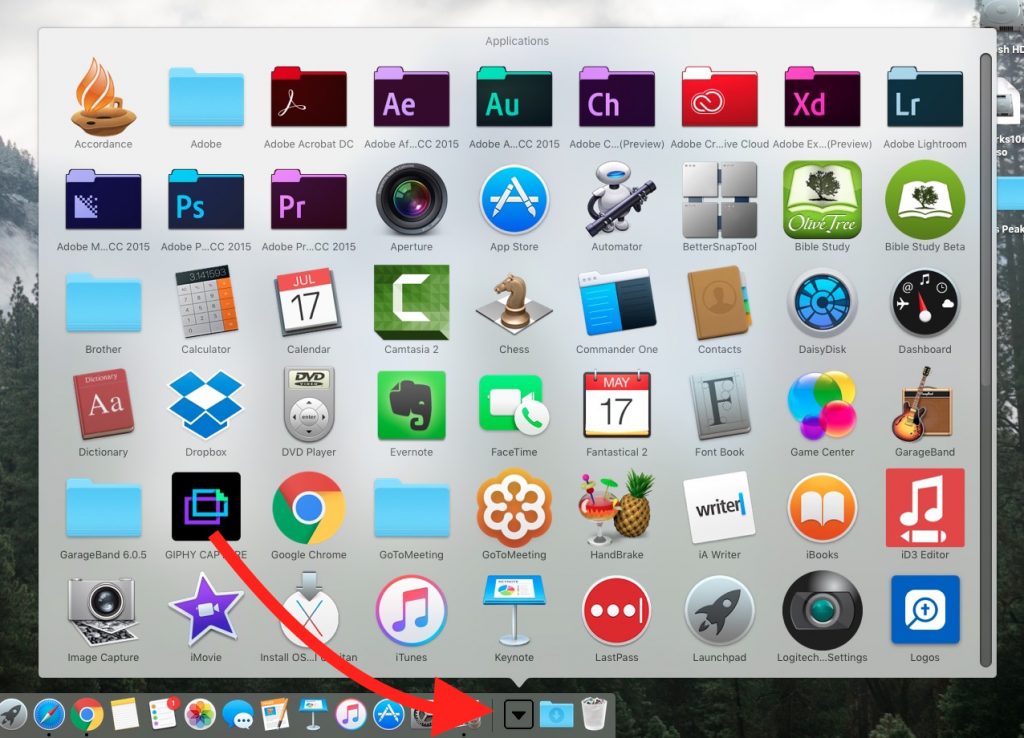
Customize what the folder looks like. To make it work like a Windows Start menu, right-click the folder and choose the following settings in the menu that pops up.
- Sort by Name
- Display as either Folder or Stack. I prefer Folder instead of Stack which looks like a stack of app icons because it looks cleaner
- View content as a List, which makes it more like the Windows Start menu.
To make it look like the screenshot above, choose View content as Grid.
Restore the Default OS X Dock
To go back to the default OS X Dock, open Terminal and enter the following command by copying it from here and pasting it into Terminal. Then press Enter to execute it.
defaults delete com.apple.dock; killall Dock
This will result in the following in OS X 10.11 El Capitan.

Amazing OS X Apps
Next lets look at some amazing OS X El Capitan apps. Many of these may also work on older versions of OS X.
BetterSnapTool
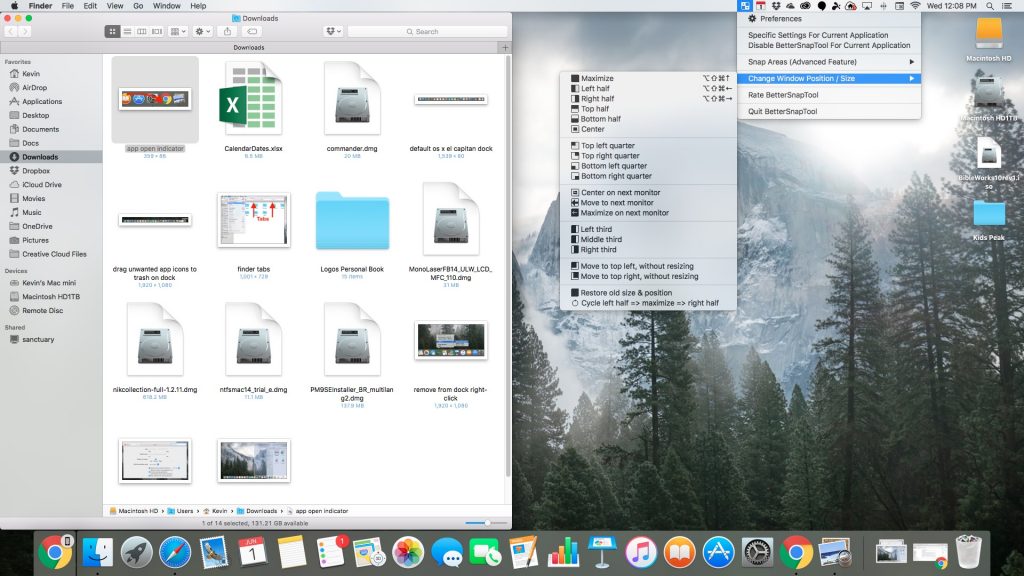
BetterSnapTool ($2.99) does a better job of snapping windows into place than the new Split Screen Mode feature in OS X. The new Split Screen Mode doesn’t do as much as BetterSnapTool either and it’s harder to use (see above how to use it). BetterSnapTool works faster and more quickly, but doesn’t work as well with multiple desktops like the built-in tool. If you don’t use that feature and don’t mind paying a few bucks, get BetterSnapTool instead. It’s well worth the cost for the better features.
With the app, drag a window to one side of the screen or the other to put it in that half. Drag it to the top of the screen to fill the screen, but not go into full screen mode. This way the Dock and Menubar of OS X still show up if you want them to. Users can also change settings on a per app basis. The app does a lot more than this, so go check it out.
Commander One
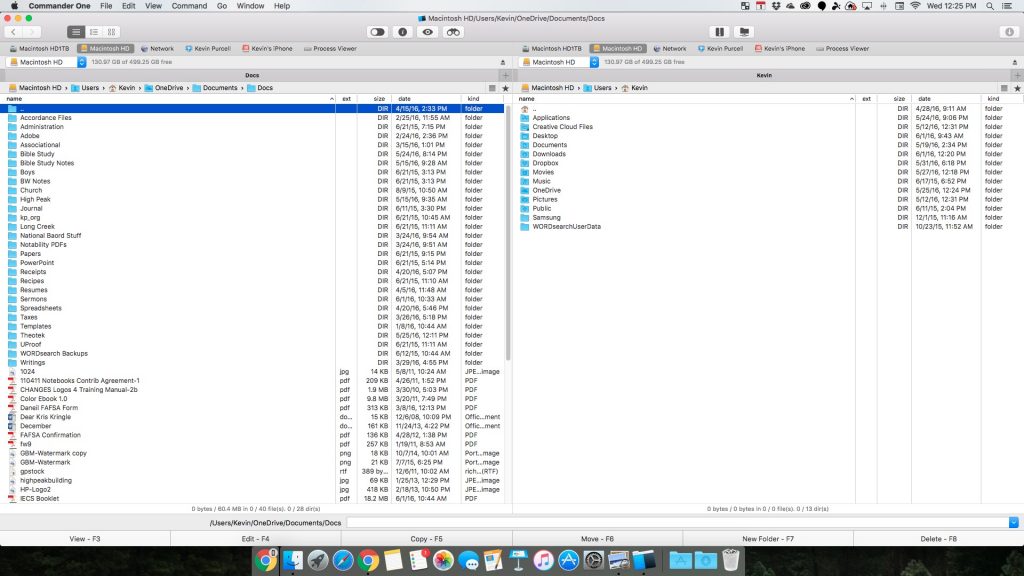
We mentioned Finder tabs above, but a Finder replacement like Commander One (Free to try, $29.95 for Pro) will let you do dual-pane browsing of your Mac files. We reviewed another option called Forklift earlier which costs $10 less but doesn’t offer as many features.
Parallels Access
Back to My Mac works okay for remote access to a Mac, but it’s not as versatile as something like Parallels Access ($19.99/year), which recently updated their utility. The software installs on the Mac and a client program installs on an iPad or iPhone to give users remote access to their apps installed on a Mac via tablet or phone.
The above video shows it working on Android. It also works on Windows and their recent update makes it a powerful tool for people who want to reach their Windows programs in a browser or on their mobile iOS app.
Fantastical 2
Fantastical 2 is popular among Mac users. However, some might wonder if it’s still worth the price now that the company charges a whopping $50 for the Mac version? Yes and no.

People who bought the old version of Fantastical for far less and began using it know how beneficial the app is. It sits in the Menubar on a Mac and you click it to enter a new appointment using natural language. It’s so much simpler than the built-in Mac Calendar app. The app interfaces with the built-in Calendar so you don’t have to choose between the two. Use Fantastical for quick entry of appointments and to quickly see your day’s tasks and schedule. Use the larger Calendar when you need a large screen version of your calendar.
However, people who own the old version won’t find enough new to upgrade. Since it’s not available, new users will need to buy the new version. I wish it cost about half of the $50 price, but I also won’t do without it any longer.
DaisyDisk
To find out what files and folders hog your Mac OS X drive, use a program like DaisyDisk ($9.99). The utility scans the SSD or Hard Drive to find all the files and shows the folders size in a pie chart with colors to easily see what’s gobbling up all the space.
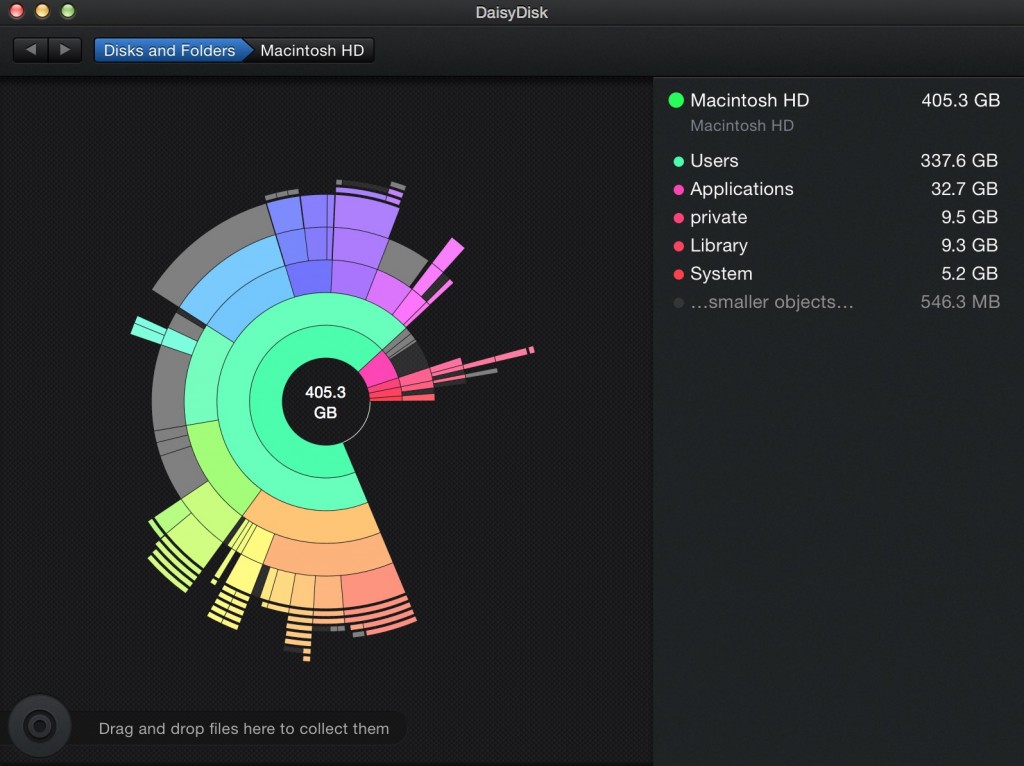
See what’s cluttering up a Mac hard drive using DaisyDisk.
When the user finds folders or files taking up too much space, they can archive them or move them to free up space. To “collect” the files drag them to the circle in the lower left corner. Then after collecting the files and folders you can choose what to do with them.
Reflector 2
The most powerful way to show your iPhone or iPad on your Mac is by using Reflector 2 ($14.99). Why would you want to do this? To stream from a mobile device to a computer that’s hooked up to a TV, Monitor or Projector.

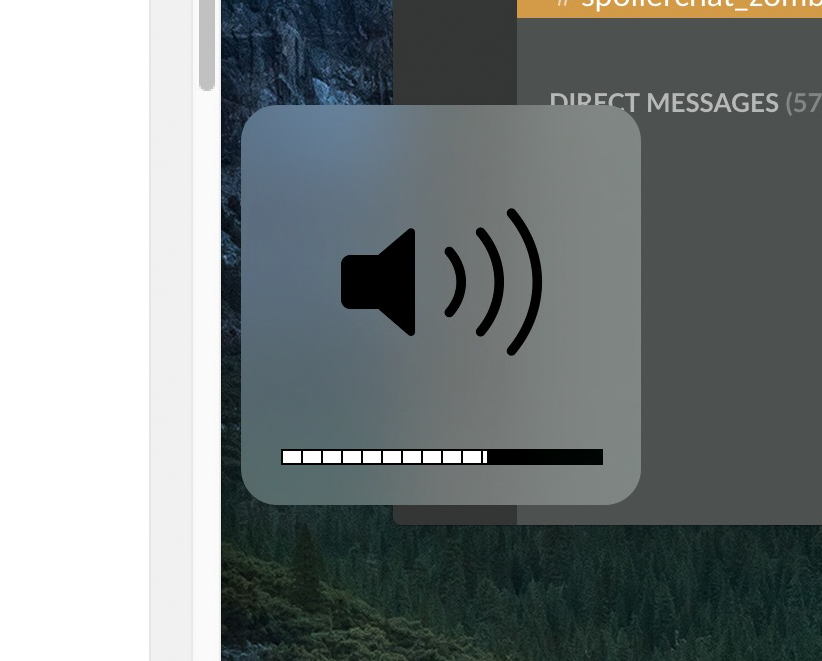
Reflector 2 not only works with iOS, but also with Android. On Android it uses the Google Cast Receiver function. Right now there’s a slight bug that keeps some Android phones from working properly. You see the screen, but it keeps showing as “connecting” as in the image below.
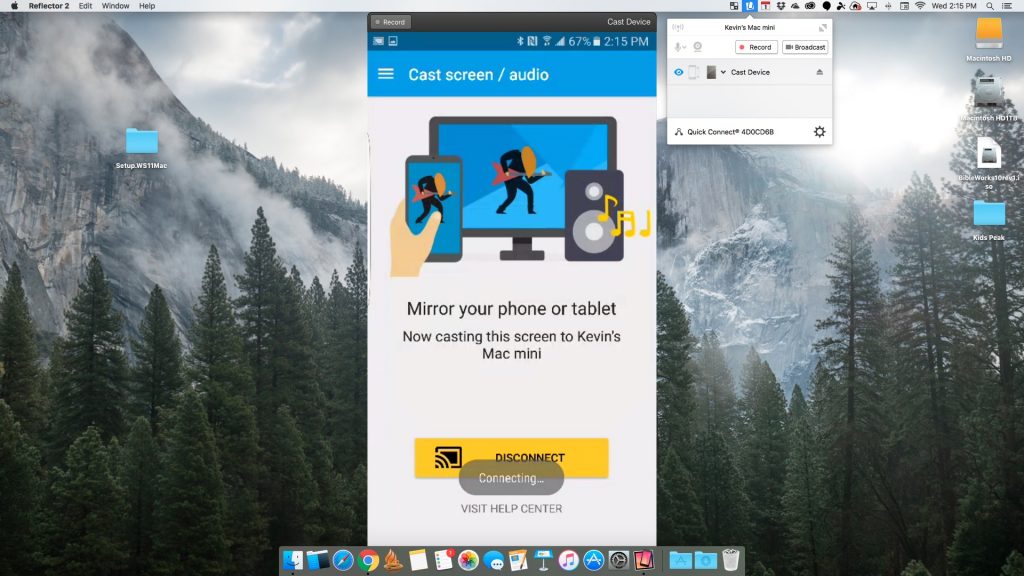
If you’re using iOS, you can make use of the app and it works well. It turns your Mac into something like an Apple TV for screen sharing.
Nik Collection from Google
Photographers used to use the Nik Software for professional photo editing. Google bought the company and lowered the price, but then recently made the tools free. Hurry up and get them because we don’t know how long they’ll keep offering these awesome photography plugins.
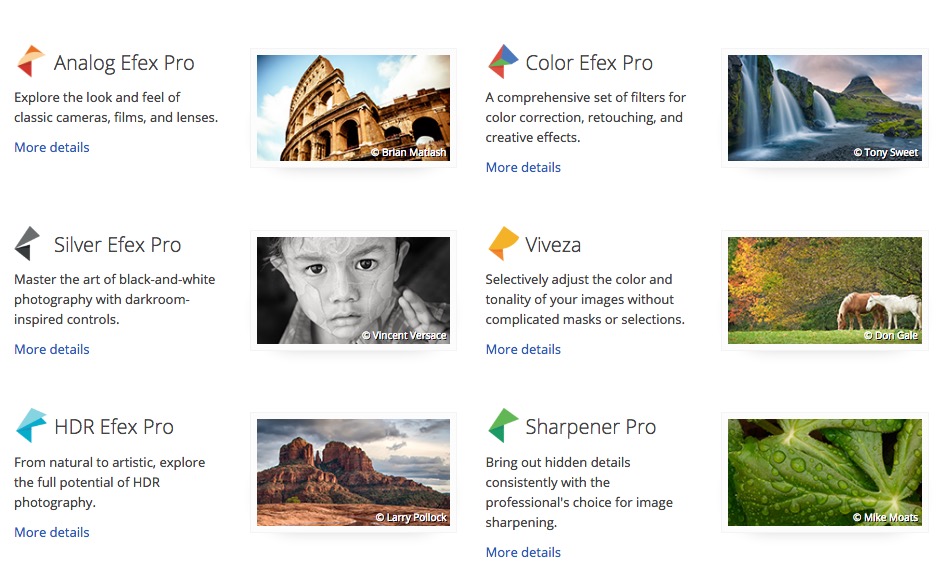
The included tools are like filters in Instagram, but they do far more and pros swear by them. They sharpen photos or turn them into HDR images. Users can also get awesome black and white images.
AppCleaner
Some Mac app developers don’t do a good job of coding their apps. This results in stuff getting left when you drag the app icon from the Applications folder into the trash or right-click it and delete it. That’s supposed to get rid of everything on the computer, but it doesn’t. AppCleaner is a free utility that effectively cleans up apps. Instead of dragging to the trash can, drag the app icon to the AppCleaner window.
The animated GIF above shows how to drag the icon onto AppCleaner. After you do this, it will show a list of all that AppCleaner will delete (see below).
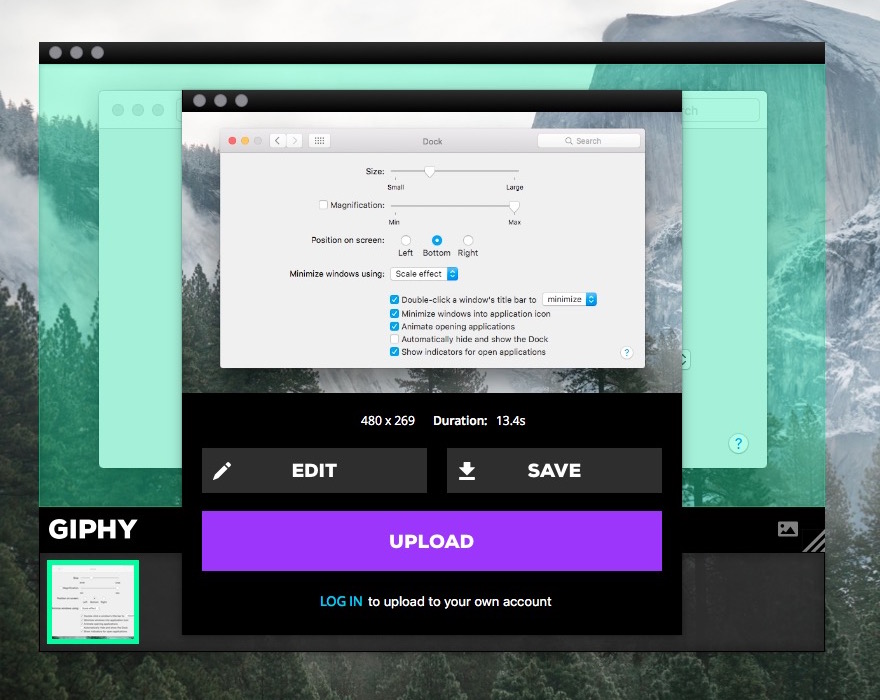
GIPHY CAPTURE
I used GIPHY CAPTURE to create the above animated GIF files. It creates animated GIFs from the screen of the Mac. It’s like screen capture software only it makes animated GIFs instead of a JPG or PNG file.
Open the app and place the translucent window over what you want to capture. Press the record button and do what you want included in the animated GIF. Then save it to your Mac or upload it online. It’s free and simple to use.
Convert2MP3.com
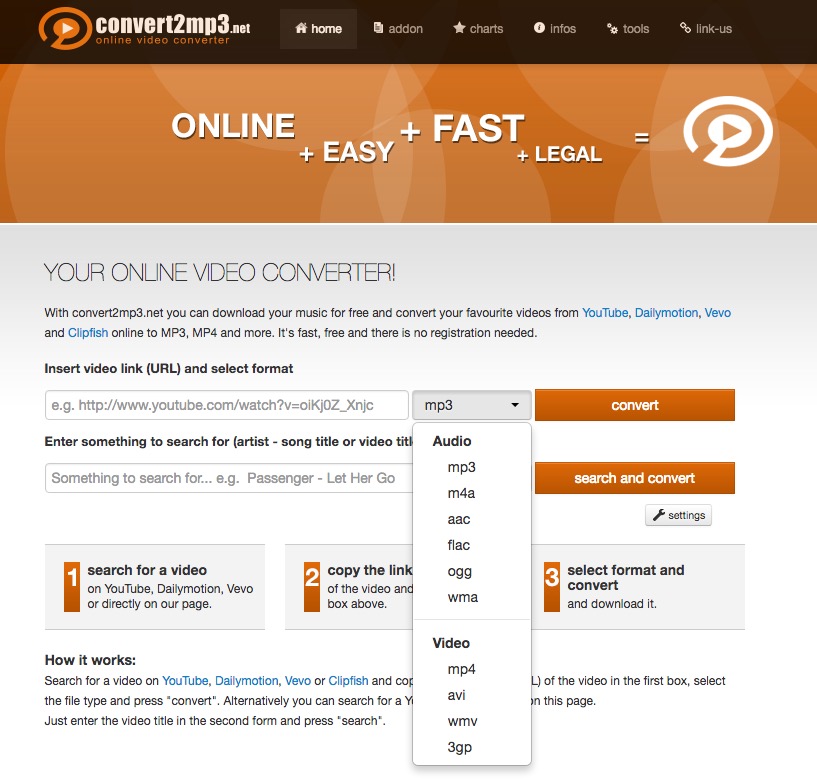
The last suggestion isn’t an app, but a website that converts YouTube videos into MP3 files. I use Convert2MP3.com to covert my podcast. Copy the YouTube video URL to page’s box and hit Convert and it will start to rip just the audio and turn it into an MP3 file with decent quality sound. After hitting convert, it shows another page that even adds a couple of basic ID3 tags.
If you don’t want to make MP3 files click the drop down menu and pick M4A, AAC and others. It also turns videos into MP4, AVI or WMV files.
Related Posts
-
Apple has a long history of sprinkling Easter eggs, shortcuts, and other hard-to-find tricks throughout…
-
Like on a PC, most of your Mac's software lives in the same place on…
-

The OS X Notes app got more powerful in OS X El Capitan and iOS…