Over the past few years computers have gotten extremely powerful, which has made things once possible only on large server computers common on desktops and laptops. Virtualization is one such utility which is now available and affordable on most systems.
What is Virtualization?
Virtualization is the ability to run more than one operating system on top of another operating system using virtualization software. Virtualization makes running multiple operating systems convenient and less invasive than older methods, such as setting up partitions and configuring boot options. Virtualization is also a great solution for handling compatibility with older applications.
In this article, we take a look at some of the other virtualization programs out there, and how to install and set them up.
Windows Virtual PC
We took a look at installing and using Windows Virtual PC with Windows XP Mode a couple years ago, so I will not go into too much detail since you can refer to that article for detailed instructions. Windows Virtual PC is provided as a free download to customers running Windows 7. If you are running Windows 7 Professional, Enterprise or ultimate editions, Windows Virtual PC is included along with Windows XP Mode. This is a preconfigured Windows XP Professional SP3 .VHD (Virtual Hard Disk) file you can use to run your older programs that are not designed for Windows 7. If you are running Windows 7 Home Premium, you can download Windows Virtual PC and use it with your own Windows license if you wish.
Let’s take a look at setting up a Virtual Machine in Windows Virtual PC.
First you need to download Windows Virtual PC:
You need to install Windows 6.1-KB958559-x64 or x86 depending on the architecture of Windows 7 you are running, 32 or 64 bit.
Windows Virtual PC can be downloaded from https://www.windows.com/business/downloads.
For more information on system requirements, go to https://www.microsoft.com/virtual-pc.
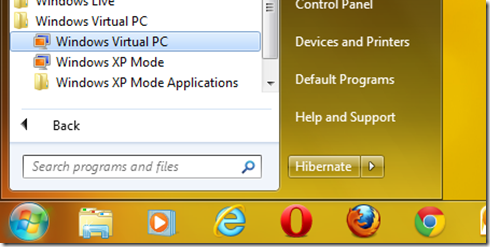
Once Windows Virtual PC is installed, click Start > All Programs > Windows Virtual PC > Windows Virtual PC. If it is not listed, try the following:
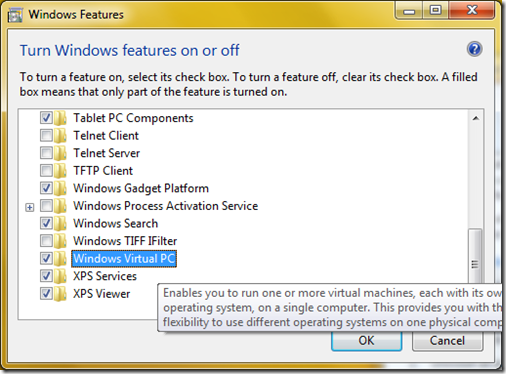
Click Start, type: turn windows features on or off, then hit Enter on your keyboard.
Make sure that Windows Virtual PC is checked. Click OK, restart your computer if prompted.
If all goes well, launch Windows Virtual PC from Start menu > All Programs.
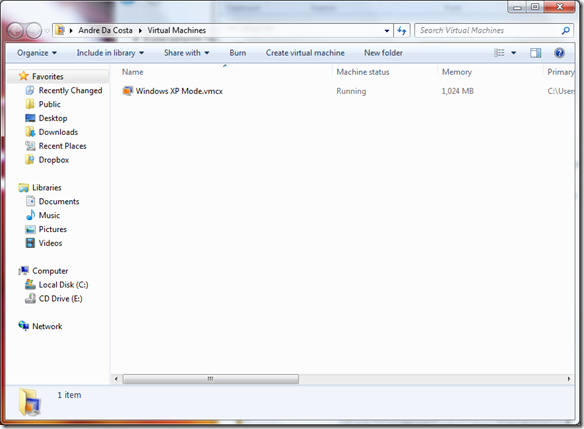
The Windows Virtual PC interface looks like a typical Windows Explorer. I already have a virtual machine setup, but if I would like to add another one I can do so. Let’s take a look at doing that. On the command bar, click the ‘Create virtual machine’ button.
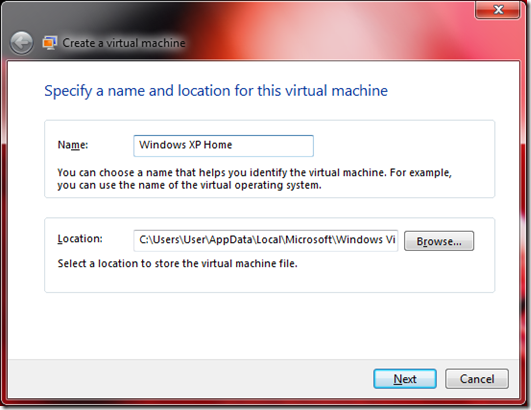
This will start the Create a virtual machine wizard. In the above wizard page, you can enter details about the Virtual Machine such as its name to help identify it if you have more than one Virtual Machine setup. You can also choose a location where you would like to store this virtual machine. In regards to virtual machine, just go with the defaults. Once you have filled in these details, click Next.
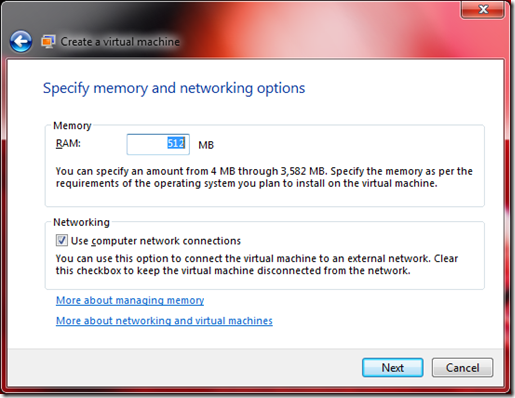
Depending on the version and edition of Windows you would like to run, you might need to allocate more memory than the default 512 MBs of RAM. Versions of Windows such as Windows Vista and Windows 7 will need more. This also means the host system will need to have enough memory to run it and the virtual machine at the same time. When it comes to virtual machines, the more memory the better. Since I am using Windows XP for this article, 512 MBs should be more than enough. But if you plan on running many older programs, consider increasing that to at least 1 GB (1024 MBs).
Another option is Networking, if you plan on keeping the virtual machine maintained and updated, you will need to have an Internet connection for Windows Updates, and obtain any available application updates. This is especially important for protection software such as Antivirus utilities in your Virtual Machine. Once you have made the appropriate adjustments, click Next.
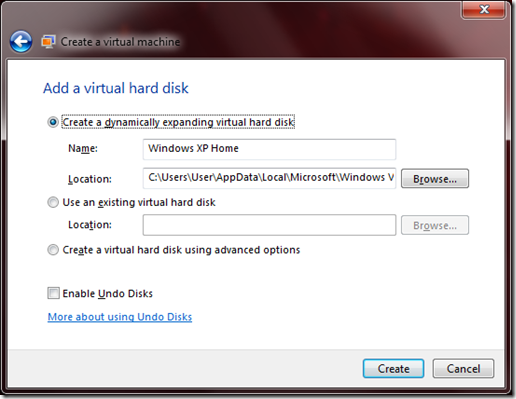
The above screen provides several options for adding a virtual hard disk which will be used to store and access the operating system. I recommend you go with the default since it will be less complicated and easier to manage. You can run into limitations if you create a fixed virtual hard disk and later find out you didn’t create it with enough space. If you already have an existing .VHD file, you can add it and use it. In this particular case, we are creating a new one. After selecting the appropriate options, click Create.
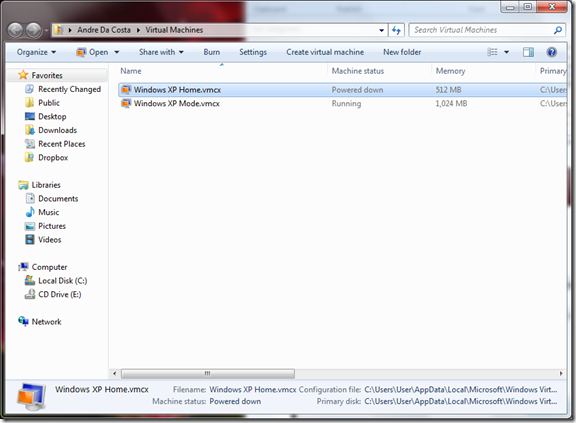
Go back to the Virtual Machines window. There you will see the virtual machine we just created listed. Its status at the moment is powered down. To install Windows, insert your Windows disc in the disc drive. Select the virtual machine and click Open on the command bar.
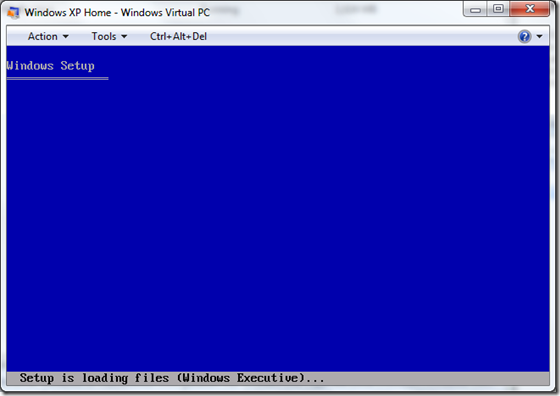
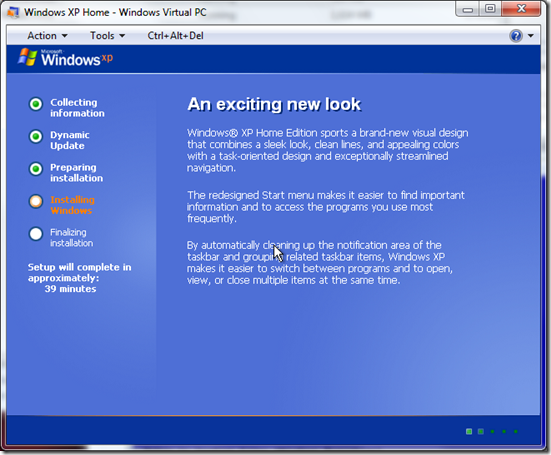
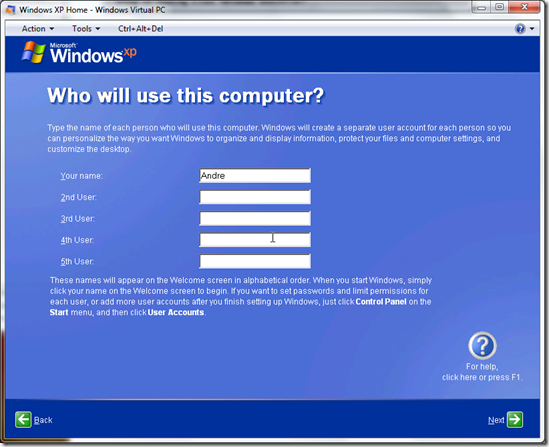
The virtual machine will boot from the Windows disc and setup will begin loading files. It functions just like you normally would expect on a physical machine. Follow the on screen instructions to install your desired version of Windows.
Installing Windows XP in Windows Virtual PC on Windows 7
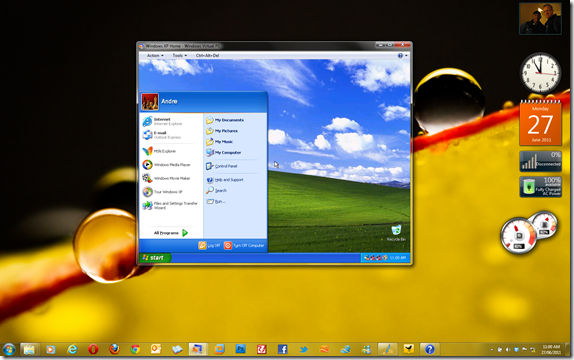
Using a virtual machine is just like using a physical PC
The above screenshot shows virtualization software, which is a computer within a computer.
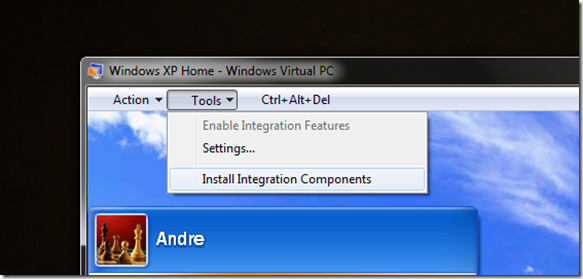
After you have setup Windows in Windows Virtual PC you can do some additional tasks, like install the integration components which will make the virtual machine perform better and easily switch between the virtual machine and host operating system.
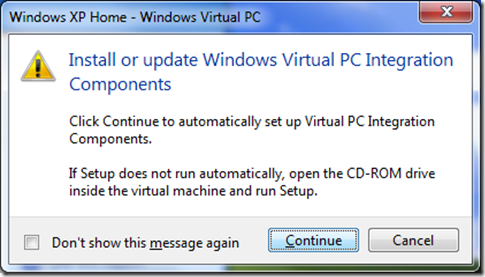
At the top of the Windows Virtual PC window, click the Tools menu and click Install Integration Components.
Click Continue.
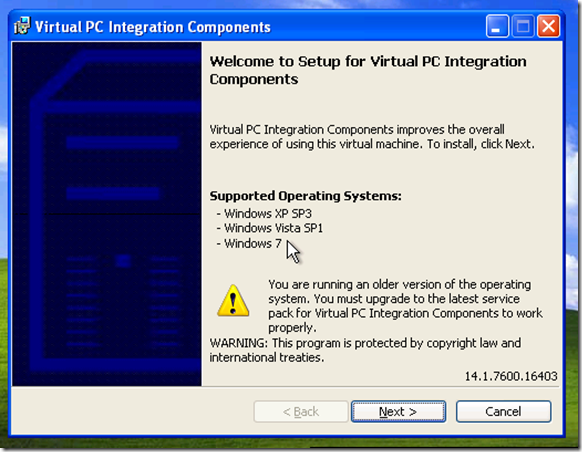
This will start the setup wizard in the virtual operating system. Follow the on screen instructions. If you don’t meet the minimum requirements you will need to resolve those issues first before continuing. As you can see, Windows Virtual PC requires that Windows XP has SP3 installed before it can proceed.
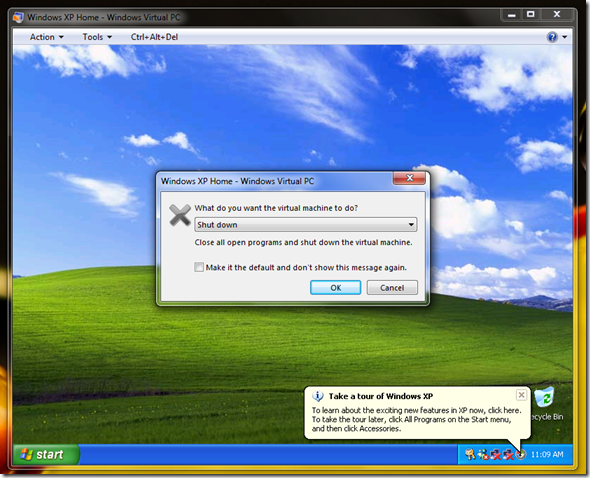
When you are finish using the virtual machine, you can shut it down by clicking the close button. You will be prompted for an action, whether you want to put it to sleep, shut it down or turn off the computer. Choose the desired action and click OK.
