Many of you have Microsoft Access installed on your computer and aren’t taking advantage of it. But a database can be a tool that solves many of your problems.
What is a database?
A database is a container which stores a variety of information. The principal way of storing information in a Microsoft Access database is with tables. You can use a database to store information about the students in a school, members of a church, your friends or varieties of plants in your garden. You can then use that information to search for particular information for referencing purposes, do mathematical operations and sort your data using simple commands from customized menus.
A description of the Microsoft Access 2010 interface (click to enlarge).
What is a Table?
A table contains all the information about a specific subject. Each row in a table is called a record. Every record is unique and made up of elements called fields. Before creating a table in Access, decide on all the fields that will make up your record. Each field in the record must be given a:
- field name
- field type
- field description
Other field properties become necessary depending on the field type chosen. For our first database, we will focus on creating our first table.
Create your first database
First, launch Microsoft Access. Click Start, type: access 2010.
Hit Enter on your keyboard. Alternatively, you can click Start > All Programs > Microsoft Office > Microsoft Office Access 2010. Please note that Microsoft Office Access is only available in the Professional edition of Microsoft Office, and as a standalone application. If you would like to try it out for the purposes of this article you can download a free trial, which you can use for 60 days, here.
In Microsoft Access, select Blank Database under Available Templates.
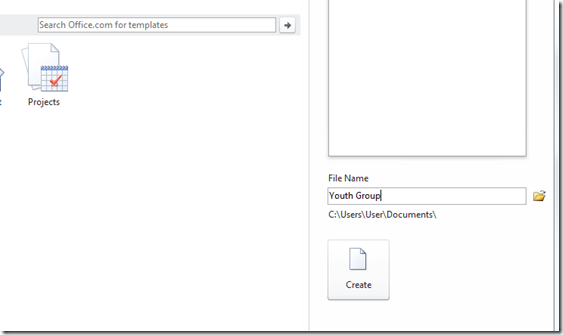
Give the database file a name. For the purposes of this article I will call mine “Youth Group.” Click Create.
By default, Microsoft Access will setup a preconfigured table for us. But we want to customize it a bit. In the Home tab, click in the View group and click Design View.
In design view we can customize the attributes of our database. Before proceeding we are prompted to give our table a name. I will call this table ‘Members’ since I am creating a database of all the members in my local youth group.
Click OK when complete.
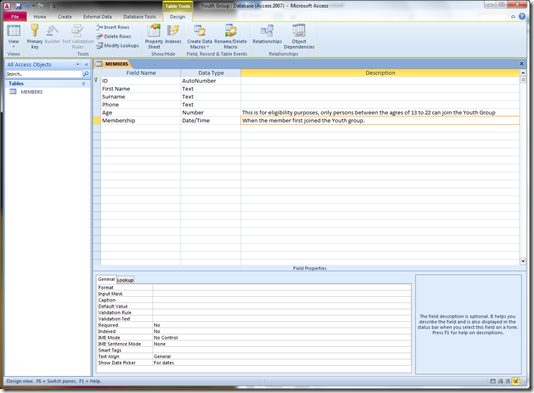
We are now in what is called the Data Dictionary view of Access. Here we have control over designing our database. Specifically, we can control details about the table that will contain the information about the members of my youth group. As we noted earlier, a database is used to store information. So we will create a table of some information we would like to keep about members here. This can include things like: first name, surname, phone number, age and membership. These attributes will constitute the fields that make up the table in our database of members.
Let’s start entering the information.
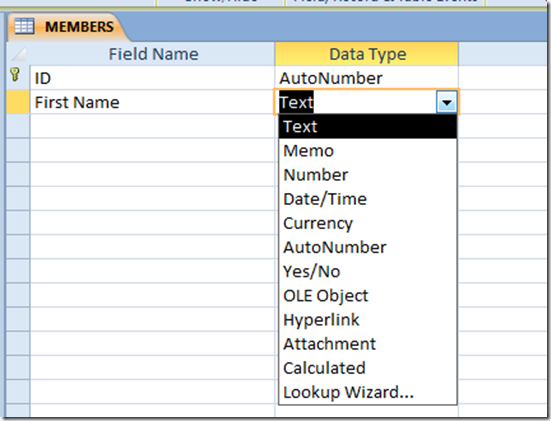
In the above screenshot I entered my first field, which is “First Name.” the Data Type for this field would be Text. When we define the data type it lets Access know what kind of value to allow in a field. This lets us keep strict control over the information entered into the database. So if more than one person uses and updates the information, they have to enter the right information every time.
As you can see, there are a variety of data types. Let’s describe some of the common ones we will use:
| Table | Text or combination of text and numbers, such as names and addresses also numbers that do not require mathematical operations to be performed on them, for example, a person’s phone number. |
| Memo | Entries that are too long to be used as a text, for example, a paragraph. |
| Number | Numeric data to be used for mathematical calculations, except monetary calculations. |
| Currency | Used for data that involve currency. |
| Yes/No | Field that contains one of two values. |
| Date/Time | Use for date fields. |
In the above screenshot, we provide a description of the purposes of this field. This can be quite useful if more than one person is involved in designing the database.
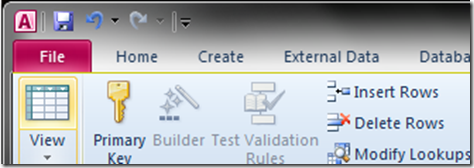
Once we have filled out all the necessary information for our database dictionary, click Save on the Quick Access Toolbar.
We can now start entering information into our database. To do that, click the View button.
Entering information into our first Access database
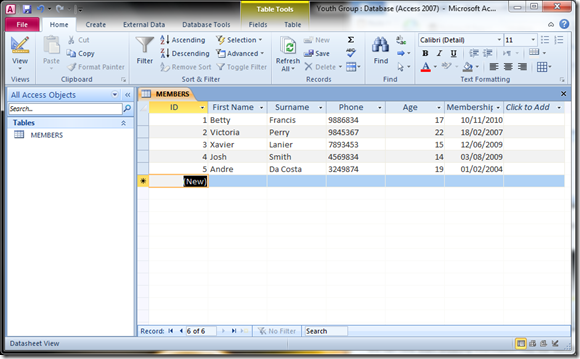
To enter information, just click in the cell and enter the text appropriate for each field. You can quickly move to the next field by pressing Tab. Repeat these steps until you have filled out all the fields.
You can save the database, close, open and update it at anytime. You can also create other tables with other unique information related to your database, such as a table with the members’ parent information, for instance.
A database is not something you create on a whim, though. It should be carefully planned so maintenance and updating can be easier. Here are some tips to consider when building your database.
- What type of information you would like to have stored in your database.
- Define the type of fields that will make up your database
- Consider keeping it simple and not have too many fields in a table for a particular scenario, consider creating additional tables to store related information.
- Make sure you use the data dictionary to help define your database, this will be essential for future purposes when you start using advanced features in Access such as Relationships, Queries and your database starts to get large.
- Think big, databases are meant to store large amounts of information, so design your database with growth in mind, this encompasses everything previously noted when designing your database.


