Have you ever settled down to use a computer and wished that you were able to access your bookmarks? If so then you’ll want to check out Xmarks – an easy way to sync your bookmarks between computers. Xmarks can sync your bookmarks to the web, to other computers and even to a different browser on another computer.
This tutorial will show how to install Xmarks on your computer and sync the bookmarks to a different computer. Xmarks will also help you to keep your passwords synchronized and backed up across multiple browsers or computers. Backing up your usernames and passwords is optional.
How to install Xmarks on Firefox:
Step 1: Head over to Xmarks.
Step 2: Click the “Install Now” button.
Step 3: It will take you to page to install the add-on based on the browser which you are using. In my case it took me to Firefox add-on installation page as I am using Firefox for this tutorial.
Step 4: Click on Download Xmarks and follow the instruction to install it in your browser.
Step 5: Click the allow button to install the Xmarks add-on to Firefox.
Step 6: Click the “Install Now” button.
Step 7: The Xmarks add-on will install.
Step 8: Restart the Firefox to complete the installation of the Xmarks add-on.
Step 9: After restarting the Firefox you should see the add-on install confirmation shown below.
Step 10: Close the confirmation add-on window.
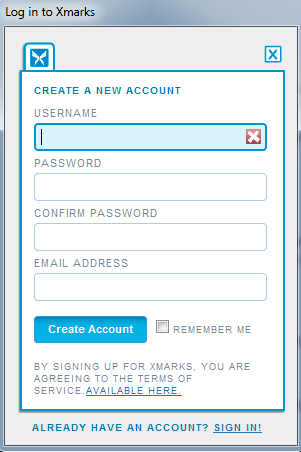
Step 11: After closing the confirmation window you should see the Xmarks log in window, shown below.
Step 12: If you don’t see log in window then click on Xmarks icon on bottom right corner of your Firefox; it will open the Xmarks setup wizard.
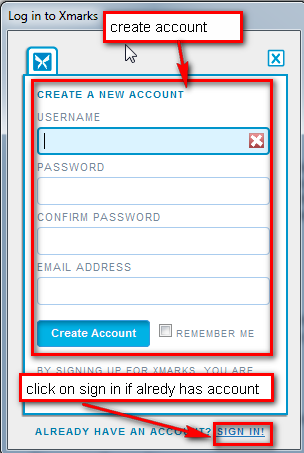
Step 13: Create an account on Xmarks. If you already have account with Xmarks then click on “Sign In” at the bottom of the window. See below screen shot.
Step 14: Fill in all required fields and click on create account.
Step 15: Xmarks will ask your confirmation if you also want to sync your passwords. If you want to synchronize your passwords then select yes and click “Next”. If you don’t want to sync your passwords just click “Next”
Step 16: Xmarks will ask if you want to sync open tabs across multiple browsers. Click on next tab.
Step 17: Click “Next” to start synchronizing your bookmarks.
Step 18: Xmarks will start the syncing process. As part of this process it will upload your Firefox bookmarks to the Xmarks server.
Step 19: Click “Finish” to complete the installation and setup of Xmarks.
Step 20: This will create your Xmarks account, now you just need to go to your email account and confirm your account with Xmarks. From now on, Xmarks will automatically keep the bookmarks synchronized for this browser.
How to manage bookmarks on the web:
Now that you have created an Xmarks account and synced your bookmarks to the Xmarks server you can see and manage your bookmarks from the web. Follow the steps below to see and manage your bookmarks.
Step A: log into my.xmarks.com with your Xmarks user id and password.
Step B: You should be able to see and manage all your bookmarks from any computer.
How to sync or merge your bookmarks with another browser or computer: After creating an account on Xmarks and storing your bookmarks on their server, you can synchronize your bookmarks across all browsers on the same computer or with different computers. Please follow below guide to synchronized bookmarks.
Step A: Open any browser on a different computer and go to Xmarks.com.
Step B: Click the “Install Now” button and follow the instructions which will be similar to steps 2 to 7 from the first section. When it comes time to sign in or log in resume below.
Step C: Select ‘Yes: Log me in’ and click on next. See below screen shot.
Step D: Type your user name and password and click on next button.
Step E: Click the “Sync” button if you want to merge your bookmarks, starting with your server bookmarks.
Step F: If you don’t want to merge your bookmarks, but would rather copy your Xmarks bookmarks into the browser then click on “Change Sync Settings” and follow the on screen instructions.
Step G: Select how you want Xmarks to sync your bookmarks.
Step H: Xmarks will sync bookmarks to your new browser or computer.
Please note that we used Mozilla Firefox and Google Chrome as an example, but the Xmarks add-on works on IE, Firefox, Chrome and Safari. You can use any of them to store your bookmarks on the Xmarks server or to sync them across two different browsers.


